Using the editor
What you will learn in this chapter: how to install the editor, create a circle and animate it almost without typing, and where all the point-and-click tools live. If you have never programmed before, this is exactly where you should start.
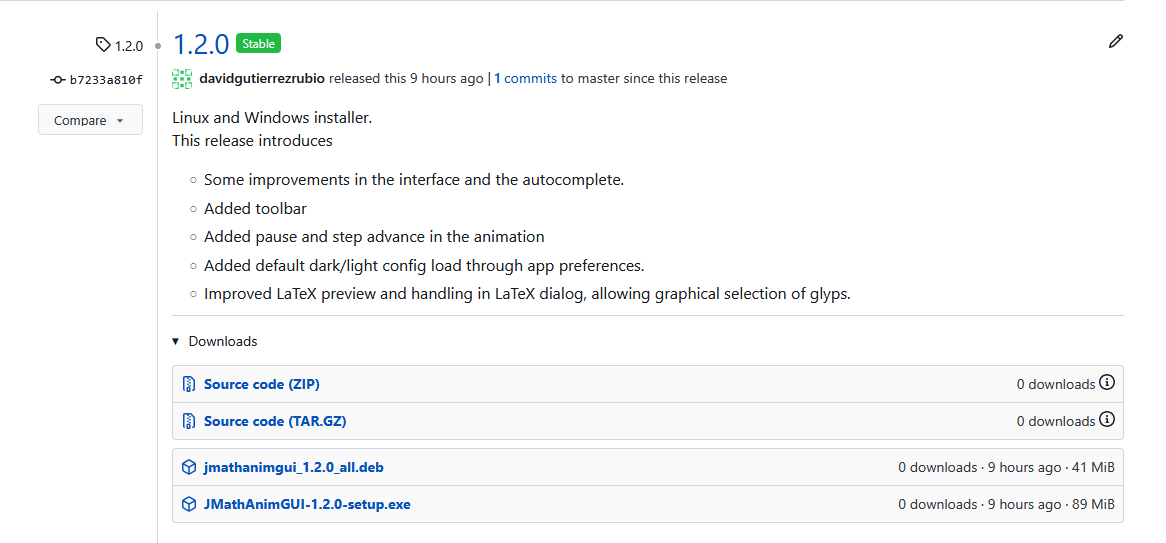
The easiest way to use JMathAnim is to simply download the latest release for your operating system (Windows or Linux).
You can find these downloads on the project's releases page.
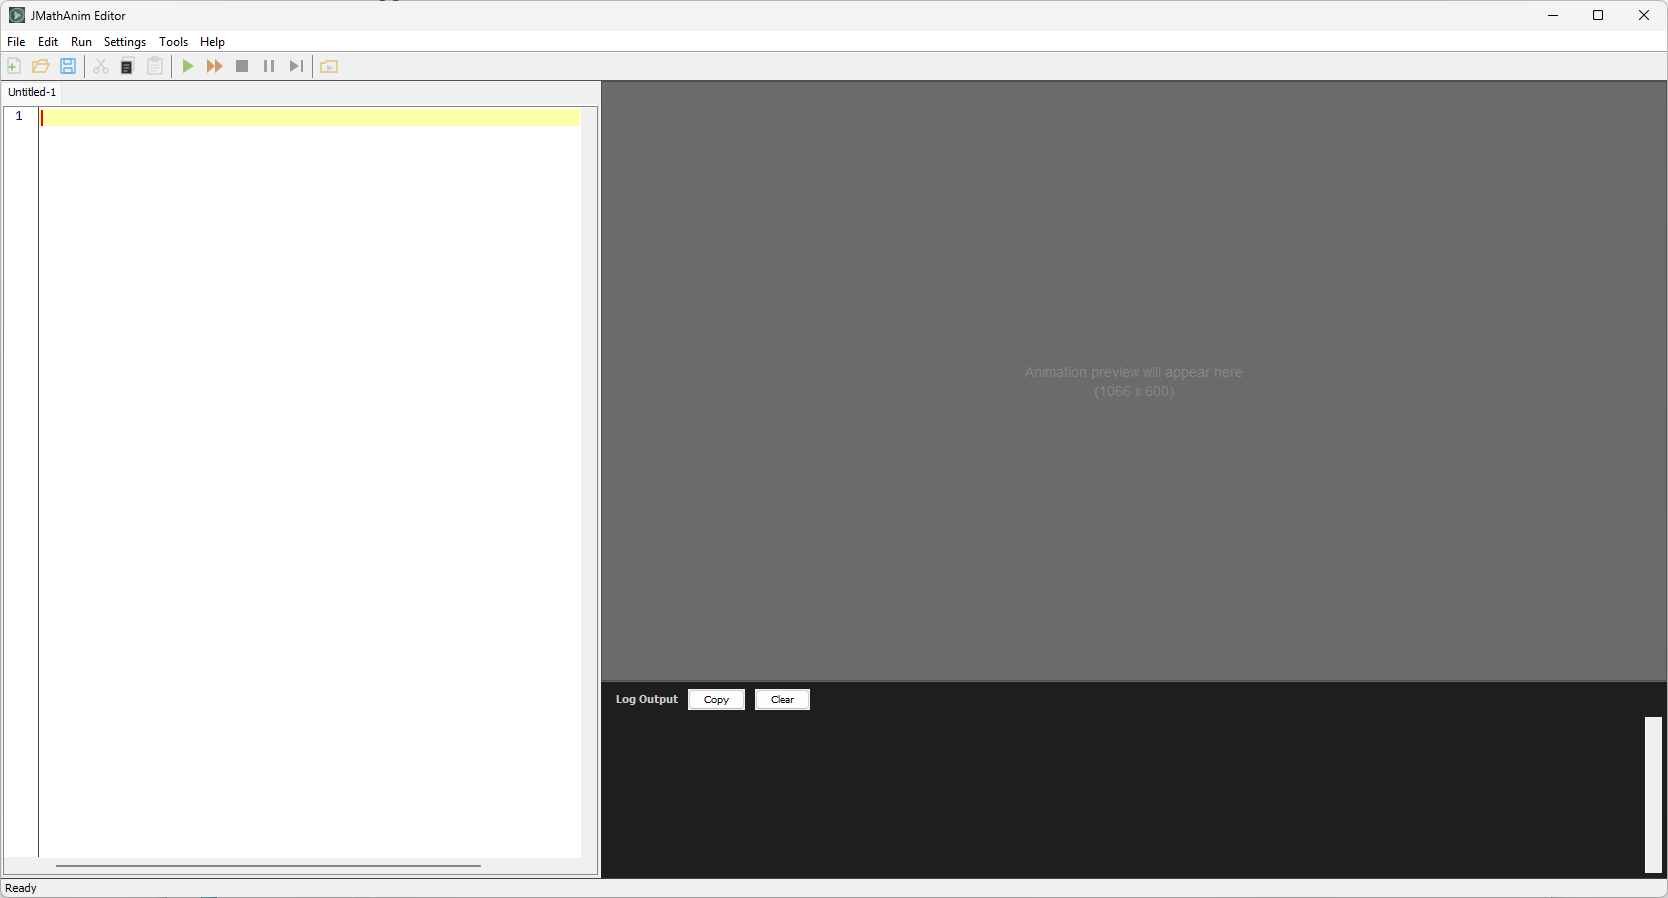
Download the installer for your OS. It will create a JMathAnimGUI entry in your menu. If you execute it, you will see a window like this:
Using the editor: The very-basic-easy-fast way
The editor has some built-in features to help you write code faster and easier for most simple tasks. For example, suppose we want to create a circle filled with a fancy color and show an animation that draws it and then scales it. Create a new document and press alt+S (or alternatively, browse in the snippets palette on the left of the window):
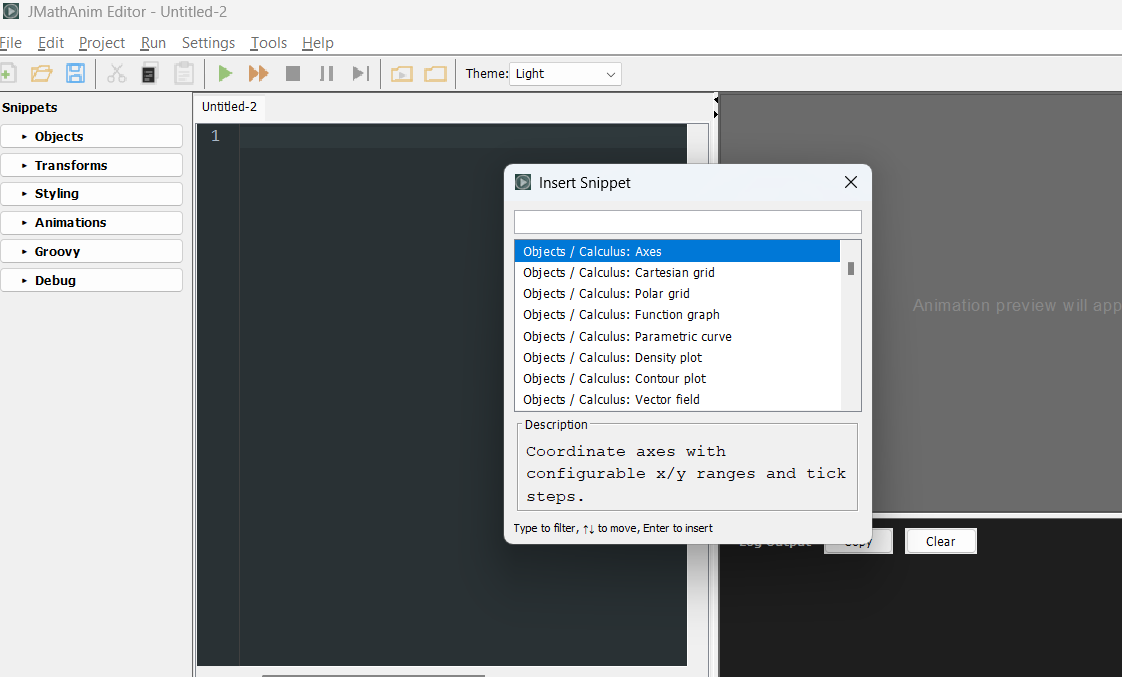
You will be shown a list of available objects/commands. Type the first letters of "circle" to show matching entries:
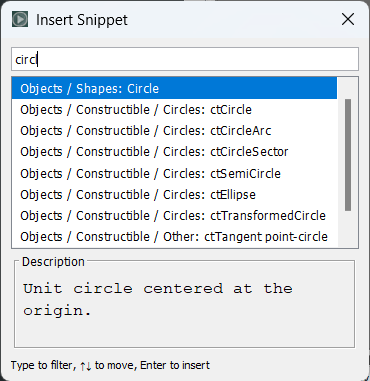
And select the first one (in the image it is already selected, so just press enter). A piece of code will be automatically generated:
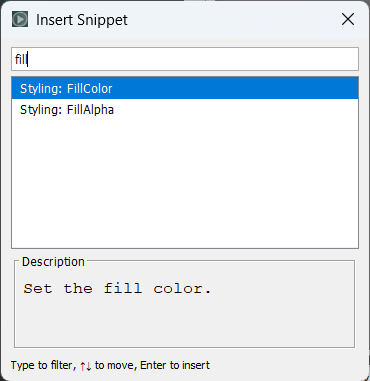
This is one way to create objects using a special syntax called DSL (Domain Specific Language). This format uses parameter: value pairs separated by commas. Let's add a parameter to specify the fill color of our circle. Ensure that the cursor is inside the DSL block shape(.....). To add the fill color parameter, you can browse in the snippet sidebar (Styling category) or you can press alt+S again to show the snippet search menu. Type fill and you will see the available options:
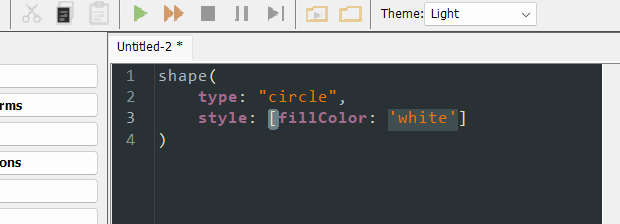
And select fillColor. A parameter will be added to the shape(...) DSL block with the cursor ready to edit the color:
You can specify a color in several ways here:
- Use an SVG name. The SVG standard has a predefined list of colors that
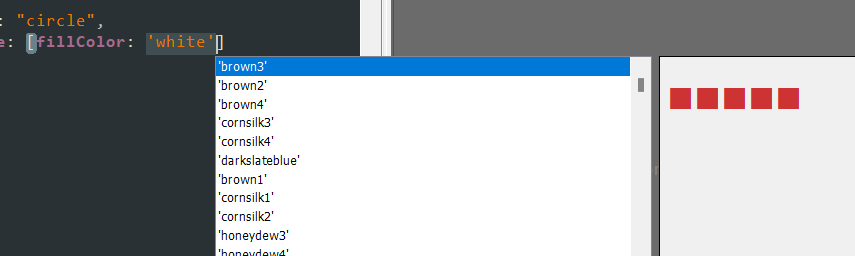
JMathAnimrecognizes. You can just replace the stringwhitewith another one or just pressctrl+spaceto activate autocomplete:
- Use the palette chooser. Press
ctrl+shift+Kand a dialog with SVG and custom colors will appear:
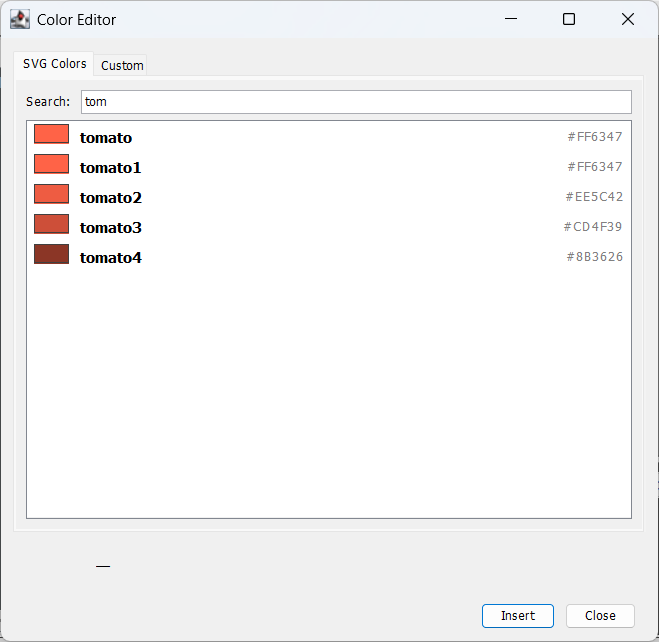
- Use a standard RGB or RGBA hex format for colors, like
#FDCBA0or#A0908AC0. This is the format used by the palette chooser when choosing a custom color.
In this example I changed the color to tomato:
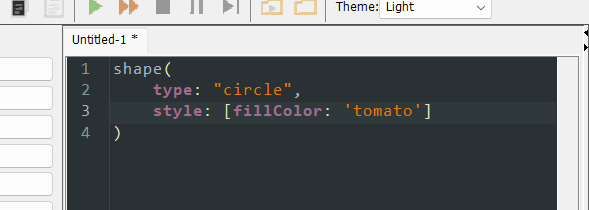
You can try other styling options such as thickness, dash style, etc.
As we are going to do things with this circle, we will assign it to a variable. Add the code def c= to the beginning of the code so that we store this neat circle in the c variable.
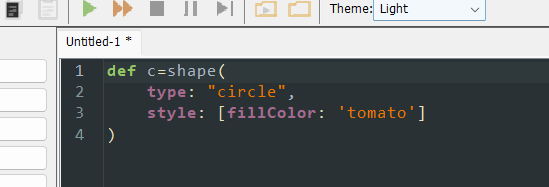
Ok, let's first add an animation to draw the circle, the so-called ShowCreation animation. Ensure that the cursor is located past the DSL block. In the snippet sidebar it is located in the category Animations -> Appear or you can just invoke the search dialog with alt+S:
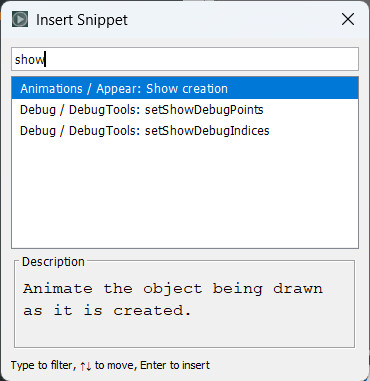
And it will generate something like this:
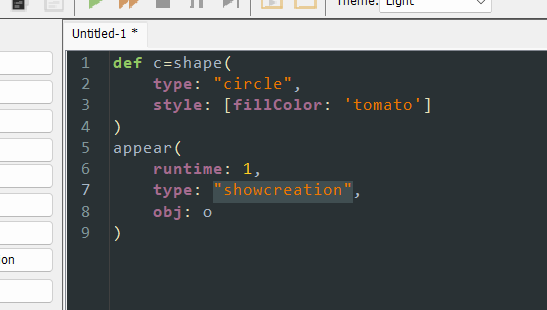
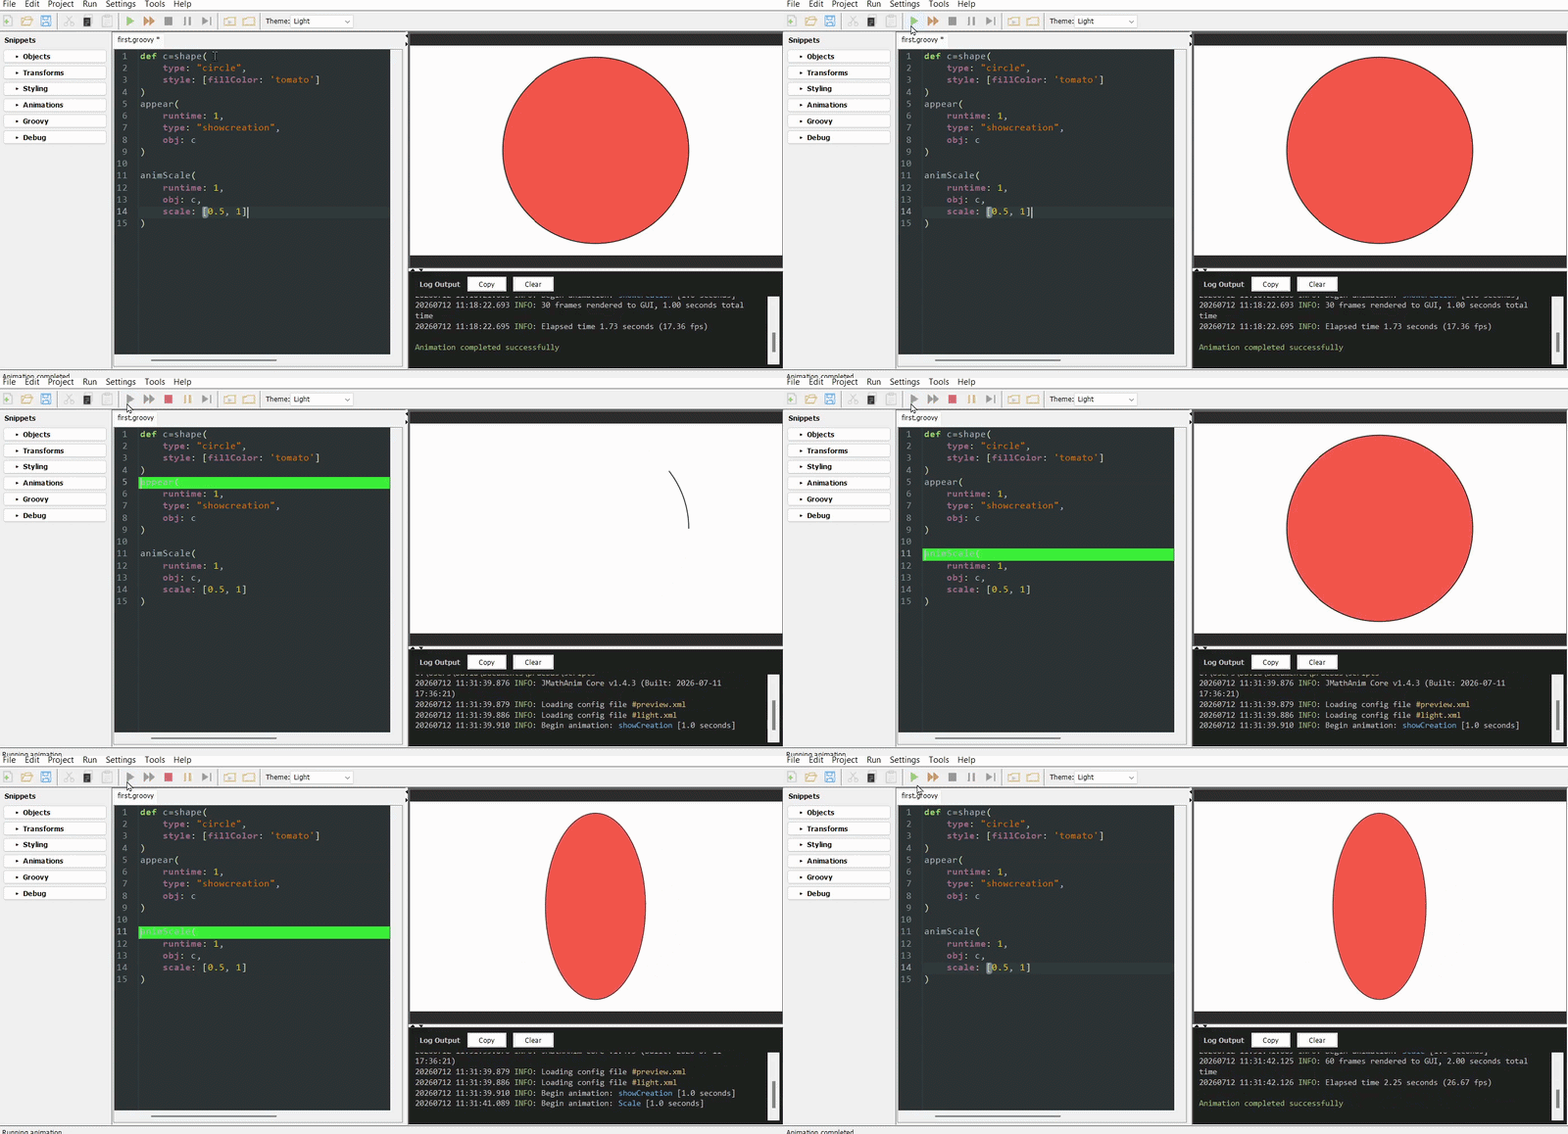
The parameters are in most cases self-explanatory: runtime is the duration in seconds of the animation, type is the type of appear animation, and obj is the name of the object(s) we want to animate. Change the default value o to the name of our beautiful tomato circle c and press F5. If the file has not been saved yet, you will be asked for a file name and directory to save it, aaaaand magic!
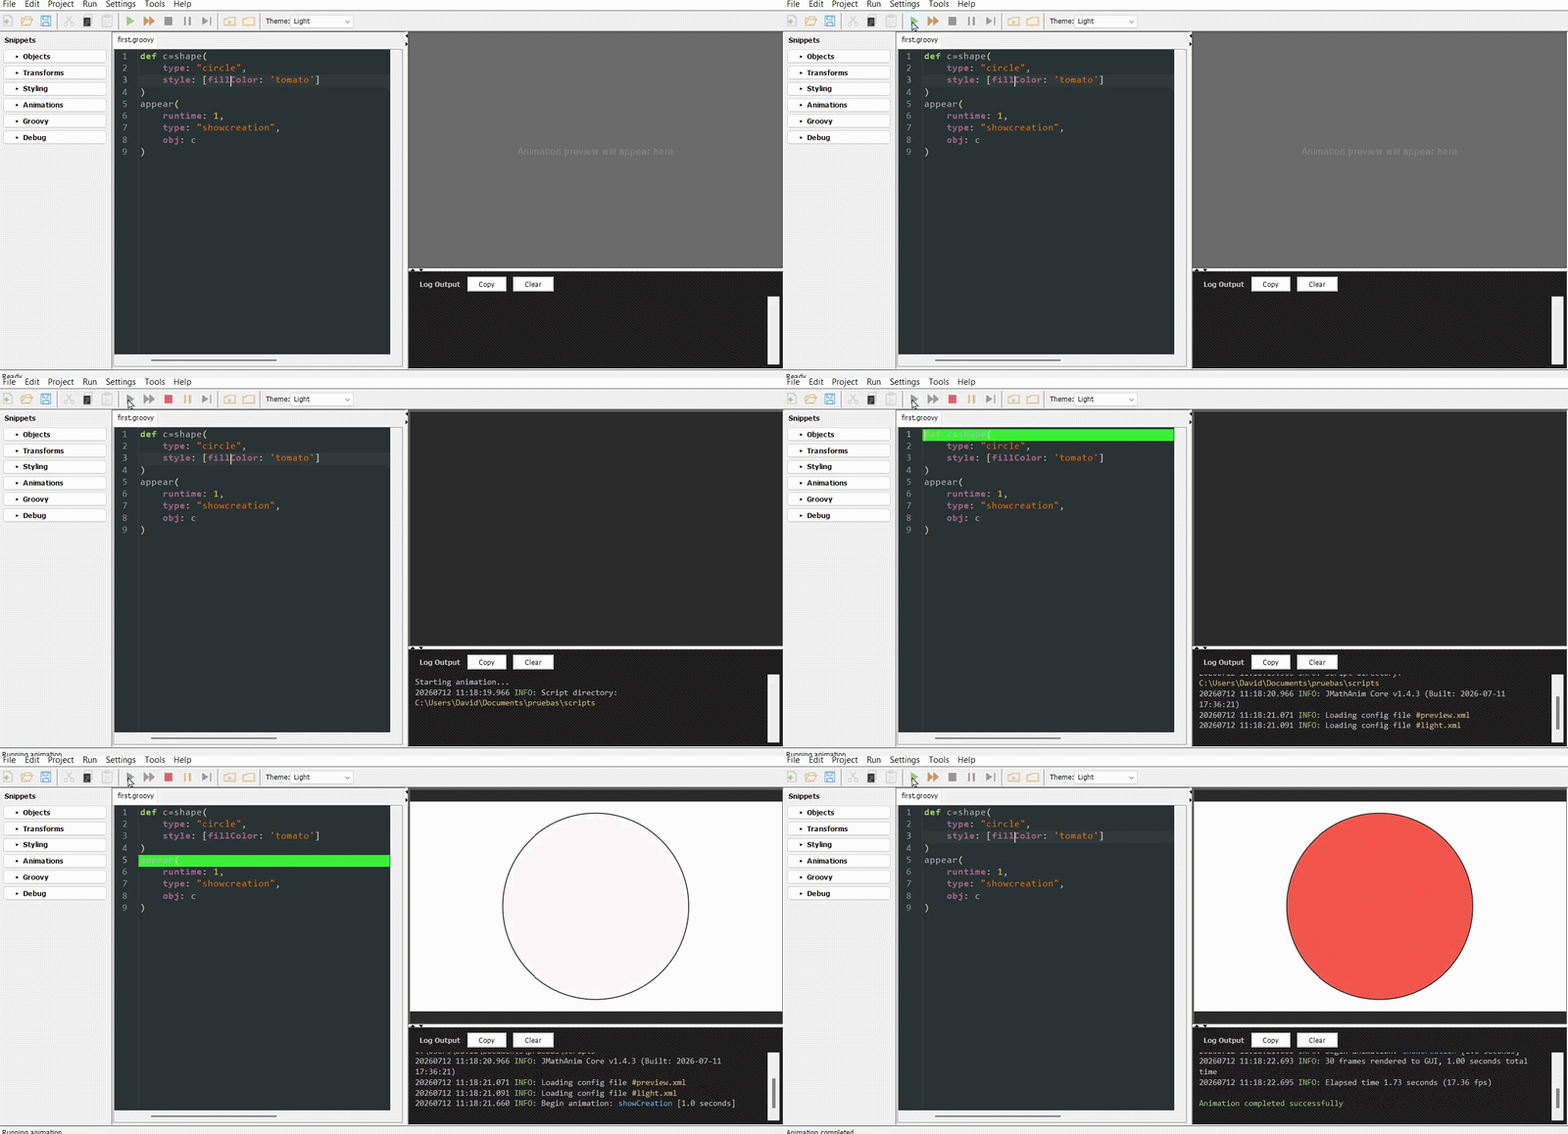
If you are seeing the same animation but with a different background color, select the "Light" theme in the toolbar to see a white background.
Animations defined in DSL format are automatically played. Let's add another animation just after the creation. Press alt+S and search for scale; you will see several options:
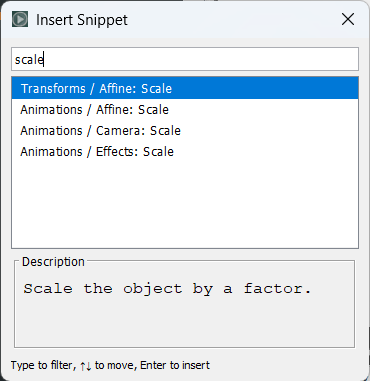
In this case we are interested in animating a scale change so select the second one (Animations / Affine: Scale). A DSL block will be inserted:
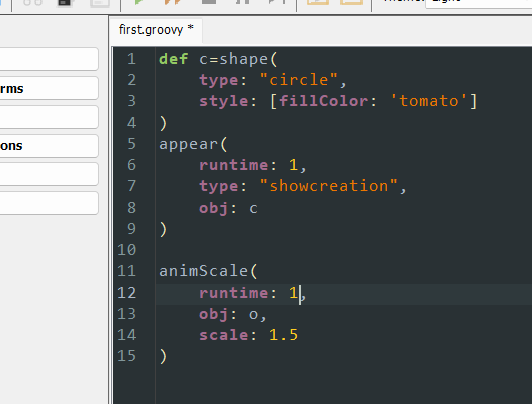
Change the obj parameter value to c (the name of our circle). The scale parameter is set to 1.5, meaning "scale this object uniformly by a factor of 1.5". Change this value to "[0.5, 1]", meaning "scale 0.5 in X and 1 in Y".
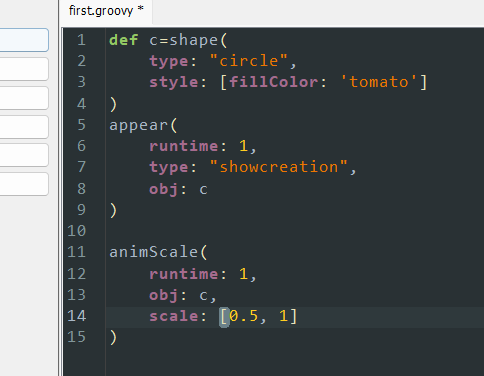
and press F5 (or click the play icon in the toolbar) and you will see that after the creation, the circle gets stretched:
A slightly more advanced example: Using Groovy syntax
Most common objects and animations have a DSL syntax available, but internally, the script engine of JMathAnim uses Groovy syntax, so if you want to use programmatic animations it is recommended you learn the basics of this language. Don't worry: you need surprisingly little. The chapter A Groovy survival kit covers everything required in a friendly, no-programmers-were-harmed way.
For example, the previous animation using pure Groovy syntax can be achieved with this:
def c = Shape.circle().fillColor('tomato')
play.showCreation(1, c) //Parameters: runtime, object(s) to animate
play.scale(1, 0.5, 1, c) //Parameters: runtime, x-scale, y-scale, object(s) to animate
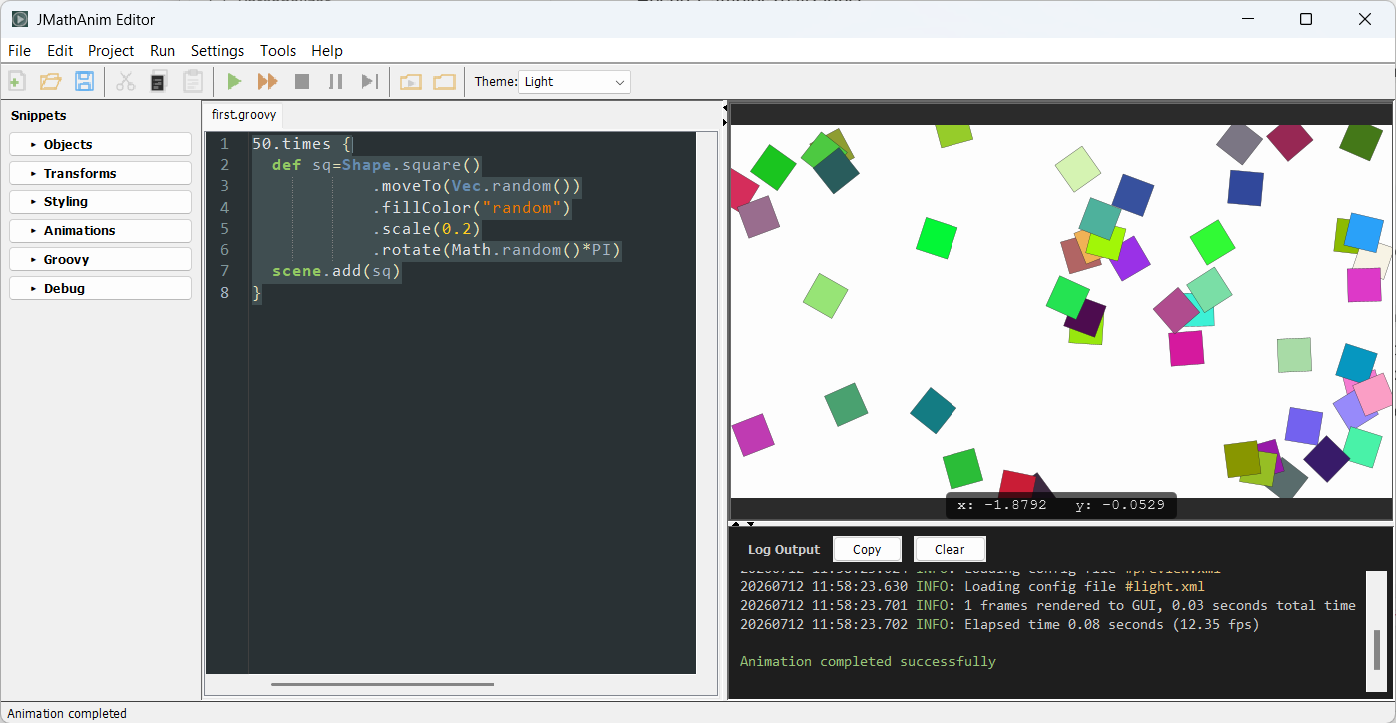
The reason JMathAnim uses a programming language rather than a visual editor is that it allows defining complex animations through code. For example, the following code generates 50 squares at random places on the screen, with random colors and rotated with a random angle:
50.times {
  def sq=Shape.square()  //A square with (0,0) and (1,1) corners
            .moveTo(Vec.random()) //Move its center to a random position on screen
            .fillColor("random") //Fill color is a random color
            .scale(0.2) //Scale it 0.2 factor
            .rotate(Math.random()*PI) //Rotate it with a random angle from 0 to PI
  scene.add(sq) //Add it to the scene
}
And you will get something like this:
Of course, if you feel more comfortable, you can also mix Groovy and DSL style! The good thing about DSL is that you can easily add parameters with the snippet sidebar or alt+S:
50.times {
    shape(
        type: "square",
        transform: [
            moveto: Vec.random(),
            scale: 0.2,
            rotate: Math.random()*PI],
        style: [fillColor: "random"],
        addToScene: true
    )
}
The LaTeX Editor
JMathAnim uses the excellent JLatexMath library to generate LaTeX formulas. For example, let's add these lines to the script; the formula contains an error that we will correct:
def c=Shape.circle()
def t=LatexMathObject.make(r'$A=\pi r^3$')
scene.add(t)
play.showCreation(1,c,t)
JMathAnim uses the special string definition r'string' (or r"string") to write LaTeX code properly without worrying about escape characters like $ or \. In a normal string, Groovy assigns special meanings to these symbols and will throw an error. The script preprocessor converts these strings so that Groovy can handle them correctly.
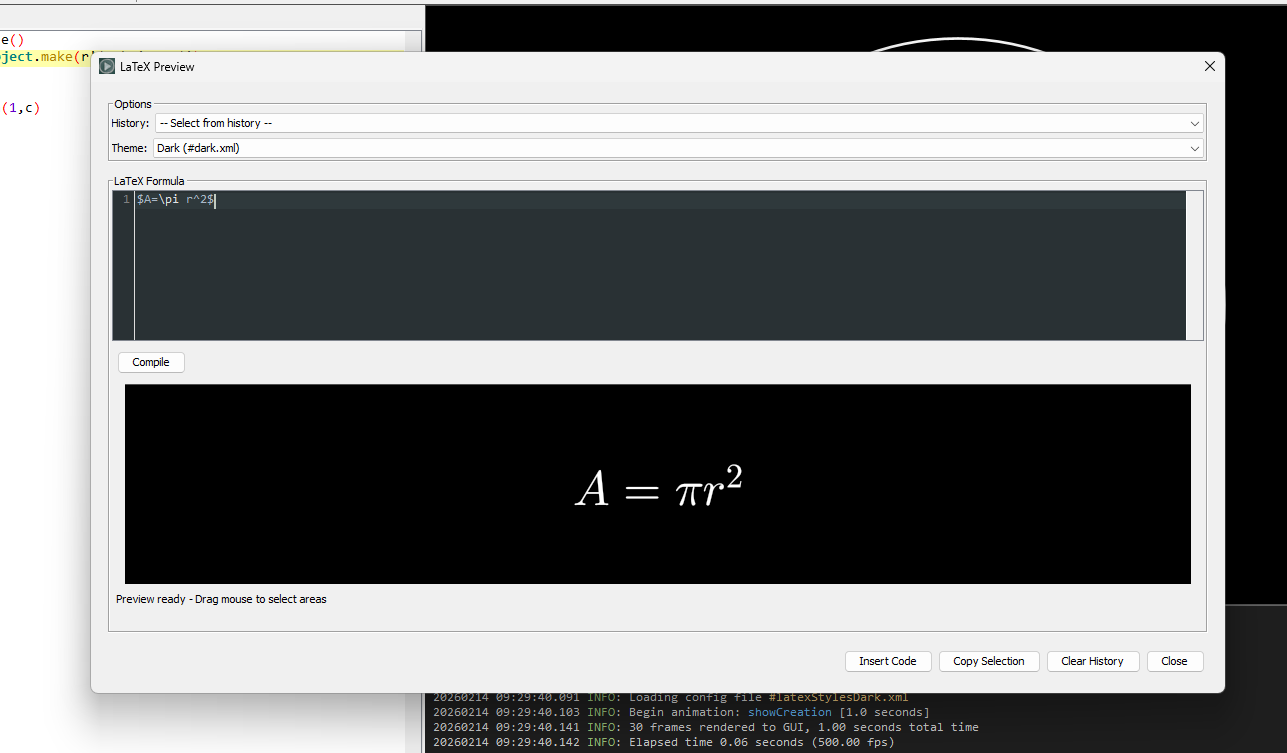
If you place the cursor inside the LaTeX string and select Tools -> LaTeX Editor... (or press Ctrl+Shift+L), a window will open where you can edit the LaTeX code and preview the result almost in real time (you can use Alt+C to generate the formula). If you make any changes, the Insert Code button will replace the old string with the new one $A=\pi r^2$.
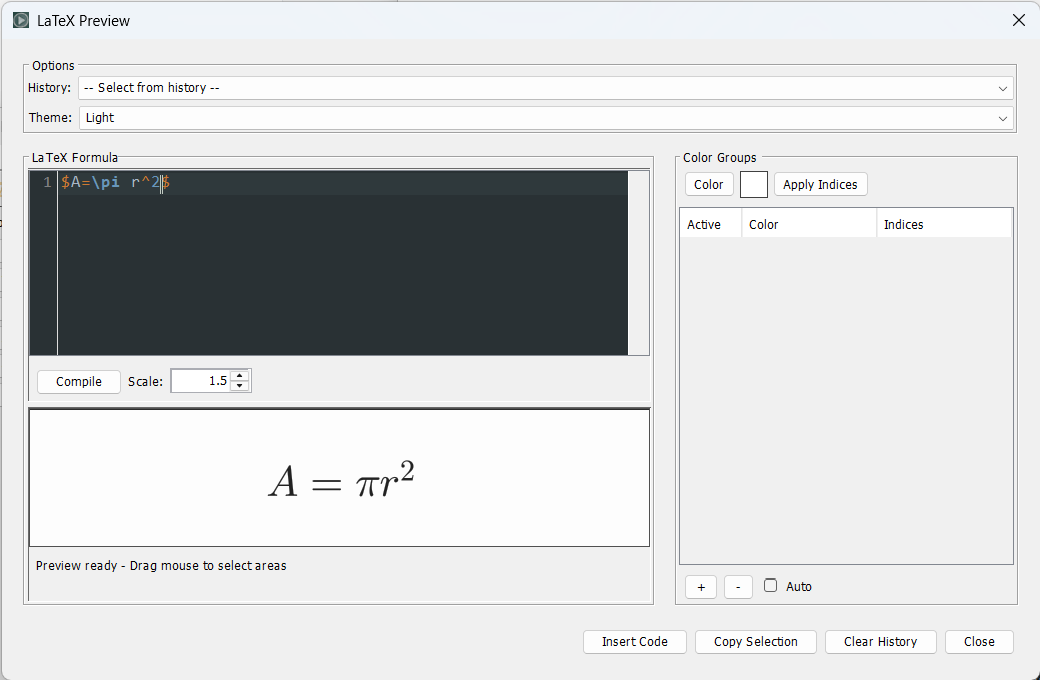
You can also drag an area or click individually on the generated glyphs (Ctrl+click adds to the selection). This will allow you to copy the generated indices with the Copy Selection button, which will be useful for some commands like slice or setColorToIndices, as we will see later.
Your toolbox: what the editor can do for you
The LaTeX Editor is just one of several point-and-click tools. Here is the full squad, so you know they exist before we meet them in later chapters:
| Tool | Shortcut | What it does | Covered in |
|---|---|---|---|
| Snippets (sidebar or search) | Alt+S |
Inserts ready-made DSL blocks for objects, styles and animations | This chapter |
| Method search | Ctrl+Shift+G |
Finds a method or getter of the object written before the caret and inserts it | This chapter |
| Autocomplete | Ctrl+Space |
Suggests parameters and values inside DSL blocks | Everywhere |
| Color Editor | Ctrl+Shift+K |
Visual palette to pick SVG or custom colors | Changing styles |
| LaTeX Editor | Ctrl+Shift+L |
Live LaTeX preview, glyph selection, index copying | Mathematical formulas |
| LaTeX Style Editor | Ctrl+Shift+E |
Build formula-coloring rules by clicking, no code needed | Coloring formulas |
| Transform LaTeX | Ctrl+Shift+T |
Design equation-to-equation animations by pairing glyphs visually | Mathematical formulas |
Looking a method up instead of remembering it
You build objects with the DSL, but afterwards you talk to them: ask them where their center is,
change their color, move them, read a value. That is a lot of names to memorize. Rather than
learning them by heart, write the dot and press Ctrl+Shift+G:
def c = ctCircle(center: [0, 0], radius: 2)
def r = c.          // caret here, then Ctrl+Shift+G
The editor guesses the type of c from its declaration and lists only what that object accepts:
its own methods first, then the ones it inherits. Type any part of the name (radius finds
circleRadius, color finds color(...), area finds area) or of the description, pick with
Enter, and the call is written at the caret; if it takes arguments, the sample values are left
selected so you can type over them.
Entries written without parentheses are Groovy properties: whenever a getXxx() has a matching
setXxx(), the palette offers the short form, which reads and writes alike.
def w = sq.width     // reads getWidth()
sq.width = 2         // calls setWidth(2), scaling the shape
The list is not only getters: copy(), thickness(2), shift(1, 0), rotate(PI/4),
stack().toObject(...) and the rest of the everyday methods are there too. The search also works
after a chain, so s.getPath(). lists what a path offers, and the Show every type checkbox lists
the whole catalogue when the type cannot be guessed.
And a few shortcuts for running your scripts that you will use a thousand times a day:
| Action | Shortcut |
|---|---|
| Run (preview, fast and low-res) | F5 |
| Run (production, final HD video) | Shift+F5 |
| Stop / Pause / Step one frame | F6 / F7 / F8 |
| Open the folder with generated videos | Ctrl+Shift+M |
And that is the basic use of the editor. Next stop: a friendly crash course in the Groovy language, and then what actually happens when you press F5. In the following chapters we will cover the syntax of the library and how to create objects, transform them, and animate them.