Advanced Animation Techniques
This chapter covers advanced techniques for working with animations in JMathAnim, including combining multiple animations, adding visual effects, controlling timing, and creating complex animation sequences.
Is this chapter for me? If you just want your objects to appear, move and transform, the previous chapter is enough. Come here when you catch yourself thinking "I wish that square did a little jump while moving" . That's exactly what this chapter is about, and it's more fun than it sounds!
Combining Animations
When you need multiple transformations to occur simultaneously, there are important considerations about how animations interact.
The State Management Problem
Suppose you want a square to shift and rotate at the same time. Your first instinct might be to run both animations together:
def sq = shape(
      type: "square",
      style: [fillColor: 'seagreen', thickness: 6],
      transform: [center: true]
)
def shift = animShift(
      runtime: 5,
      obj: sq,
      vector: [1, 0],
      run: false
)
def rotate = animRotate(
      runtime: 5,
      obj: sq,
      angle: -PI/2,
      run: false
)
play.run(shift,rotate) // play both at the same time
scene.waitSeconds(3)
If you run this code, you will see a square rotating, but not shifting at all.
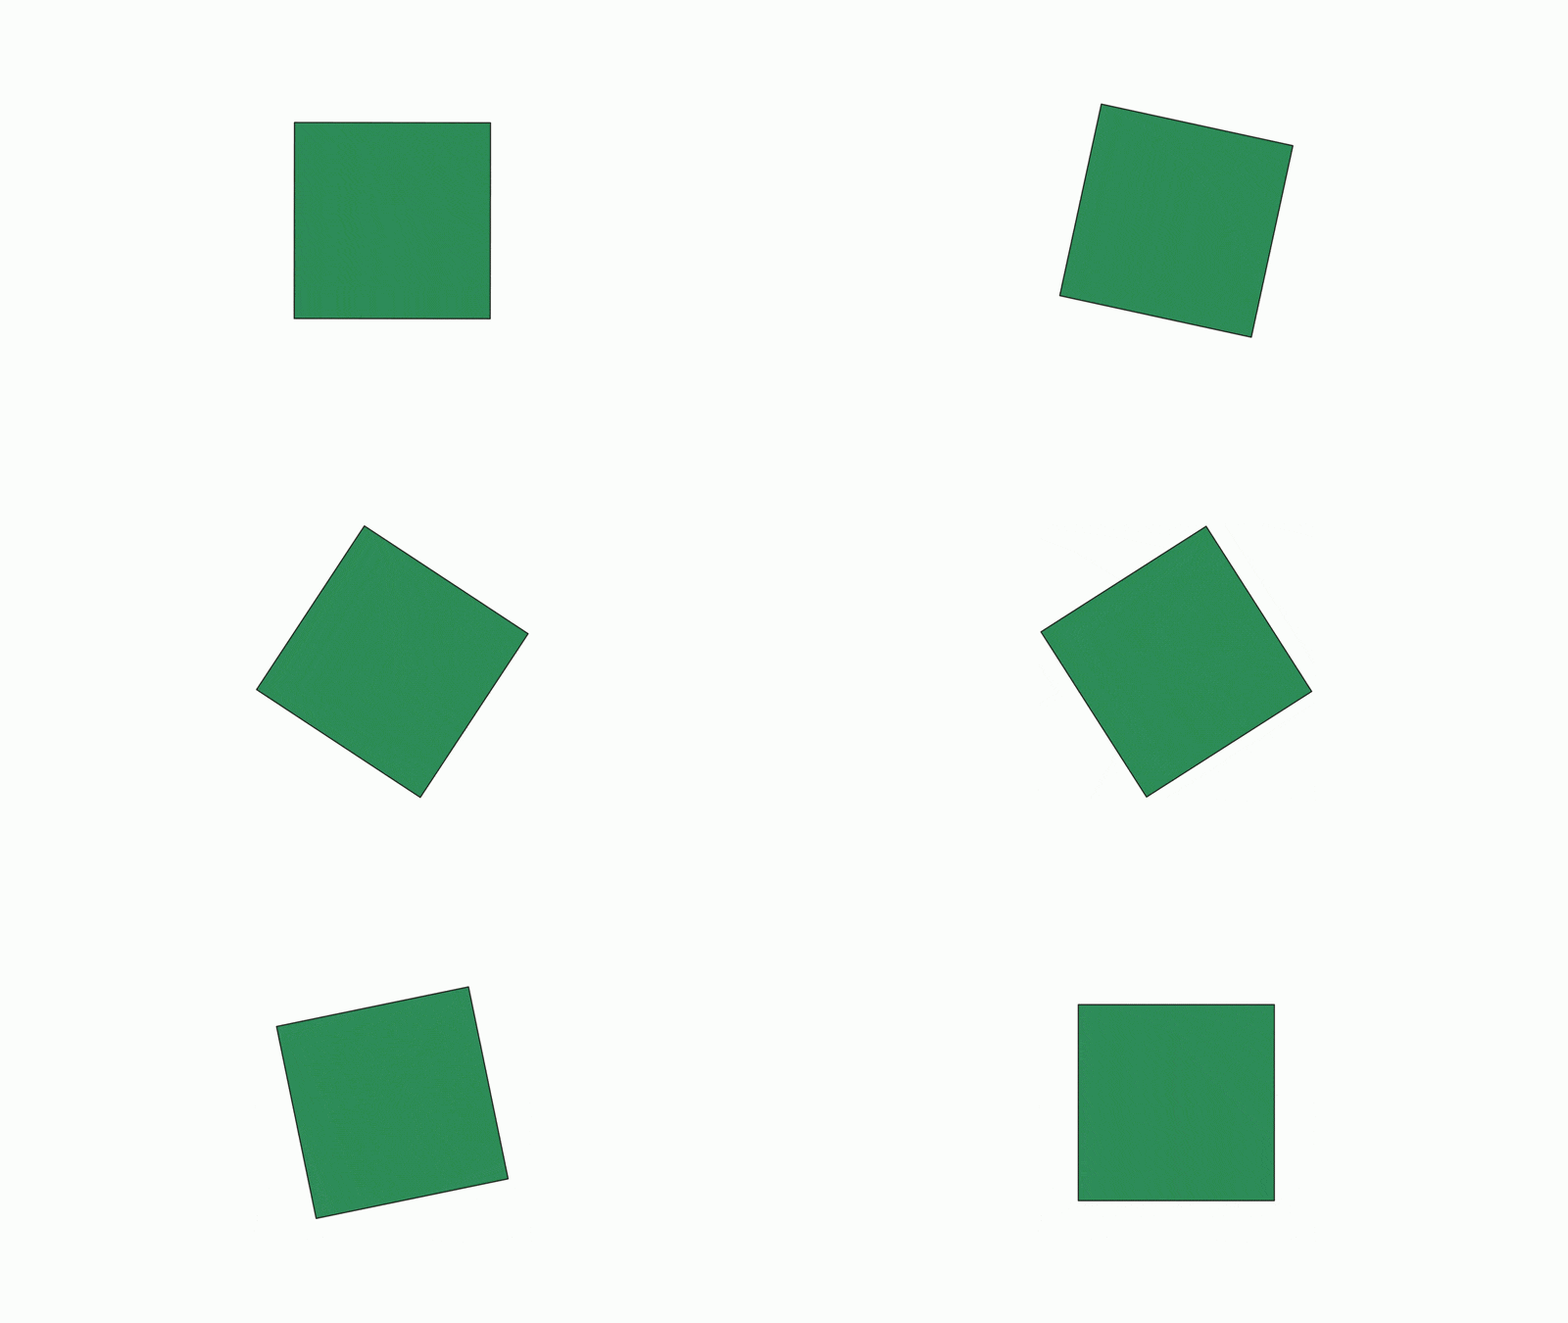
To understand why this happens and how to solve it, remember that each animation follows this process:
1. Initialize - Saves the current state of the object
2. Each frame - Restores object to initial state, then applies changes from a parameter t from 0 to 1.
3. Finalize - Cleanup
When both animations run simultaneously, the rotate animation's state restoration erases the changes made by the shift animation on each frame. In fact if there were n animations applied to the same object(s), the last one will delete the work done by the previous n-1 animations!
The solution is to disable state management for one animation using the parameter useObjectState inside the advanced parameters list. Alternatively, if you are using Groovy syntax, you can disable it with anim.setUseObjectState(false) where anim is your Animation object.
def sq = shape(
      type: "square",
      style: [fillColor: 'seagreen', thickness: 6],
      transform: [center: true]
)
def shift = animShift(
      runtime: 5,
      obj: sq,
      vector: [1, 0],
      run: false
)
def rotate = animRotate(
      runtime: 5,
      obj: sq,
      angle: -PI/2,
      run: false,
      advanced: [useObjectState: false] //Add this line to disable state management
)
play.run(shift,rotate)
scene.waitSeconds(3)
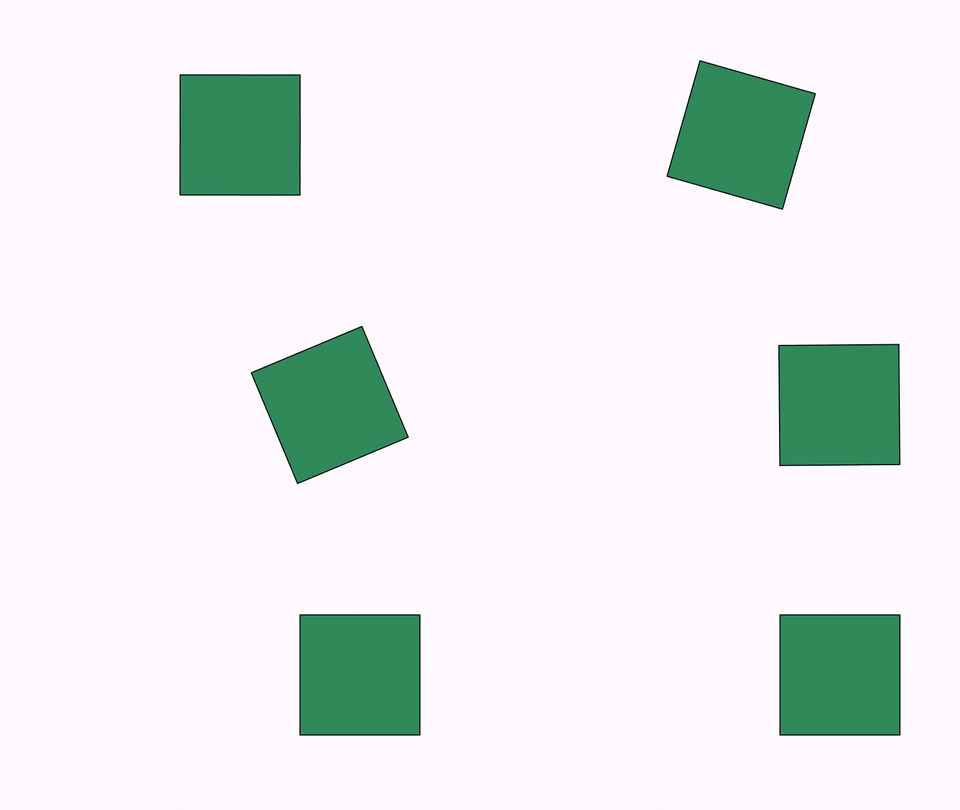
Now the square properly shifts and rotates:
Rule of thumb: When combining animations on the same object:
- Keep state management enabled for the first animation
- Disable it for subsequent animations with advanced: [useObjectState: false] or in Groovy syntax, with the method .setUseObjectState(false)
Adding Effects to Animations
Several animation classes inherit from AnimationWithEffects, which allows you to add visual enhancements. These include all movement-related animations and some more:
TransformFlipTransformTransformMathExpressionshiftstackalignmoveInmoveOutsetLayout
Basically there are 4 effect types: jump, scale, alpha and rotation. We will see them one by one:
The Jump Effect
This effect add a "jump" in a general sense.
How It Works
- Direction: Perpendicular to the shift vector (90° clockwise from motion direction)
- Height: Specifies jump amplitude (negative values jump in opposite direction)
- Default trajectory: Parabola (except
TransformMathExpression, which uses semicircle)
Basic Example
def hexagon = shape(
      type: "regularpolygon",
      sides: 6,
      transform: [scale: .25, moveto: Vec.relAt(.25, .5)],
      style: [fillColor: 'steelblue']
)
def triangle = shape(
      type: "regularpolygon",
      sides: 3,
      transform: [scale: .5, moveto: Vec.relAt(.75, .5)],
      style: [fillColor: 'orange']
)
morph(
    runtime: 5,
    type: "flip",
    from: hexagon,
    to: triangle,
    effects: [jump: .5]
)
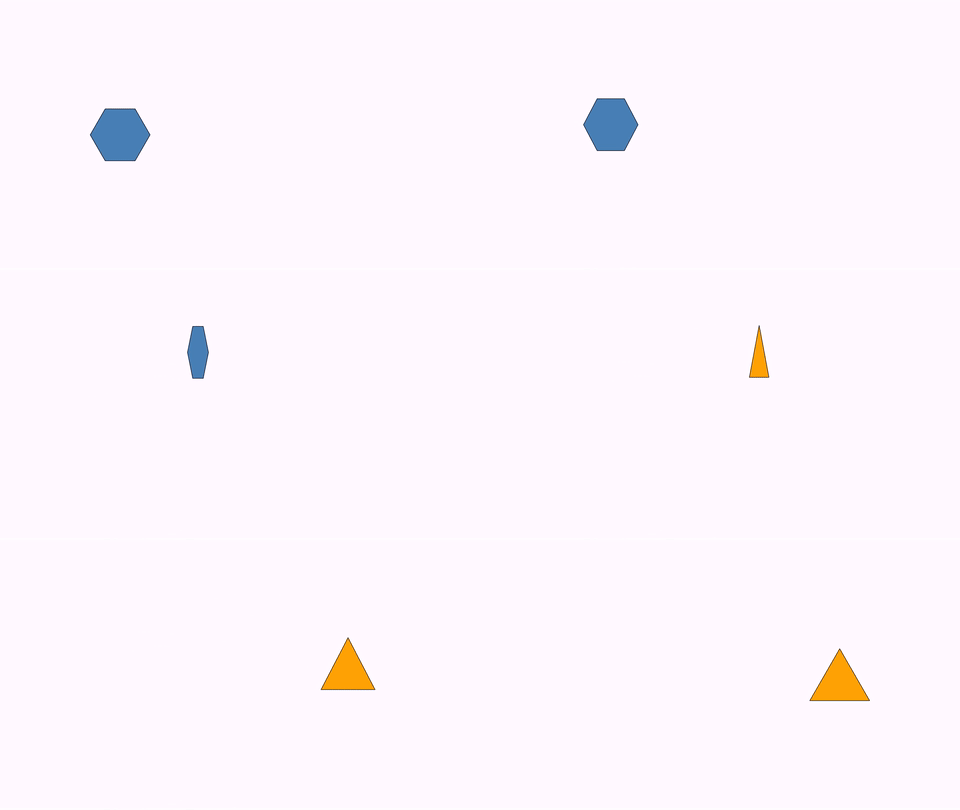
Jump Types
You can customize the trajectory using the JumpType enum. Here is a visual comparison of different jump paths:
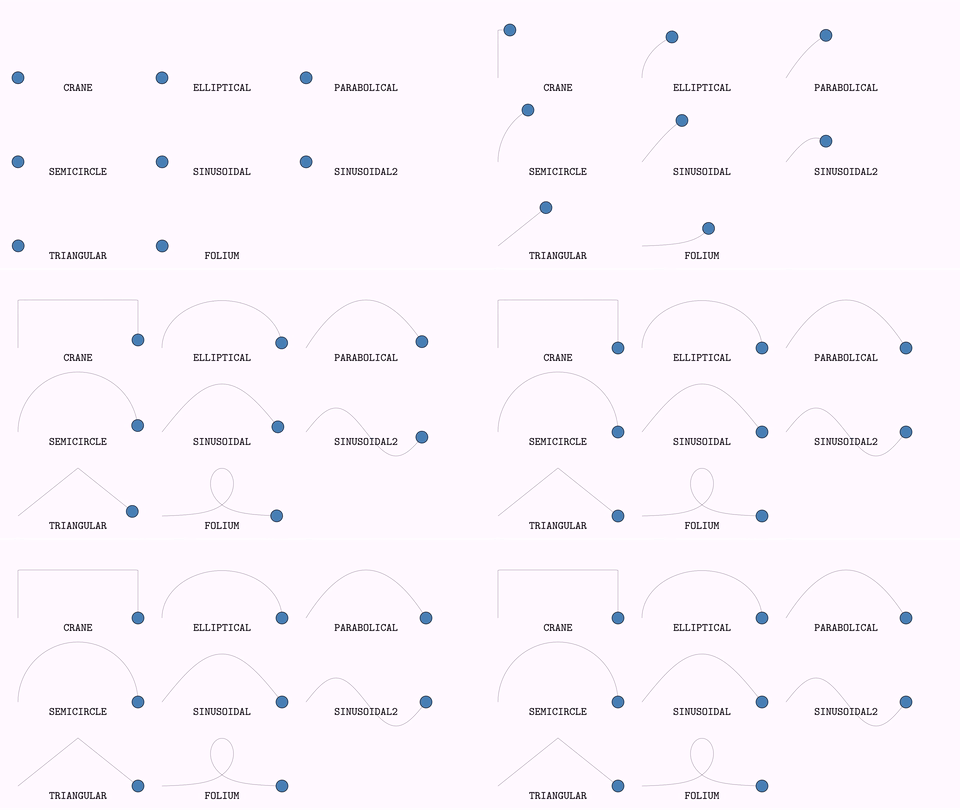
If you want to use this effect in Groovy syntax, just use the .addJumpEffect(double height) or addJumpEffect(JumpType type,double height) methods in your AnimationWithEffects object.
The Scale Effect
This method creates a "breathing" effect where the object grows and shrinks during animation.
def pol=shape(
    type: "regularpolygon",
    sides: 6,
    style: [fillColor: 'steelblue'],
    transform: [scale: .25, center: true]
)
animShift(
    runtime: 3,
    obj: pol,
    vector: [1,0],// Shift right
    effects: [scale: 2]    // Scale up to 2x and back
)
//Or you can use Groovy style
//def anim = Commands.shift(3, 1, 0, pol)  // Shift right
//anim.addScaleEffect(2)                    // Scale up to 2x and back
//play.run(anim)
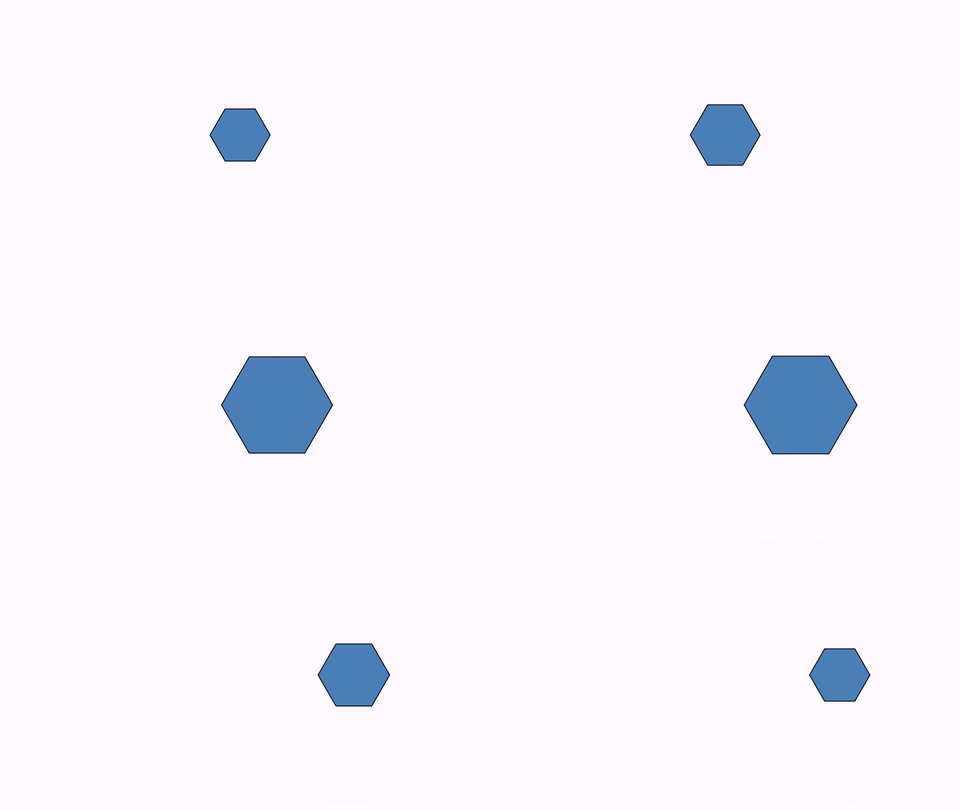
How it works: The object scales from 1.0 to the specified factor and back to 1.0 during the animation.
The Alpha Effect
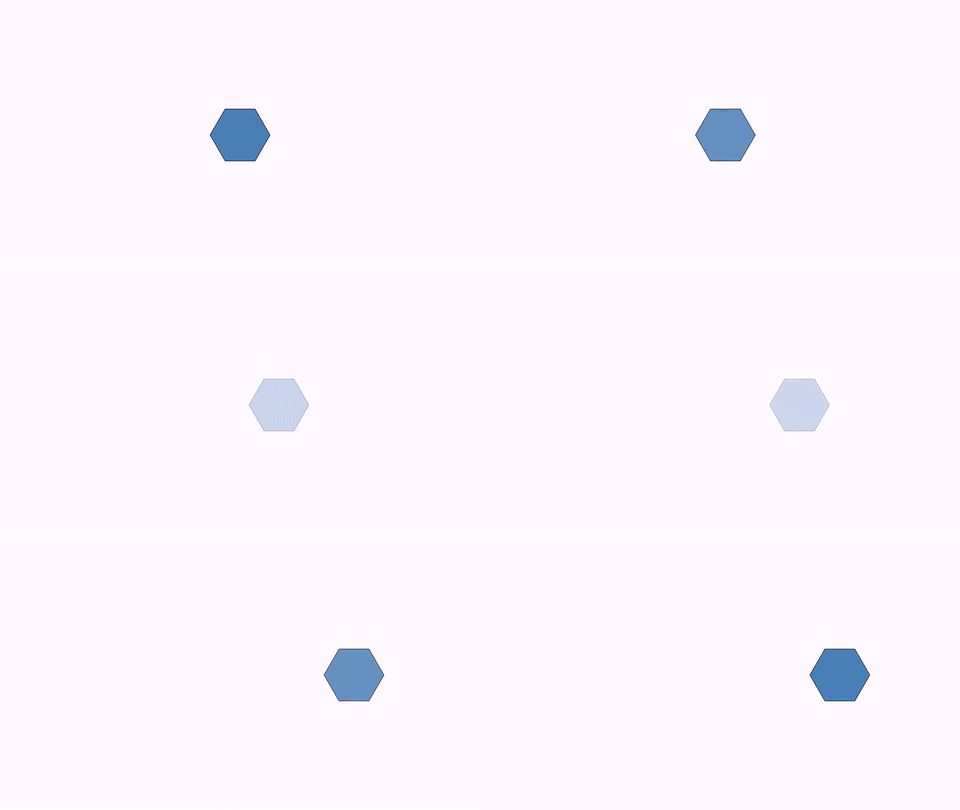
This method creates a fading in-and-out effect.
def pol=shape(
    type: "regularpolygon",
    sides: 6,
    style: [fillColor: 'steelblue'],
    transform: [scale: .25, center: true]
)
animShift(
    runtime: 3,
    obj: pol,
    vector: [1,0],// Shift right
    effects: [alpha: 0.5]    // Fade to 20% opacity and back,
)
//Or you can use Groovy style
//def anim = Commands.shift(3, 1, 0, pol)  // Shift right
//anim.addAlphaEffect(.2)                   // Fade to 20% opacity and back
//play.run(anim)
The Rotation Effect
The .addRotationEffect(int numTurns) method adds spinning motion to the animation. Use positive values for counter-clockwise rotation and negative for clockwise ones.
def pol=shape(
    type: "regularpolygon",
    sides: 6,
    style: [fillColor: 'steelblue'],
    transform: [scale: .25, center: true]
)
animShift(
    runtime: 3,
    obj: pol,
    vector: [1,0],// Shift right
    effects: [turns: -1]    // One clockwise rotation
)
//Or you can use Groovy style
//def anim = Commands.shift(3, 1, 0, pol)  // Shift right
//anim.addRotationEffect(-1)    // One clockwise rotation
//play.run(anim)

Combining Multiple Effects
Yes, you can nest multiple effects on the same animation!
def square=shape(
    type: "square",
    transform: [moveto: Vec.relAt(.25,.5), scale: .25],
    style: [fillColor: 'steelblue']
)
def circle = shape(
    type: "circle",
    transform: [scale: .25, moveto: Vec.relAt(.75,.5)],
    style: [fillColor: 'firebrick']
)
morph(
    type: "auto",
    from: square,
    to: circle,
    effects: [scale: .5, jump: .5, jumptype: "folium"]
)
scene.waitSeconds(3)

Effects in Shift Animations
Shift-type animations (shift, stack, align, moveIn, moveOut, setLayout) inherit from the ShiftAnimation class, which provides additional specialized effects.
Rotation by Arbitrary Angle
Beyond .addRotationEffect() (which uses complete rotations), you can specify exact angles:
// Rotate exactly 45 degrees during the shift
anim.addRotationEffectByAngle(45 * DEGREES)
Important: Animations like setLayout and stack compute shift vectors without considering this rotation, so the object's final position may differ from what you expect.
Per-Object Effects
When animating multiple objects, you can apply different effects to each one.
Example: Different Rotations for Each Square
def squares = MathObjectGroup.make()
for (int n = 0; n < 10; n++) {
    squares.add(Shape.square().scale(.1).fillColor(JMColor.random()))
}
squares.setLayout(LayoutType.RIGHT, .1).center()

// Pass individual squares, not the group
def anim = Commands.shift(5, 0, -1, squares.toArray())

// Apply different rotation to each square
for (int n = 0; n < 10; n++) {
    anim.addRotationEffectByAngle(squares.get(n), PI * n / 9)
}

play.run(anim)
scene.waitSeconds(2)
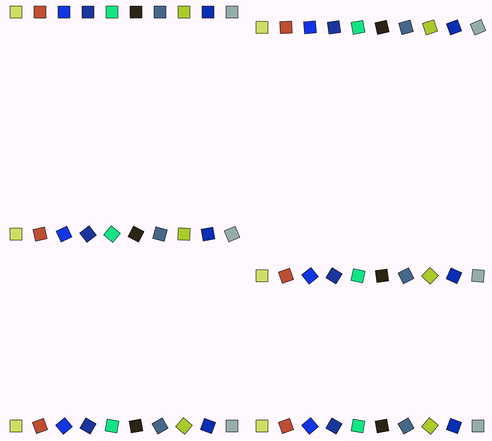
Key insight: Use squares.toArray() to pass individual objects instead of the group, allowing per-object effect control.
The Delay Effect
Creates a staggered, wave-like animation where objects move sequentially rather than simultaneously.
Example Without Delay
def smallSquaresGroup = MathObjectGroup.make()
10.times {
    smallSquaresGroup.add(
          Shape.square().scale(.1).fillColor("random")
    )
}

def centralSquare = shape(
    type: "square",
    transform: [scale: .25],
    stack: [screen: "lower", gaps: .1]
)

// Position small squares to the left of central square
layout(
    apply: smallSquaresGroup,
    refpoint: centralSquare,
    type: "simple",
    layout: "left"
)


scene.add(smallSquaresGroup, centralSquare)
scene.waitSeconds(1)

animSetLayout(
    runtime: 5,
    obj: smallSquaresGroup,
    layout: "upper",
    refpoint: centralSquare,
)
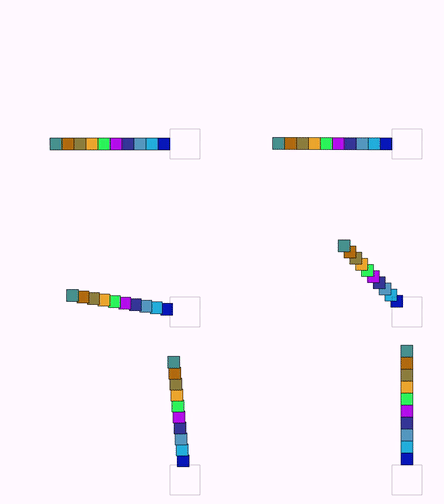
All squares start and end simultaneously:
With Delay Effect
Just add a delay parameter to the animation:
animSetLayout(
    runtime: 5,
    obj: smallSquaresGroup,
    layout: "upper",
    refpoint: centralSquare,
    delay: 0.5 //50% delay
)
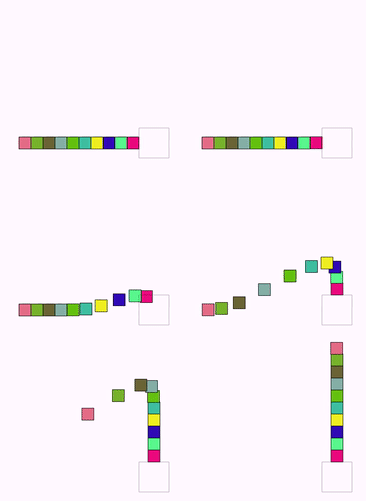
How Delay Works
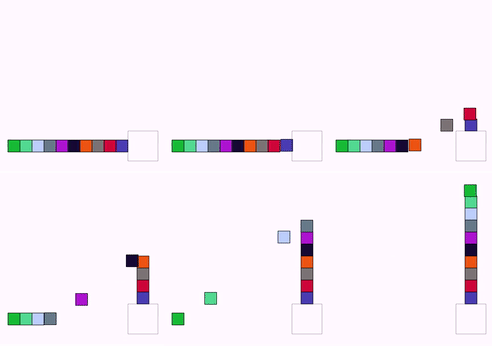
The parameter t (0 < t < 1) determines the stagger amount:
- Individual animation duration = total runtime × (1 - t)
- Animations are distributed evenly across the total runtime
Examples:
- .addDelayEffect(.3) Each animation uses 70% of total time, staggered over full duration
- .addDelayEffect(.75) Each animation uses 25% of total time, creating a strong wave effect
Delay in creation animations
appear accepts it too, and there the parts being staggered are the ones the object is made of: the elements of a group or a compound object, the glyphs of a formula or a text, the shapes of a multishape or an SVG. The value replaces the default stagger the creation strategy uses:
appear(obj: squares, runtime: 2, delay: 0.5)                  // a compound, element by element
appear(obj: formula, type: "draw", runtime: 2, delay: 0.5)    // a formula, glyph by glyph
appear(obj: [s1, s2, s3], type: "fadein", delay: 0.5)         // a list, object by object
Here delay: 0 is a value of its own, not the absence of the parameter: it cancels the default stagger of the strategy, so every part is created at the same time. An object drawn in a single stroke has no parts to stagger, and a delay on it is reported and ignored.
Controlling Animations with Lambda Functions
Lambda functions provide fine-grained control over animation timing and behavior, transforming how animations feel.
Understanding Lambda Functions
Every animation maps normalized time (0 to 1) to animation progress (0 to 1). In a beautiful mathematical notation, it will be something as:
λ: [0,1] → [0,1]
This function transforms the linear time parameter t in doAnim(t) into the value the animation actually interpolates with, which is called lt throughout the code. It is what enables smooth starts and stops, bouncing, reverse playback and custom timing curves.
That mapping is not a single function, though. It is built from five layers, each answering a different question, and knowing which layer your function belongs to is the whole trick.
The five timing layers
                      t   ← frame clock, 0 → 1
                      │
                      │   clamped to [0,1]
                      ▼
          ┌───────────────────────────┐
    ①     │        ALLOCATION         │  which slice of the container's
          │   the slot its container  │  time this animation occupies
          │          gives it         │  default (0,1) = the whole time
          └─────────────┬─────────────┘
                        ▼
          ┌───────────────────────────┐
    ②     │         DIRECTION         │  forwards or backwards
          │                           │  default: forwards
          └─────────────┬─────────────┘
                        ▼
          ┌───────────────────────────┐
    ③     │          REPEAT           │  how many passes fit in the
          │                           │  runtime. Default: one
          └─────────────┬─────────────┘
                        ▼
          ┌───────────────────────────┐
    ④     │         BEHAVIOUR         │  WHERE it is at each instant
          │                           │  of its own progress.
          │                           │  Default: straight to the end
          └─────────────┬─────────────┘
                        │
              ┌─────────┴─────────┐
              ▼                   ▼
    ┌──────────────────┐  ┌──────────────────┐
 ⑤a │      EASING      │⑤b│  EFFECTS EASING  │
    │  HOW SMOOTHLY it │  │  same, but only  │
    │  travels ④       │  │  for jump, turns,│
    │  default smooth()│  │  scale and alpha │
    └────────┬─────────┘  └────────┬─────────┘
             ▼                     ▼
            lt                 effectLt
             │                     │
             │                     └──▶ animation effects
             │
             ├──▶ the interpolation of the animation itself
             ├──▶ where it ended, which decides all the cleanup
             └──▶ whether it is playing backwards
Each layer has a setter in Java and a key in the DSL:
| # | Layer | Java | DSL | Default |
|---|---|---|---|---|
| ① | allocation | setAllocationParameters(a, b) |
advanced: [allocationParameter: [a, b]] |
(0, 1) |
| ② | direction | setReversed(true) |
advanced: [reversed: true] |
forwards |
| ③ | repeat | setRepeatCount(n) |
advanced: [repeat: n] |
1 |
| ④ | behaviour | setBehaviourLambda(f) |
advanced: [behaviour: f] |
none |
| ⑤a | easing | setLambda(f) |
lambda: f |
smooth() |
| ⑤b | effects easing | setEffectLambda(f) |
advanced: [effectLambda: f] |
same as ⑤a |
Two things are worth understanding about the order rather than memorising it:
The easing is always last. Its contract is λ(0)=0 and λ(1)=1. Sitting on top, that guarantee lands on the ends of each repetition and of each leg of the behaviour, not merely on the ends of the global clock. If it were applied first, a there-and-back would reach its far point at maximum speed, because that is exactly where smooth has its steepest slope.
The allocation is always first. It is the outer window: outside its slice it returns a flat 0 or 1, which is what makes a staggered child of a group stand still before its turn and stand still after it is done.
Layer ① belongs to the container. A delay: on a group, or the slot each child gets inside an animJoin, is written there. Scripts rarely set it by hand.
Available Lambda Functions
The UsefulLambdas class provides several pre-built functions. Here's a visual guide:
//this function given a lambda function and a legend
//returns a graph of the lambda in [0,1] with the legend
def drawGraphFor = { lambda, name ->
    def fg = funcGraph(
          func: lambda,
          range: [0, 1],
          style: [thickness: 15, drawColor: 'darkblue']
    )

    def axisX = shape(type: 'segment', from: [-0.1, 0], to: [1.1, 0])
    def axisY = shape(type: 'segment', from: [0, -0.1], to: [0, 1.1])
    def text = latex(
          text: name,
          transform: [scale: 0.7],
          stack: [to: axisX, destinyAnchor: 'lower', gaps: 0.2]
    )
    group(obj: [fg, text, axisX, axisY]) //Return this group
}

//List of graphs to create
def specs = [
    [UsefulLambdas.smooth(), '{\\tt smooth()}'],
    [UsefulLambdas.smooth(.25d), '{\\tt smooth(.25d)}'],
    [UsefulLambdas.allocateTo(.25, .75), '{\\tt allocate(.25,.75)}'],
    [UsefulLambdas.restrictTo(.25, .75), '{\\tt restrictTo(.25,.75)}'],
    [UsefulLambdas.repeat(3), '{\\tt repeat(3)}'],
    [UsefulLambdas.reverse(), '{\\tt reverse()}'],
    [UsefulLambdas.backAndForth(), '{\\tt backAndForth()}'],
    [UsefulLambdas.backAndForthLinear(), '{\\tt backAndForthLinear()}'],
    [UsefulLambdas.bounce1(), '{\\tt bounce1()}'],
    [UsefulLambdas.bounce2(), '{\\tt bounce2()}'],
    [UsefulLambdas.backAndForthBounce1(), '{\\tt backAndForthBounce1()}'],
    [UsefulLambdas.backAndForthBounce2(), '{\\tt backAndForthBounce2()}']
]

def functions = group(
      obj: specs.collect { drawGraphFor(it[0], it[1]) },
      layout: [type: 'box', rowSize: 4, gaps: [0.5,0.2],  direction: 'right_down']
)

scene.add(functions)
camera.zoomToAllObjects()
scene.saveImage("lambdas01.png")
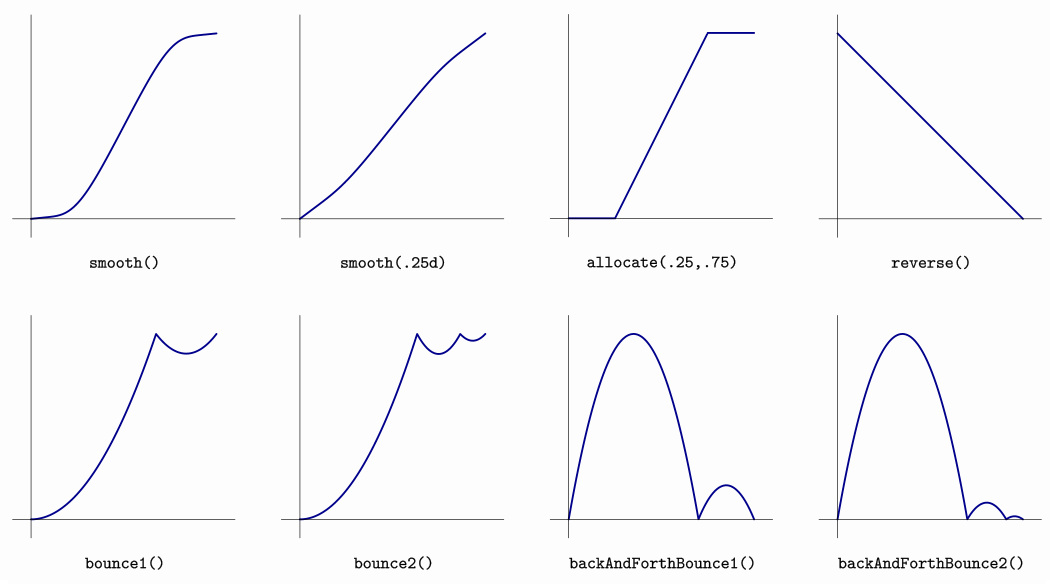
Interpreting Lambda Graphs
- X-axis: Time from 0 to 1 (start to finish)
- Y-axis: Animation progress from 0 to 1 (0% to 100% complete)
- A proper easing satisfies λ(0) = 0 and λ(1) = 1 and never goes down
Which layer does a function belong to?
Look at the graph and ask whether it goes up all the way:
- It rises monotonically from 0 to 1 (
smooth,linear, your own acceleration curve): it is an easing. It belongs inlambda:. - It comes back, or overshoots and settles (
backAndForthLinear,backAndForth,bounce1,bounce2,backAndForthBounce*): it is really a behaviour, a shape of the progress. It has two possible homes, and the choice matters: - in
lambda:, the short form. It replaces the easing, so nothing smooths it. This is the right home forbounce1andbounce2, which already carry their own acceleration built in. - in
advanced: [behaviour: ...], so thatlambdakeeps easing its result. This is the right home for a shape you write yourself in linear terms.
An animation whose mapping ends at 0 (any there-and-back, or a reversed animation) is understood to have finished where it started, so it undoes whatever it created. That is why appear(obj: sq, lambda: "backAndForth") makes the square appear and disappear again, leaving nothing behind.
Common Lambda Functions
1. smooth(smoothness) - Default for all animations, with smoothness 0.7
UsefulLambdas.smooth()      // Default: smoothness 0.7
UsefulLambdas.smooth(0)     // Linear (no smoothing)
UsefulLambdas.smooth(.25)   // 25% smoothness
2. reverse() - λ(t) = 1 - t. Prefer advanced: [reversed: true], which uses the direction layer and leaves the easing slot free, so the animation still runs smoothly while going backwards.
3. allocateTo(start, end) - Compress animation into time window. This is used mostly to compose with another lambdas. If you want to restrict your animation to a given time interval in a simple way, use advanced: [allocationParameter: [.25,.75]] in your DSL block or .setAllocationParameters(.25,.75) in your Groovy Animation object, which is the allocation layer.
UsefulLambdas.allocateTo(.25, .75) // Animation runs from 25% to 75% of duration
4. repeat(n) - Sawtooth of n full passes, keeping the end of each one. This is the repeat layer; use advanced: [repeat: n] rather than composing it by hand, so the easing applies to every pass.
5. bounce1() / bounce2() - Single or double bounce effect. They overshoot to 1, back off and settle, so they are behaviours with their own easing already inside them.
6. backAndForthBounce1() / backAndForthBounce2() - Returns to start at t=1
Setting Default Lambda
To use linear timing for a single animation:
anim.setLambda(t -> t) // or UsefulLambdas.smooth(0)
To set a default lambda for all animations in your scene:
config.setDefaultLambda(UsefulLambdas.smooth(.5)) // In setupSketch()
Recipes
Take a plain shift of a square and see how each layer changes it.
Go there and come back, linearly
animShift(obj: sq, dx: 2, lambda: "backAndForthLinear")
The there-and-back occupies the easing slot, so there is no easing left: constant speed on both legs, with corners at t=0, t=0.5 and t=1. Mechanical on purpose.
Go there and come back, eased
animShift(obj: sq, dx: 2, advanced: [behaviour: "backAndForthLinear"])
Now the there-and-back is a behaviour and lambda keeps its default smooth(), which is applied to its result. The square starts gently, accelerates, brakes as it reaches the far point, and does the same on the way back.
There is a third variant worth knowing, the classic one:
animShift(obj: sq, dx: 2, lambda: "backAndForth") // the parabola 4t(1-t)
| at the start | at the turn | how it feels | |
|---|---|---|---|
lambda: "backAndForthLinear" |
full speed | corner | mechanical, constant |
lambda: "backAndForth" |
fastest | stops | shoots out, turns smoothly |
advanced: [behaviour: "backAndForthLinear"] |
gentle | gentle | eased at all three points |
Bounce
animShift(obj: sq, dx: 2, lambda: "bounce1")
bounce1 occupies the easing slot, and there is only one, so nothing smooths it further. That is correct: bounce1 already rises as a quadratic ease-in, overshoots to its target, backs off and settles. Putting it in the behaviour layer instead works, but smooth is nearly flat near 1, so it would halve the depth of the bounce. Leave the bounces in lambda:.
Play it backwards
appear(obj: sq, advanced: [reversed: true]) // behaves as a disappear
The direction layer is not the same as lambda: "reverse". The layer leaves the easing slot free, so the animation still runs smoothly, and the animation reports that it ended at its beginning, undoing whatever it created.
Repeat it
animRotate(obj: sq, angle: PI, advanced: [repeat: 3])
Three full passes inside the same runtime, each one eased on its own. Combine it with a behaviour for three eased round trips:
animShift(obj: sq, dx: 2, advanced: [repeat: 3, behaviour: "backAndForthLinear"])
Write your own behaviour
The behaviour layer is meant to be written linearly, since the easing sits on top of it. A trip that goes, waits at the destination and comes back:
animShift(obj: sq, dx: 2, advanced: [behaviour: { t ->
    t < 0.3 ? t / 0.3 : (t < 0.7 ? 1 : (1 - t) / 0.3)
}])
You do not have to think about smoothing anywhere in that definition.
Decorate without moving the destination
The animation effects (jump, turns, scale, alpha) travel on their own timing, which shares layers ① to ④ but can carry a different easing:
animShift(obj: sq, dx: 3, effects: [scale: 0.5],
          advanced: [effectLambda: "backAndForth"])
The square ends 3 units to the right and stays there, while its scale drops to half along the way and recovers. Written as lambda: "backAndForth" instead, the square would have come back too.
Composing Lambda Functions
Lambda functions are DoubleUnaryOperator objects that support composition via .compose(). Most of the classic compositions now have a layer of their own, which is preferable because the layers compose with each other and with the easing. Reach for manual composition when you need a parameterized function, such as restrictTo(a, b) or smooth(s), or when you are building a timing curve from scratch.
Example: Delayed Rotation
Let's revisit the problem of the rotating-shifting square (this time in Groovy style):
def sq = Shape.square()
    .scale(.5)
    .style("solidblue")
    .moveTo(-1, 0)

def ag = AnimationGroup.make(
    Commands.shift(6, 2, 0, sq),
    Commands.rotate(6, PI * .5, sq)
        .setUseObjectState(false)
)
play.run(ag)
Both animations start and end together. Now let's make the rotation occur only during the middle 20% of the animation:
Commands.rotate(6, PI * .5, sq)
    .setUseObjectState(false)
    .setLambda(
        UsefulLambdas.smooth()
            .compose(UsefulLambdas.allocateTo(.4, .6))
    )

How it works:
1. allocateTo(.4, .6) compresses time from [0,1] to [.4, .6]
2. smooth() applies easing to the compressed time
3. Result: Rotation starts at 40% and finishes at 60% of total duration
This composition by hand is exactly what the allocation layer does, so the same thing can be written as
Commands.rotate(6, PI * .5, sq)
    .setUseObjectState(false)
    .setAllocationParameters(.4, .6)
which leaves setLambda free for whatever easing you want on top.
Example: Bounce Effect
.setLambda(
    UsefulLambdas.bounce2()
        .compose(UsefulLambdas.allocateTo(.2, .75))
)
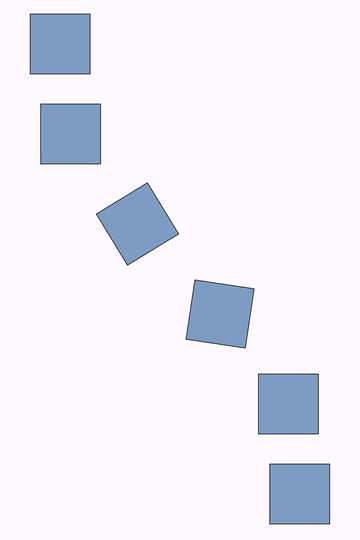
The bounce occurs between 20% and 75% of the animation duration.
Visualizing Lambda Effects
Here's a complete example showing lambda graphs alongside their effects:
// Axes with 0.25 ticks on both axes (added to the scene automatically)
axes(xRange: [0, 1], xStep: 0.25, yRange: [0, 1], yStep: 0.25)

// Timing lambdas
def shiftLambda  = UsefulLambdas.bounce1()
def rotateLambda = UsefulLambdas.smooth().compose(UsefulLambdas.allocateTo(.3, .6))

// Builds a graph + a point riding on it + a legend that follows the point.
// Returns the moving point (the only thing the animation needs afterwards).
def makeTracer = { lambda, graphColor, pointColor, name ->
    def fg = funcGraph(
          func:  lambda,
          range: [0, 1],
          style: [drawColor: graphColor, thickness: 6]
    )
    def pt = pointOnGraph(
          x: 0,
          graph: fg,
          style: [drawColor: pointColor, thickness: 40]
    )

    def legend = label(
          text: name,
          path: pt,
          scale: .5
    )
    scene.add(legend, fg, pt)
    pt //return this object
}

def pointShift  = makeTracer(shiftLambda,  "brown",  "darkblue", "shift")
def pointRotate = makeTracer(rotateLambda, "orange", "darkred",  "rotate")

camera.setMathXY(-1, 2, .25)

def sq = shape(// Animated square
      type:      'square',
      style:     'solidblue',
      transform: [scale: 0.25, moveTo: [0, -0.25]],
      addToScene: true
)
animGroup(// Play everything at once
      anims: [
          // Points move at constant speed (linear) along the x-axis
          animShift(obj: pointShift,  dx: 1, runtime: 6, lambda: 'linear', run: false),
          animShift(obj: pointRotate, dx: 1, runtime: 6, lambda: 'linear', run: false),
          // Square driven by the custom lambdas
          animShift(obj: sq, dx: 1, runtime: 6, lambda: shiftLambda, run: false),
          animRotate(obj: sq, angle: PI * .5, runtime: 6, lambda: rotateLambda,
                advanced: [useObjectState: false], run: false)
      ])
scene.waitSeconds(1)
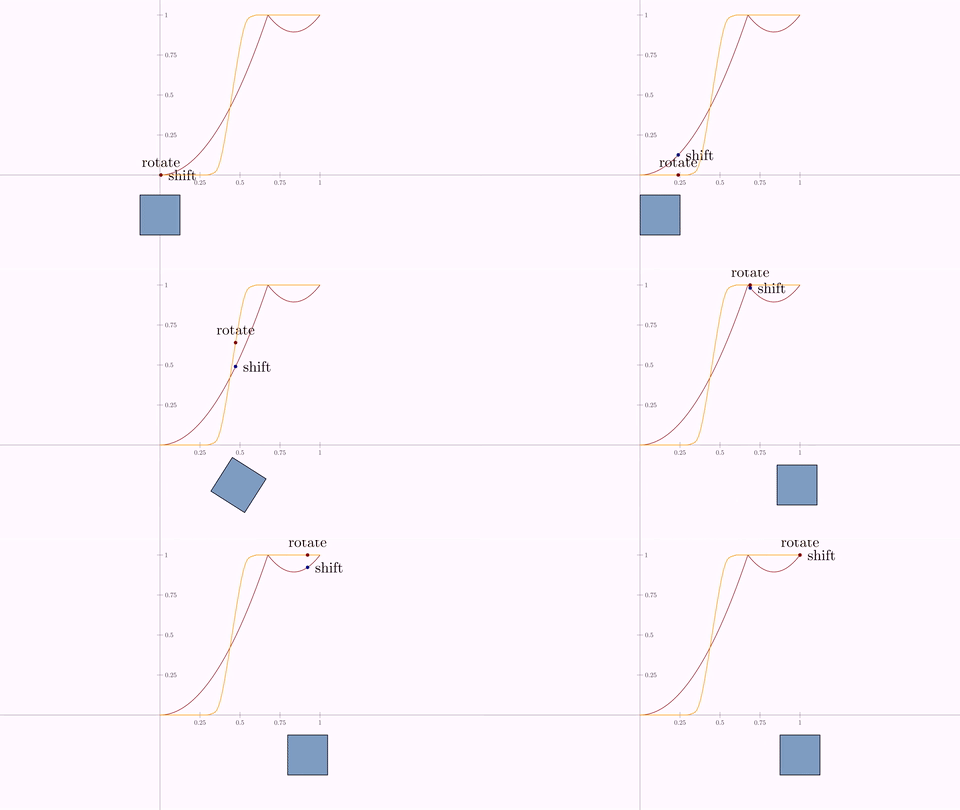
What's happening: - Two moving dots show current time on each lambda curve - The square follows the combined behavior of both lambdas - Shift lambda (brown): bounces - Rotate lambda (orange): occurs only from 30% to 60%
Making Procedural Animations
Sometimes predefined animations aren't enough. Procedural animations give you frame-by-frame control for complex, custom movements.
Basic Concept
Procedural animation means manually modifying objects and advancing frames, like stop-motion animation.
Key Variable: dt
The dt variable holds the time step for each frame:
dt = scene.getDt() // Time per frame (e.g., 1/60 for 60fps)
Example: Random Walk, by hand (the long way)
def A = Point.origin()
scene.add(A)

def dt = scene.getDt() //Get the time step for each frame
for (t in arange(0, 10, dt)) {//10 seconds of frames
    // Random step in x and y
    A.shift((1 - 2 * Math.random()) * dt, (1 - 2 * Math.random()) * dt)
    scene.advanceFrame()
}
You will obtain a rather nervous point: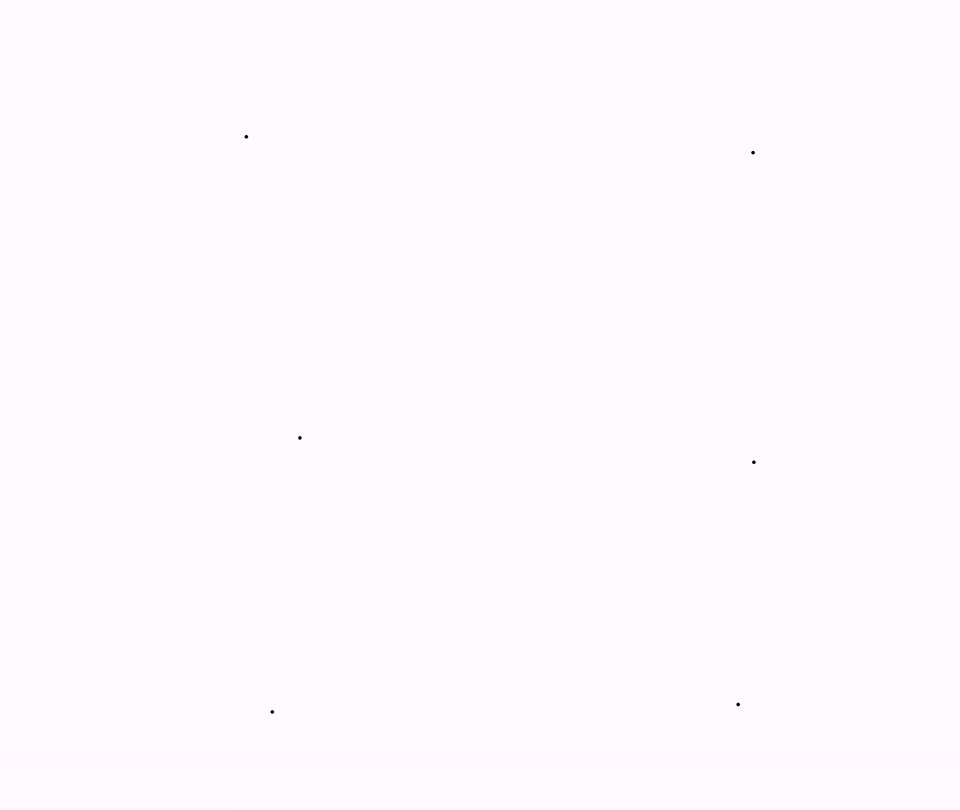
The harryhausen { } block
Writing that loop by hand every time is easy to get wrong: forget the scene.advanceFrame() and the whole block ends up in a single frame. The harryhausen { } block helps you in the process, and gives you dt inside without asking for it:
def A = point()
scene.add(A)

harryhausen(runtime: 10) {
    // Random step in x and y
    A.shift((1 - 2 * Math.random()) * dt, (1 - 2 * Math.random()) * dt)
}
The block is executed once per frame and the frame is rendered right after it, so what the block changes is what the frame shows. If you are wondering aboutthe block's name, check this out.
These names and methods are available inside the block, and inside it only:
| Name | Meaning |
|---|---|
dt |
Time step between two frames, 1 / fps |
t |
Seconds elapsed since the block started; 0 on the first frame |
frame / frames |
Index of the current frame, from 0, and how many will be run |
progress |
From 0 on the first frame to 1 on the last |
stop() |
Ends the block after the current frame |
harryhausen(5) { ... } is a shorthand for runtime: 5, and harryhausen(frames: 120) gives the number of frames instead of a duration. A block that declares parameters receives t, dt, frame in that order, which is what a helper method written apart needs:
harryhausen(frames: 120) { t, dt -> step(t, dt) }
stop() is for a block that runs until something happens rather than for a fixed time:
harryhausen(runtime: 30000) {
    ball.shift(0, -9.8 * dt * dt)
    if (ball.center.y < 0) stop()
}
Inside a skip { ... } block the body is executed the same number of times but no frame is rendered, so the scene reaches the same state at no cost.
The animate { } block
Most frame by frame animations are the same thing: a parameter travelling from one value to another, and a formula depending on it. Written with harryhausen you have to interpolate that parameter yourself, and applying an easing means computing it by hand. The animate { } block does it for you:
animate(from: 0, to: 2 * PI, runtime: 3, lambda: "smooth") {
    p.moveTo(cos(it), sin(it))
}
The block runs once per frame, exactly as harryhausen does, but the value it receives is the parameter already interpolated between from (default 0) and to (default 1), with the easing of lambda applied. It is the implicit it of Groovy, so a one-line block needs no declaration at all.
If a name reads better, and in a formula it usually does, ask for it with variable::
animate(from: -2, to: 2, variable: "x", runtime: 4) {
    p.moveTo(x, x * x)
    label.setText("x = ${round(x, 2)}")
}
That name exists inside the block only: a variable of your script called x is left untouched outside it. The aliases var: and varName: do the same.
Everything harryhausen gives is available here too:
| Name | Meaning |
|---|---|
it / the name of variable |
The interpolated parameter, with the easing applied |
value |
The same parameter, under a fixed name |
progress |
The linear progress, from 0 to 1; the easing is in the parameter, not here |
dt, t, frame, frames |
As in harryhausen |
stop() |
Ends the block after the current frame |
frames: gives a number of frames instead of a duration, and a block that declares parameters receives value, progress, dt in that order:
animate(to: 10, frames: 120) { v, prog -> step(v, prog) }
Combining Procedural and Predefined Animations
You can mix manual control with predefined animations:
def A = point()
def square = shape(
      type: "square",
      transform: [center: true]
)
scene.add(A, square)

// Define and initialize a rotation animation
def rotation = animRotate(
      runtime: 5,
      obj: square,
      angle: 90 * DEGREES,
      run: false
)
rotation.initialize()

harryhausen(runtime: 10) {
    //Manual: random walk for point A
    A.shift((1 - 2 * Math.random()) * dt, (1 - 2 * Math.random()) * dt)

    //Predefined: process rotation animation
    //For most simple animations you don't need to call finishAnimation,
    //but it is a good practice to do so
    if (rotation.processAnimation()) rotation.finishAnimation()
}
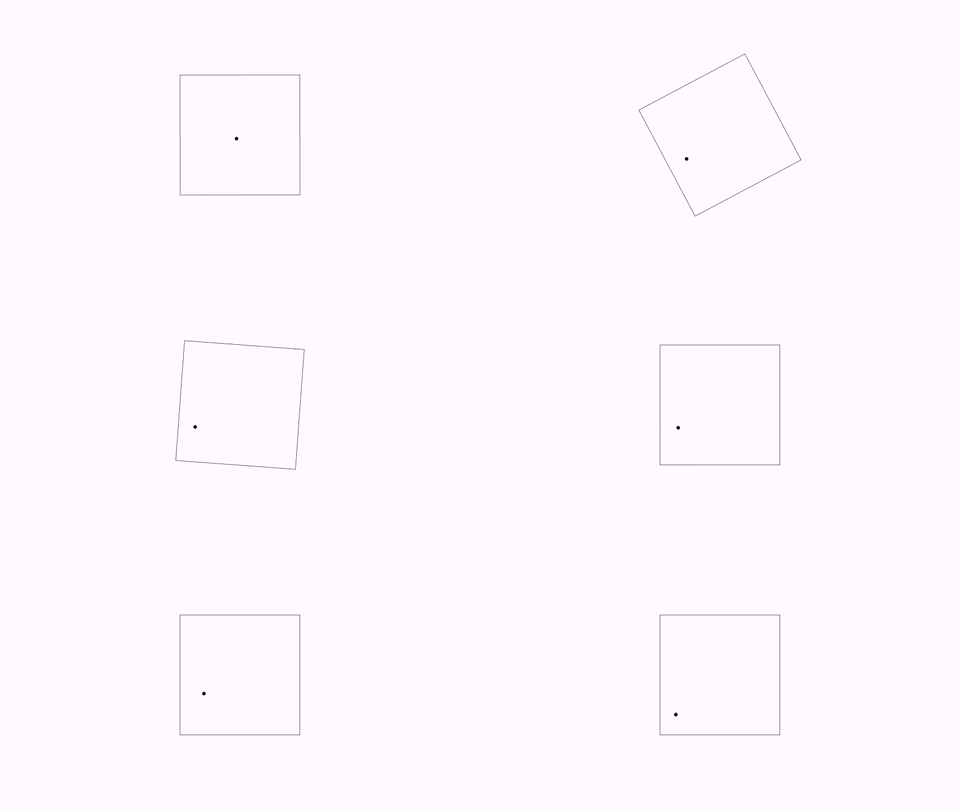
Important notes:
initialize()the animation before the loop- Call
processAnimation()each frame. It will return true when the animation is done, so call thefinishAnimation()method then. - Once the animation finishes, subsequent calls have no effect
Reusing Animations
You can safely skip this section unless you are explicitly looking for this. In practice, you will rarely need to reuse existing animations, but it is better to be prepared for any eventuality...
Animation Lifecycle
Understanding the animation lifecycle is crucial when reusing animations. Every animation follows this flow:
- Creation - Animation object created, auxiliary objects initialized
- Initialization -
initialize()saves the object states (at t=0) - Preparation -
prepareForAnim()runs exactly once, immediately before the first frame, and leaves the scene showing what the animation looks like at t=0 - For each frame (t from 0 to 1):
- Restore objects to initial state (t=0)
- Apply transformations for the mapped time
- Finish -
finishAnimation()applies the deferred scene changes and callscleanAnimationAt(endState)
That last step does not ask what t was, but where the animation ended: at its start, halfway, or at its end. Since the mapping of a backwards animation ends at 0, one that plays in reverse cleans up exactly as if it had never run, undoing whatever it created. This is what makes any animation reversible without the animation itself knowing anything about it.
The Reinitialization Problem
When you reuse an animation, it automatically reinitializes, capturing the current state as the new "initial state."
Example: Forward and Reverse Rotation
Attempt 1: Naive approach
def sq = Shape.square()
    .scale(2, 1).center()
    .style("solidgreen")

def text = LatexMathObject.make("Forward...")
    .stack()
    .withGaps(.1)
    .toScreen(ScreenAnchor.LOWER_RIGHT)
scene.add(text)

def rotate = Commands.rotate(2, 45 * DEGREES, sq).setLambda(t -> t)
play.run(rotate)
scene.waitSeconds(1)

text.setLatex("Reverse...")
play.run(rotate.setLambda(UsefulLambdas.reverse()))
text.setLatex("End")
scene.waitSeconds(1)

What happened?? The reverse animation starts from the rotated position (which is now the "initial state"), not the original position. This is because the "initial state" has changed in the second run. We need to tell the animation to use the original t=0 state, otherwise, playing the animation backwards won't run properly.
Solution 1: Disable Reinitialization
def sq = Shape.square()
    .scale(2, 1).center()
    .style("solidgreen")

def text = LatexMathObject.make("Forward...")
    .stack()
    .withGaps(.1)
    .toScreen(ScreenAnchor.LOWER_RIGHT)
scene.add(text)

def rotate = Commands.rotate(2, 45 * DEGREES, sq).setLambda(t -> t)
rotate.setShouldResetAtFinish(false)  // Prevents reinitialization
play.run(rotate)
scene.waitSeconds(1)

text.setLatex("Reverse...")
play.run(rotate.setLambda(UsefulLambdas.reverse()))
text.setLatex("End")
scene.waitSeconds(1)
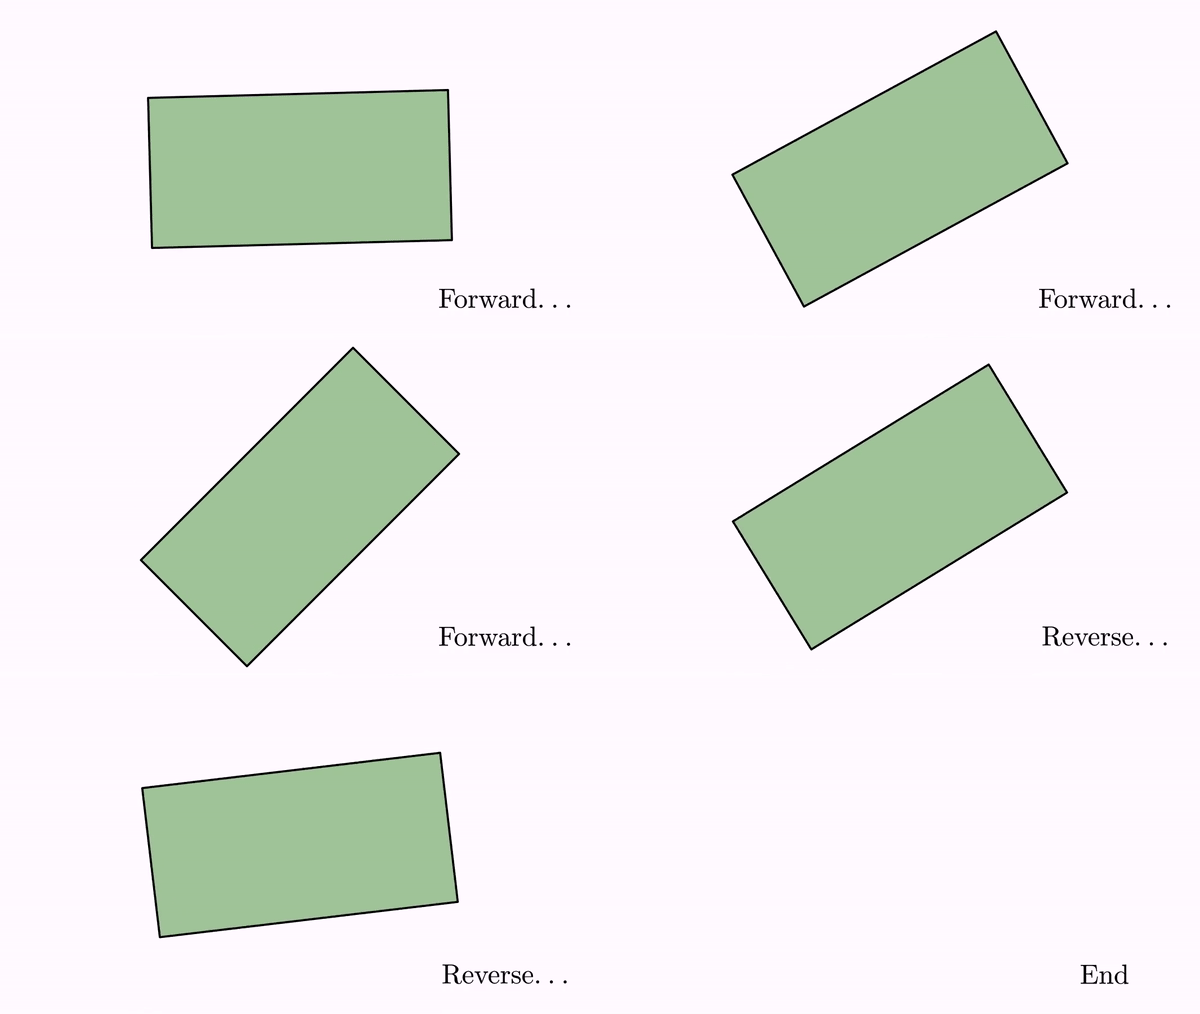
Ah, that's better, but we meet an unexpected problem: The rectangle disappears at the end! Is this a bug?? Well, no, as the joke says, it's is not a bug, it's a feature! When playing in reverse and exiting at t=0, JMathAnim tries to restore the original state, and that includes the object being or not in the scene. If the object wasn't originally in the scene when animation was called, it removes it to ensure everything is left as before (yes, I know, JMathAnim sometimes is just too smart...)
Solution 2: Ensure Object is in Scene
def sq = Shape.square()
    .scale(2, 1).center()
    .style("solidgreen")

def text = LatexMathObject.make("Forward...")
    .stack()
    .withGaps(.1)
    .toScreen(ScreenAnchor.LOWER_RIGHT)

scene.add(sq, text)  // Add square BEFORE animating

def rotate = Commands.rotate(2, 45 * DEGREES, sq).setLambda(t -> t)
rotate.setShouldResetAtFinish(false)
play.run(rotate)
scene.waitSeconds(1)

text.setLatex("Reverse...")
play.run(rotate.setLambda(UsefulLambdas.reverse()))
text.setLatex("End")
scene.waitSeconds(1)

And the rectangle now behaves correctly!
A note on reverse() versus the direction layer
The examples above use setLambda(UsefulLambdas.reverse()), which spends the easing slot on the inversion: the animation runs backwards at constant speed, with no smoothing left to give it. The direction layer does the same job one layer earlier and leaves the easing free:
play.run(rotate.setReversed(true)) // or advanced: [reversed: true] in the DSL
The rotation now runs backwards and eases in and out, and you can still change lambda independently. Both forms end at the animation's start, so the caveats about the object being in the scene apply the same way.
Creating Complex Animations
JMathAnim provides special Animation subclasses for building sophisticated animation sequences.
The WaitAnimation
Does exactly what it says: waits for a specified duration.
animWait(runtime: 2)              // waits 2 seconds
def wait = WaitAnimation.make(2)  // the same thing, in plain Groovy, ready to play it
scene.waitSeconds(2) //scene shortcut
Played on its own it is a pause, and scene.waitSeconds(numSeconds) is the same shortcut. The reason it is an Animation and not just a pause is that it can be used as one: built with run: false, it becomes a filler inside animJoin (a gap between two steps of a sequence) or inside animGroup (padding a group so it lasts longer than its longest child).
def a1 = animShift(obj: s, dx: 1, run: false)
def a2 = animRotate(obj: s, angle: 90 * DEGREES, run: false)

animJoin(anims: [a1, animWait(runtime: 0.5, run: false), a2])
The call is named animWait and not wait because wait is a final method of java.lang.Object, which a script cannot safely overload.
You can use this animation to generate a given number of seconds in frames. We can rewrite the example of the nervous point in this way:
def A = Point.origin()
scene.add(A)

dt = scene.getDt() //Get the time step for each frame
def numberOfSeconds = 10

def anim=WaitAnimation.make(numberOfSeconds)
anim.initialize()
while (!anim.processAnimation()) {
    // Random step in x and y
    A.shift((1 - 2 * Math.random()) * dt, (1 - 2 * Math.random()) * dt)
    scene.advanceFrame()
}
anim.finishAnimation()
The AnimationGroup
Plays multiple animations simultaneously. Finishes when the last animation completes.
Basic Example
def sq1 = shape(
    type:  'square',
    style: [fillColor: 'seagreen', thickness: 7]
)

def sq2 = shape(
    type:  'square',
    style: [fillColor: 'crimson', thickness: 7],
    stack: [to: sq1, destinyAnchor: 'left']
)

animGroup(anims: [
    animShift(obj: sq1, dx:  .5, dy: -.5, runtime: 2, run: false),
    animShift(obj: sq2, dx: -.5, dy: -.5, runtime: 2, run: false)
])
scene.waitSeconds(1)
Or if you prefer using a pure Groovy style:
def sq1 = Shape.square()
    .fillColor("seagreen")
    .thickness(7)

def sq2 = Shape.square()
    .fillColor('crimson')
    .thickness(7)
    .stack().withDestinyAnchor(AnchorType.LEFT).toObject(sq1)

def shift1 = Commands.shift(2, .5, -.5, sq1)
def shift2 = Commands.shift(2, -.5, -.5, sq2)

def ag = AnimationGroup.make(shift1, shift2)
play.run(ag)
scene.waitSeconds(1)
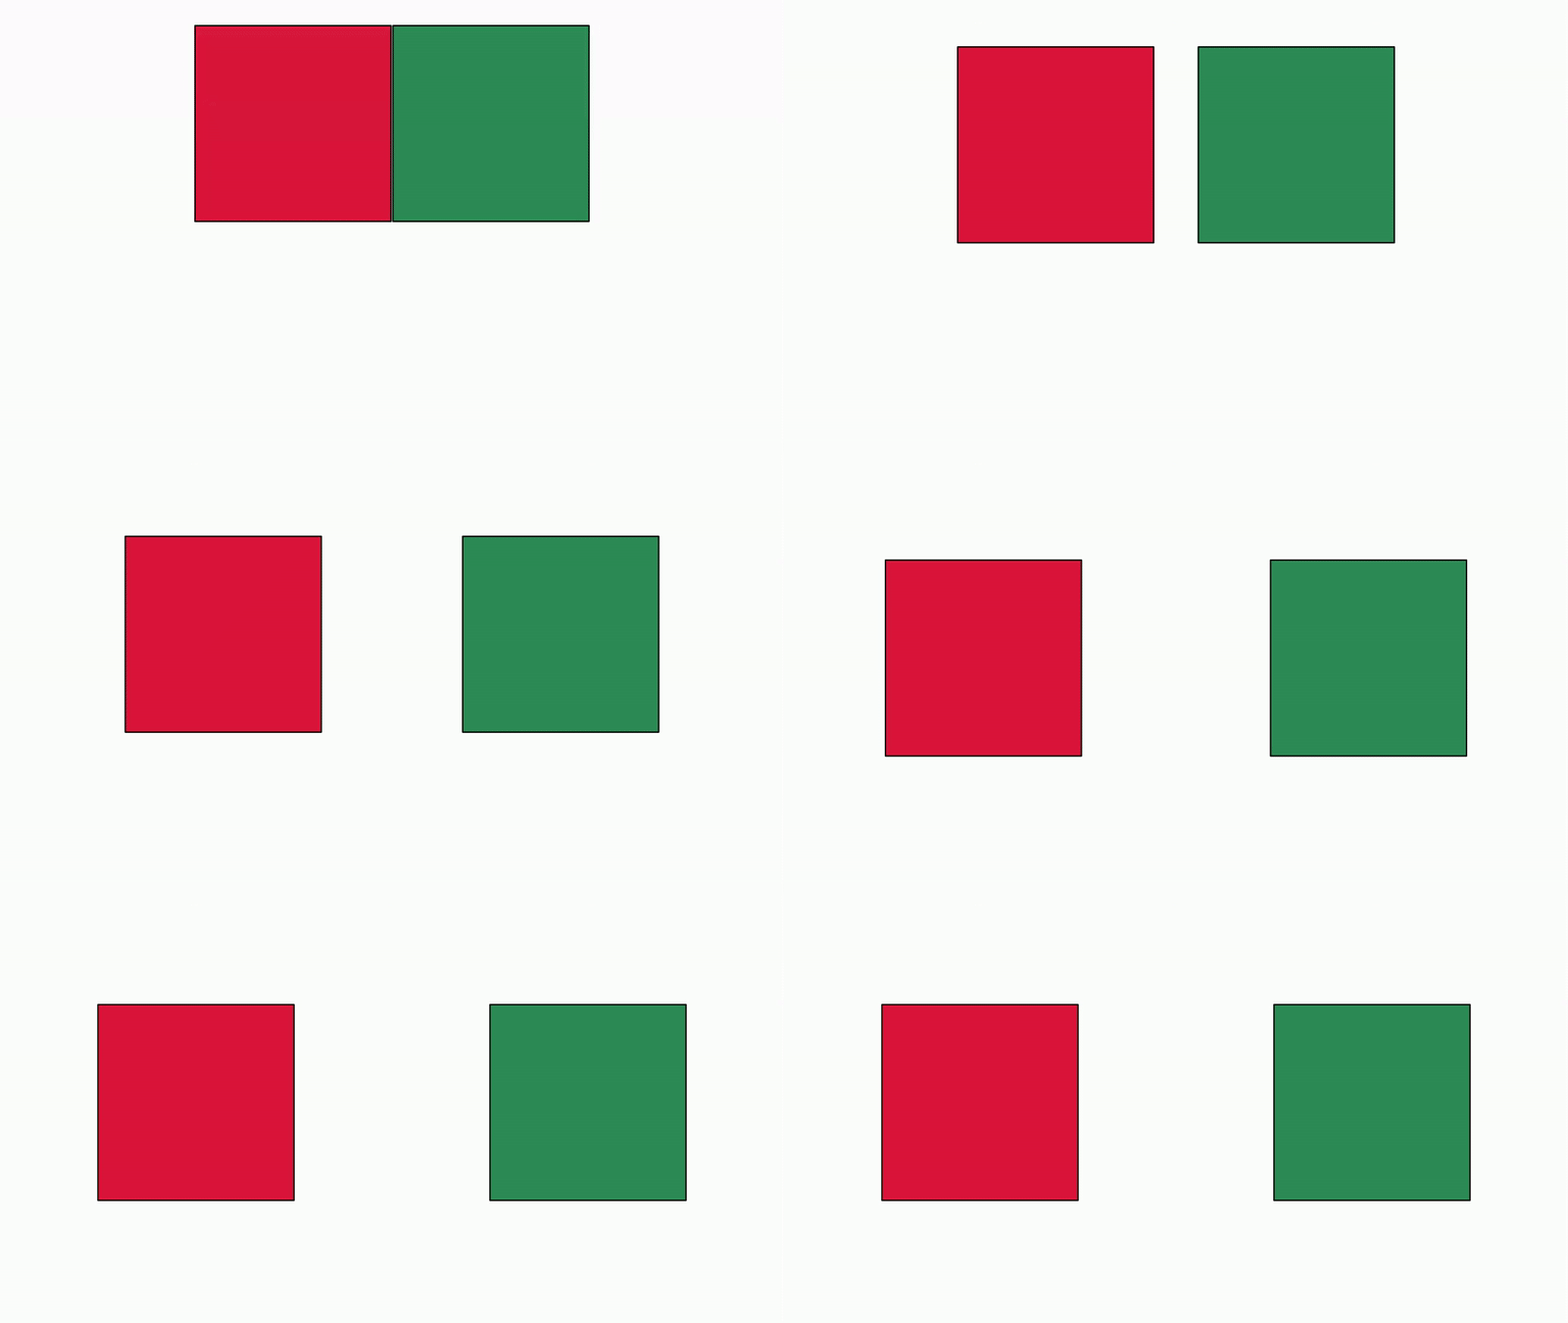
Both squares move simultaneously but in different directions.
With Delay Effect
AnimationGroup also supports delay effects:
def anims = (1..10).collect {
    def orangeRectangle = shape(
        type:       'square',
        transform:  [center: true],
        style:      [fillColor: 'orange', fillAlpha: 0.2],
        addToScene: true
    )
    animScale(obj: orangeRectangle, sx: 2, sy: .7, center: [0, 0], runtime: 5, run: false)
}

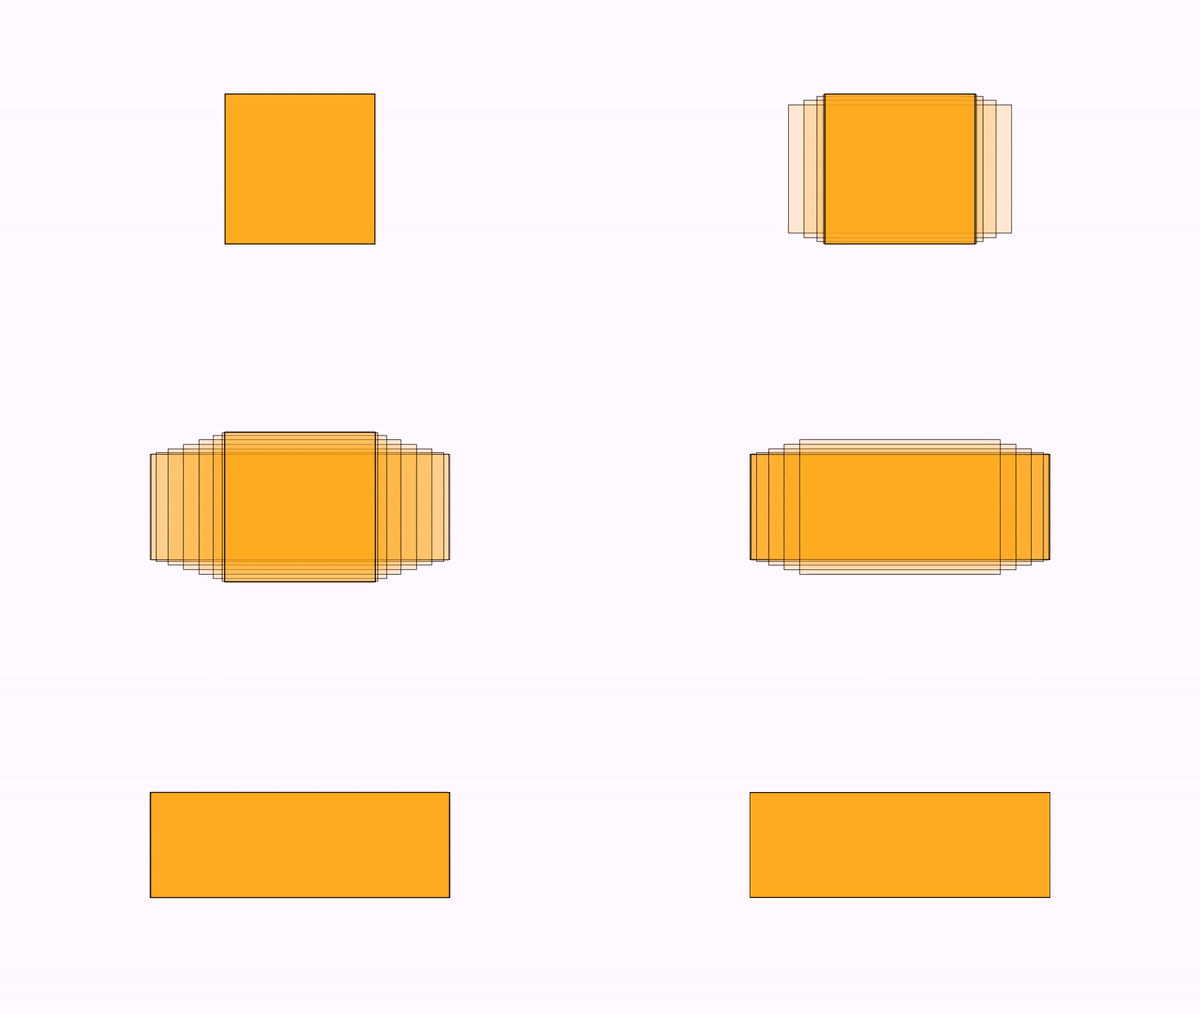
animGroup(anims: anims, delay: 0.5)   // 50% stagger
scene.waitSeconds(1)
Or in a more straightforward Groovy way:
def orangeRectangles = new Shape[10]
def ag = AnimationGroup.make()

for (int i = 0; i < 10; i++) {
    // Create 10 rectangles
    orangeRectangles[i] = Shape.square().center()
        .fillColor("orange").fillAlpha(.2)

    // Create scaling animation for each
    ag.add(
        Commands.scale(5, Point.origin(), 2, .7, 1, orangeRectangles[i])
    )
}

scene.add(orangeRectangles)
ag.addDelayEffect(.5)  // 50% stagger
play.run(ag)
scene.waitSeconds(1)
The JoinAnimation
The JoinAnimationtreats all contained animations as a single unified animation.
def sq = shape(
    type:      'square',
    transform: [center: true],
    style:     [fillColor: 'seagreen', thickness: 7]
)

animJoin(anims: [
    animShift(obj: sq, dx: 1, runtime: 2, run: false),
    animRotate(obj: sq, angle: -PI/2, runtime: 2, run: false)
])
scene.waitSeconds(1)
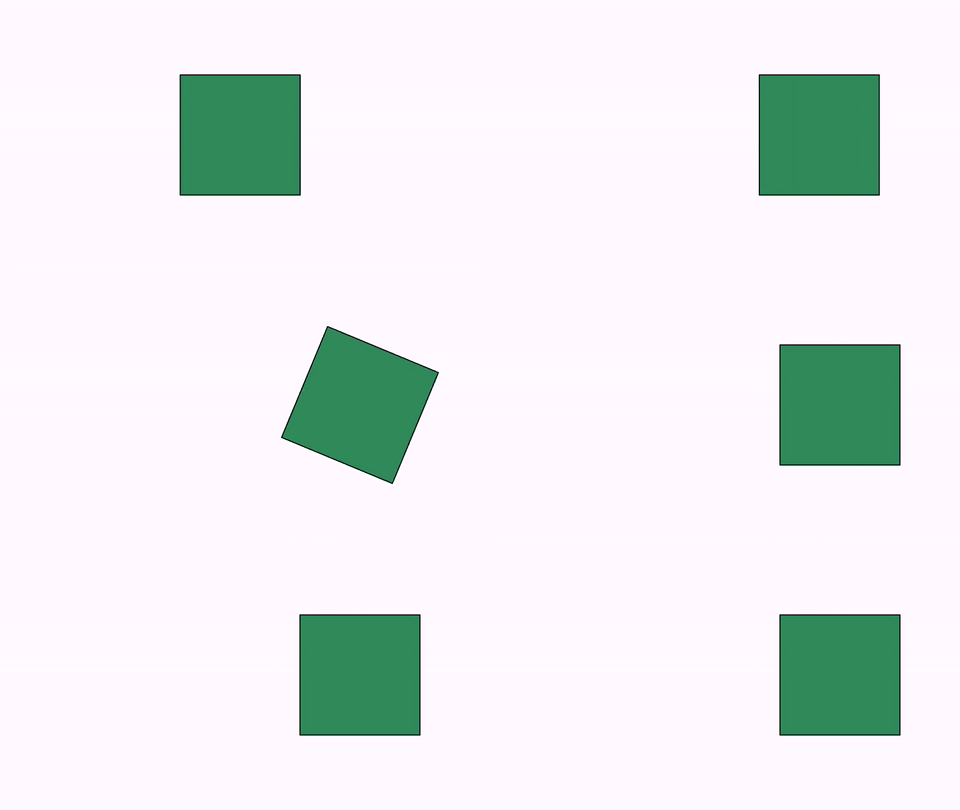
First the square shifts, then it rotates. If unspecified, the runtime if the sum of runtimes of every animations in the list.
Another example. This time we have 3 animations, with runtimes that sum to 4 seconds, but the runtime of the JoinAnimationis set to 6:
def sq = shape(
    type:      'regularpolygon',
    sides:     5,
    transform: [center: true],
    style:     'solidred'
)

animJoin(
    runtime: 6,                                        // total runtime
    anims: [
        appear(obj: sq, runtime: 2, run: false),       // ShowCreation (2s)
        animShift(obj: sq, dx: 1, runtime: 1, run: false),   // (1s)
        animRotate(obj: sq, angle: PI/4, runtime: 1, run: false)  // (1s)
    ]
)
scene.waitSeconds(3)
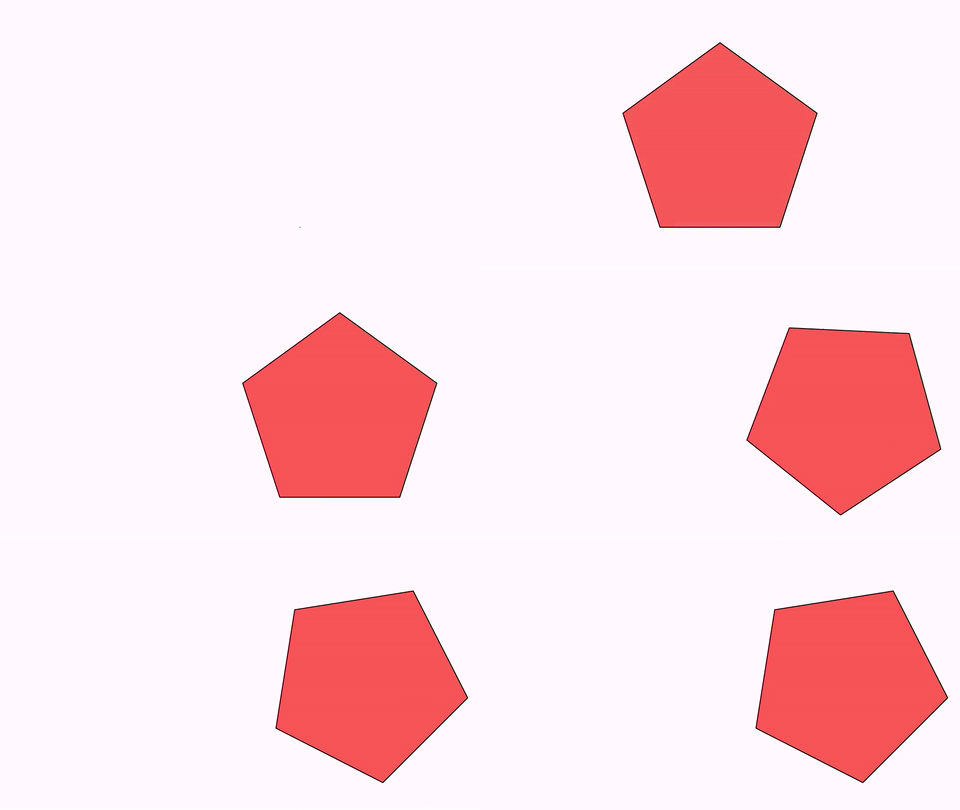
How duration works in this case: Each animation is played with runtime proportionally to the whole duration.
- Total duration: 6 seconds
- Runtime ratios: 2:1:1
- ShowCreation takes: 6 × (2/4) = 3 seconds
- shift takes: 6 × (1/4) = 1.5 seconds
- rotate takes: 6 × (1/4) = 1.5 seconds
One good thing about JoinAnimation is that you can apply lambdas as a one, complex animation! Add this line to the DSL block of the animJoin:
animJoin(
    runtime: 6,                                        // total runtime
    anims: [
        appear(obj: sq, runtime: 2, run: false),       // ShowCreation (2s)
        animShift(obj: sq, dx: 1, runtime: 1, run: false),   // (1s)
        animRotate(obj: sq, angle: PI/4, runtime: 1, run: false)  // (1s)
    ],
    lambda: "backAndForth" //Set this lambda for the global animation
)
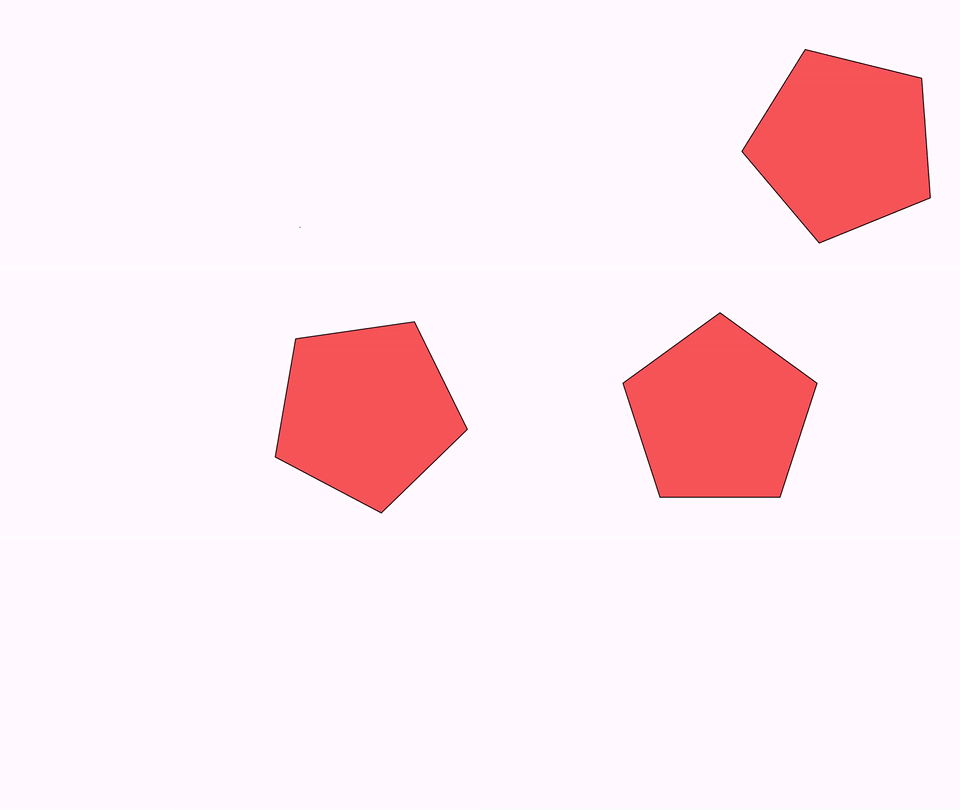
The entire sequence plays forward then backward as a single unit.
Note: The default lambda for JoinAnimation is linear (t -> t), unlike most animations which use smooth().
Breathing between steps: the gap parameter
Inserting a WaitAnimation by hand between two steps is fine for one pause, but a sequence that needs the same pause everywhere gets unreadable. The gap parameter (alias gaps) does it for you: a pause of that many seconds between one child and the next.
animJoin(gap: 0.5) {                    // half a second between steps
    animShift(obj: sq, dx: 1, runtime: 1)
    animRotate(obj: sq, angle: PI/2, runtime: 1)
    animScale(obj: sq, scale: 2, runtime: 1)
}
This is the block form of animJoin, which takes the children inside instead of in anims and needs no run: false anywhere. animGroup has the same form. It is what sequence { ... } and play { ... } do, plus the parameters of the container, so use the plain block when you need nothing else and the container when you do.
Three animations give two pauses: there is none before the first one and none after the last one, so the sequence starts and ends exactly where you wrote it. Total duration here: 3 + 2 × 0.5 = 4 seconds.
The pauses are ordinary children of the sequence, which explains how gap behaves with everything else:
- Without
runtime, the total grows by the pauses, as in the example above. - With
runtime, the pauses take part in the proportional share out like any other child.animJoin(anims: [a1, a2], gap: 1, runtime: 4)with two children of 1 second each spends 4 × (1/3) on each animation and 4 × (1/3) waiting. - The
lambdaof the sequence bends the pauses too, since it applies to the global clock. With the default linear lambda every pause lasts what it says.
A single animation has nothing to separate, so gap is simply ignored. A negative one is an error.
Summary
This chapter covered advanced animation techniques:
- Combining animations with proper state management
- Adding effects (jump, scale, alpha, rotation) to enhance animations
- The five timing layers (allocation, direction, repeat, behaviour, easing) and which one your function belongs to
- Lambda functions for custom timing and easing
- Procedural animations for frame-by-frame control
- Reusing animations correctly to avoid common pitfalls
- Complex animation structures (groups, sequences, joins)
With these tools, you can create sophisticated, professional-quality animations that combine multiple objects, effects, and timing controls.