Using the editor (the easy way)
The easiest way to use JMathAnim is with the jmathanimguieditor, that you can install both in Windows or Linux from here
Open it and write this simple code in the editor:
p=Point.at(0,0)
play.shift(2,1,0,p)
Now if you press F5 (or select Run->Run (preview) from the menu), and after saving the file, a brief animation will play in the preview windows with a tiny white dot moving to the right of the screen. Congratulations, you have done your first animation!
As you can see, JMathAnim works through commands given in a script language. Well, that language is Groovy, with small personalized improvements we will see later.
The first command just creates a Point at coordinates (0,0). The second command performs an animation that lasts for 2 seconds, with the instructions "shift the point p 1 unit to the right and 0 units up". This command actually generates animation frames.
If you are satisfied with this animation you created and want to generate a hd video (1920x1080 at 60fps), you can press shift+F5 (or select Run->Run (production) from the menu), to generate a video. During the generation, nothing is shown on the screen, and you can see the progress bar in the logging window, just below the preview window:
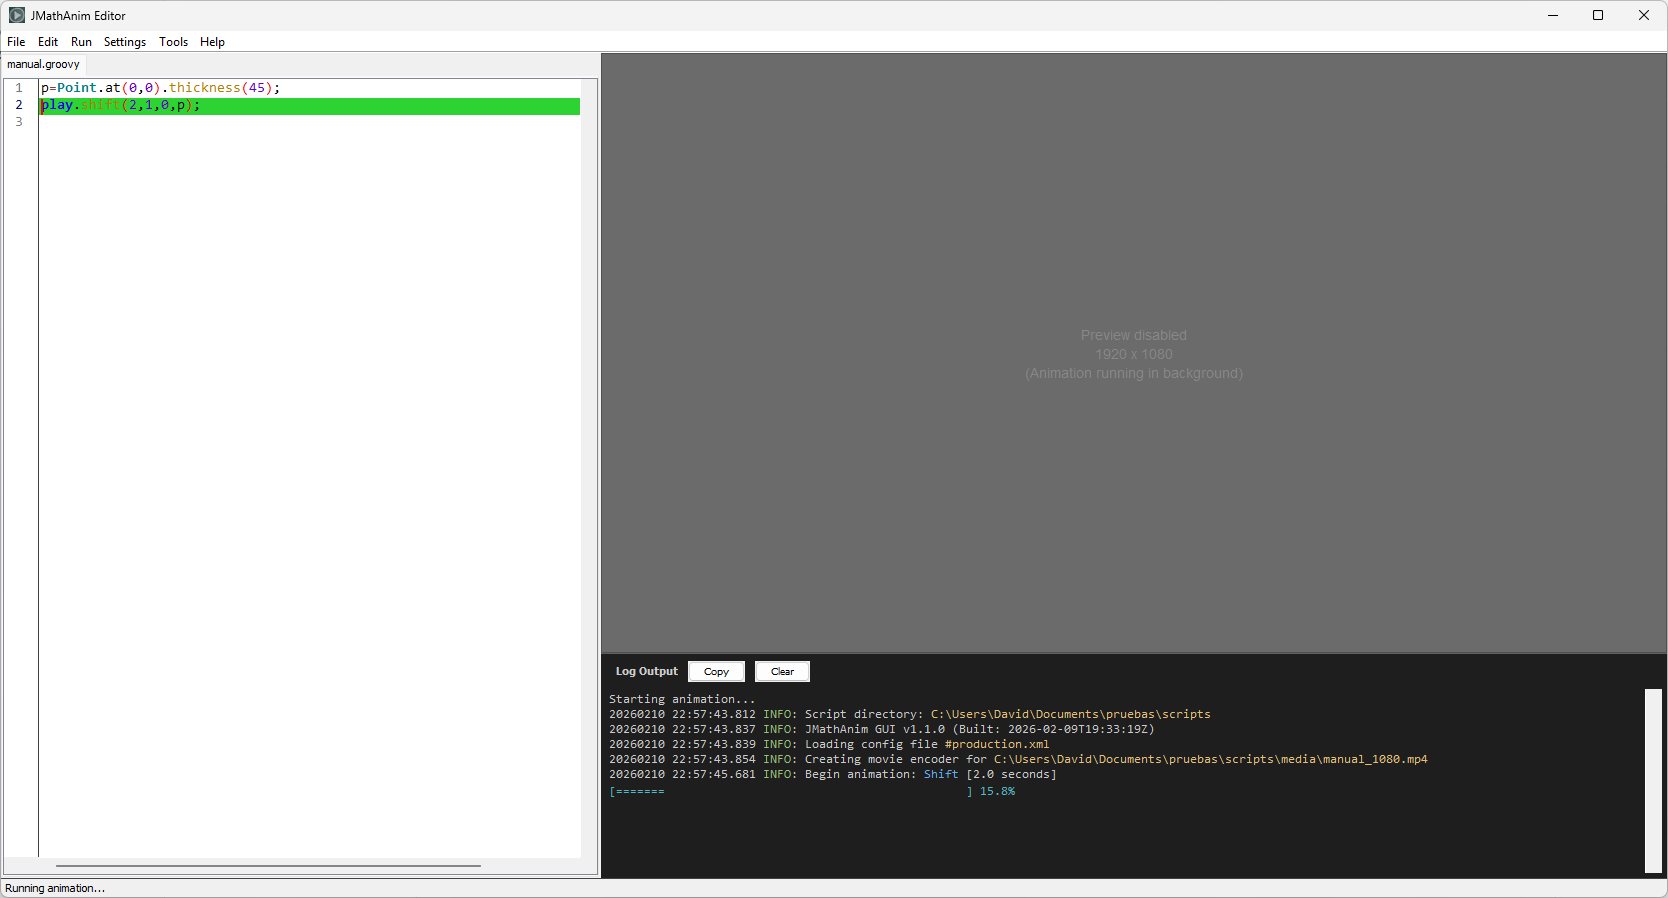
During the execution, in the editor window the line currently being executed is highlighted in green.
When the script execution is finished, the logging window will print a message that the movie is generated, with the location of the file. By default, JMathAnim puts all the generated elements in a folder named media located in the directory of the script. Pressing ctrl+shift+M opens automatically this folder. There you can see the movie created, which will have the name <name_of_your_script>_1080.mp4
Using JMathAnim core as a library. Basic flow of an animation
We will illustrate this with a simple example: Open your favorite Java IDE and crate a Maven project with the following dependency:
<dependency>
    <groupId>com.github.davidgutierrezrubio</groupId>
    <artifactId>jmathanim-core</artifactId>
    <version>1.0.0</version>
    <scope>compile</scope>
</dependency>
Or replace it with the latest version instead of 1.0.0. Create a Java class named MovingDot.java in your IDE with this code:
public class MovingDot extends Scene2D {
    @Override
    public void setupSketch() {
        config.parseFile("#dark.xml");
        config.setCreateMovie(true);
        config.setLowQuality();
    }

    @Override
    public void runSketch() throws Exception {
        Point p=Point.at(0,0);
        play.shift(2,Vec.to(1,0),p);
        waitSeconds(3);
    }

    public static void main(String[] args) {
        JMathAnimScene demoScene = new movingDot();
        demoScene.execute();
    }
}
If you execute the program, and if everything goes well, you should see the white point moving to the right in a window, which closes after a few seconds. Something like this:
Besides, a file named MovingDot_480p.mp4 should be generated at the media folder in your project directory, with the generated animation. We will examine what happened here:
public class MovingDot extends Scene2D {...
All animations are defined in a class that extends the basic class JMathAnimScene. In this case, Scene2D is a subclass of JMathAnimScene which uses JavaFX to perform drawings. When you extend this class, you’ll need to implement the two abstract methods, setupSketch and runSketch. The first does all the necessary configuration before doing actual animations, like width, height, fps, whether it should create a movie or not, should show a preview window, etc.
 @Override
    public void setupSketch() {
        config.parseFile("#dark.xml");
        config.setCreateMovie(true);
        config.setLowQuality();
    }
The config object stores global configuration and has several methods to fine tune your scene.
The config.parseFile("#dark.xml")command tells JMathAnim to set the default colors. In this case, a black background and white objects by default.
The config.setCreateMovie(true) tells the library that it should generate a movie. In practice, you should generate a movie in the last stages of your design, so by default this flag is set to false.
The config.setLowQuality() command establishes dimensions of 854x480 and 30 frames per second. Additionally there is config.setMediumQuality() with 1280x720 at 30fps and config.setHighQuality() with 1920x1080 at 60fps. All these settings are 16:9.
The second method is where you should perform all the animations and drawings:
  @Override
    public void runSketch() throws Exception {
        Point p=Point.at(0,0);
        play.shift(2,Vec.to(1,0),p);
        waitSeconds(3);
    }
The coordinates where our objects live (the "math view") are centered initially at (0,0) with x from -2 to 2 and y from -1.125 to 1.125. Although the center and the x-boundaries are always these at the beginning, the y-boundaries may vary depending on the proportion. For a 16:9 proportion, these are the default values.
The command
Point p=Point.at(0,0);
creates a Pointobject, which represents a point at (0,0). This object is not automatically added to the scene, so you should include it with the add(p)command or animating it in some way. Note that, up to this point, no frames were generated. The following command begins to do the magic:
play.shift(2,Vec.to(1,0),p);
It plays an animation that lasts for 2 seconds, shifting the specified object p with a vector of coordinates (1,0).
The specified animation generates 2 seconds of frames (the precise number of frames depends on fps) shifting our point one unit to the right.
waitSeconds(3);
With this command, we generate 3 seconds of still frames, where nothing happens, apart from seeing the objects we added to the scene.
When the runSketch()method is done, all necessary finishing procedures are called (finishing the movie, closing preview windows, etc.) and the execution terminates.
As you can see, the basic flow of a typical scene is
-
Setup animation with
setupSketch()method. -
Write all the animation code in
runSketch()method so that-
Should create different objects, adding them to the scene.
-
Frames of the animation are generated when calling animation commands like
play.shift.
-
Actually, there is another, more procedural way to do animations, with the advanceFrame() method. You can manually adjust the properties of your objects like size or position and calling advanceFrame() each time. This way can be useful when you want to do complex movements that cannot be done with the Animationclass.