Basic Objects
This chapter covers the fundamental building blocks of JMathAnim animations. All drawable objects inherit from the MathObject class (or implement the Drawable interface), which provides common methods for transformations like scale, rotate, and shift.
Table of Contents
- The Vec Class
- The Point Class
- The Shape Class
- The LatexMathObject Class
- The Line Class
- The Axes Class
- The CartesianGrid Class
- The Arrow Class
- The Delimiter Class
- The TippableObject Class
- Importing Images
- The MathObjectGroup Class
- The Rect Class
The Vec Class
The Vec class represents a 2D vector (with an additional z-coordinate for future 3D support). It's the fundamental class for representing coordinates in the math view.
Creating Vectors
def v = Vec.to(4, 5)        // Creates vector (4, 5)
def w = Vec.to(2, -1)       // Creates vector (2, -1)
def origin = Vec.origin()   // Creates vector (0, 0)
Accessing Components
def x = v.x                 // Get x-coordinate
def y = v.y                 // Get y-coordinate
def norm = v.norm()         // Get Euclidean norm (length)
Vector Operations
JMathAnim provides two styles of vector operations:
-
Immutable operations - Return a new vector, leaving the original unchanged:
def sum = v.add(w) // Returns v + w (new vector) def scaled = v.mult(3) // Returns 3v (new vector) def diff = v.to(w) // Returns w - v (new vector) -
In-place operations - Modify the original vector:
v.scale(3)                  // Multiplies v by 3 (modifies v)
v.shift(w)                  // Adds w to v (modifies v)
v.rotate(45 * DEGREES)      // Rotates v by 45° (modifies v)
Additional Methods
def dot = v.dot(w)          // Dot product of v and w
def angle = v.getAngle()    // Angle in radians (0 to 2π)
Note: The DEGREES constant converts degrees to radians. Use it for all angle operations: angle * DEGREES.
The Point Class
The Point class is the most basic MathObject, representing a single point in space. The main difference between a Point and a Vec
class is that the Vec is a lightweight object to hold coordinates, while Point is a MathObject that can be drawn on screen.
Creating Points
def p = Point.at(1, 1)      // Point at coordinates (1, 1)
def q = Point.origin()      // Point at (0, 0)
def r = Point.random()      // Point at random screen location
Accessing Coordinates
Points contain a Vec object storing their position:
def v = p.getVec()          // Get position vector
def x = p.getVec().x        // Get x-coordinate
def d = p.norm()            // Distance from origin
def AB = A.to(B)            // Vector from point A to point B
Point Styles
Points can be displayed in various styles using the DotStyle enum:
def A = Point.at(-1.75, 0).dotStyle(DotStyle.CIRCLE)
def B = Point.at(-1.25, 0).dotStyle(DotStyle.CROSS)
def C = Point.at(-0.75, 0).dotStyle(DotStyle.PLUS)
def D = Point.at(-0.25, 0).dotStyle(DotStyle.RING)
def E = Point.at(0.25, 0).dotStyle(DotStyle.TRIANGLE_UP_HOLLOW)
def F = Point.at(0.75, 0).dotStyle(DotStyle.TRIANGLE_DOWN_HOLLOW)
def G = Point.at(1.25, 0).dotStyle(DotStyle.TRIANGLE_UP_FILLED)
def H = Point.at(1.75, 0).dotStyle(DotStyle.TRIANGLE_DOWN_FILLED)

scene.add(A, B, C, D, E, F, G, H)

// Add reference axis
scene.add(
    Line.XAxis()
        .thickness(2)
        .drawColor("gray")
        .layer(-1)  // Draw behind points
)

Note: Points require higher thickness values (typically 20-40) to be clearly visible, as the thickness represents the point's diameter.
The Shape Class
The Shape class is one of the most important classes in JMathAnim. It represents curves (closed or open) and provides extensive functionality for creating and manipulating 2D shapes.
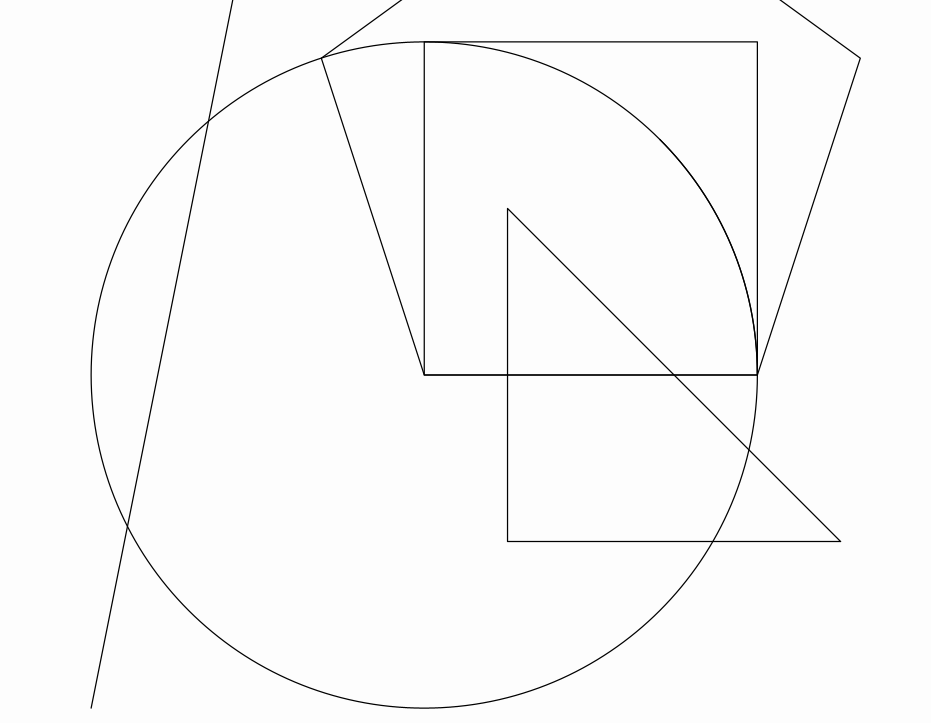
Basic Shape Constructors
JMathAnim provides convenient static methods for common shapes:
// Circle with radius 1, centered at origin
def circ = Shape.circle()

// Unit square with lower-left corner at origin
def sq = Shape.square()

// Regular pentagon with first two vertices at (0,0) and (1,0)
def reg = Shape.regularPolygon(5)

// Triangle from specified vertices
// Accepts Vec, Point, or any Coordinates object
def poly = Shape.polygon(
    Vec.to(0.25, -0.5),
    Vec.to(1.25, -0.5),
    Vec.to(0.25, 0.5)
)

// Axis-aligned rectangle
// Parameters: lower-left corner, upper-right corner
def rect = Shape.rectangle(Vec.to(1, 2), Vec.to(3, 5))

// Line segment between two points
def seg = Shape.segment(Vec.to(-1, -1), Vec.to(-0.5, 1.5))

// Circular arc
// Parameters: arc length in radians
def arc = Shape.arc(PI / 4)

scene.add(circ, sq, reg, poly, rect, seg, arc)
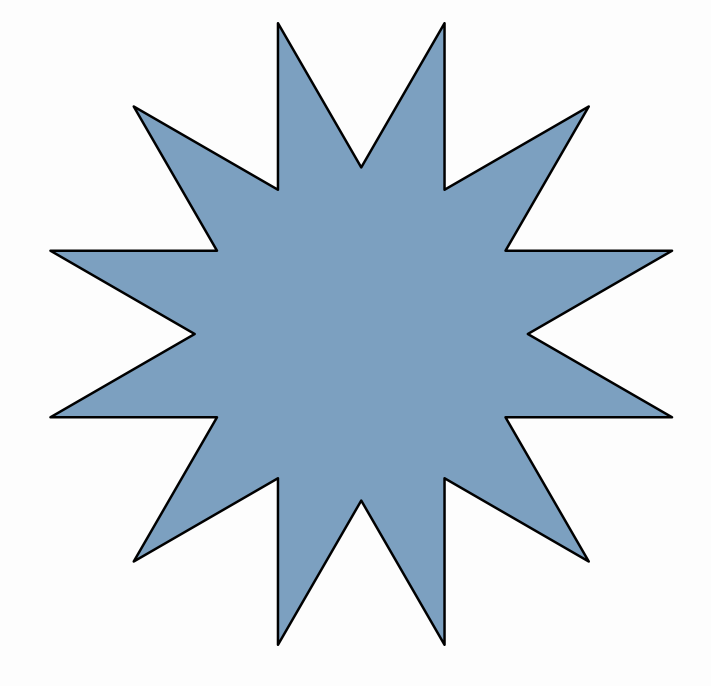
Creating Shapes with LOGO Commands
Shapes can also be created using LOGO turtle graphics commands, which is useful for complex or iterative patterns:
// CLO (or CLOSE) is a non-standard command to close the path
def logoCmd = "REPEAT 12 [FD .5 RT 150 FD .5 LT 120] CLO"
def logoShape = Shape.logo(logoCmd)

scene.add(
    logoShape
        .center()
        .style("solidblue")
)
Supported LOGO Commands
| Command | Aliases | Description |
|---|---|---|
FORWARD n |
FD n |
Move forward n units |
BACKWARD n |
BK n |
Move backward n units |
RIGHT angle |
RT angle |
Turn right by angle degrees |
LEFT angle |
LT angle |
Turn left by angle degrees |
REPEAT n [commands] |
Execute commands n times | |
PENUP |
PU |
Lift pen (move without drawing) |
PENDOWN |
PD |
Lower pen (resume drawing) |
LARC / RARC angle radius |
Left/Right arc (JMathAnim extension) | |
CLOSE |
CLO |
Close the path (JMathAnim extension) |
Commands are case-insensitive. Full reference available at Logo Commands Reference.
DSL Syntax
Since core version 1.3.5, the script interpreter admits several commands defined in DSL syntax to build objects in a more accessible way:
def s = shape(
    type: "circle",
    segments: 30,
    style:[thickness: 30, drawcolor: 'maroon',fillcolor: 'deeppink1']
)
scene.add(s)
Is equivalent to
def s=Shape.circle(30).thickness(30).drawColor('maroon').fillColor('deeppink1')
scene.add(s)
The gui editor has built autocomplete for most DSL commands. You can see a cheatsheet of DSL commands here
Working with Shape Paths
Each Shape contains a JMPath object that manages its path. Points can be accessed using zero-based circular indexing:
def pentagon = Shape.regularPolygon(5) //Has points with indices 0, 1, 2, 3, 4

def p0 = pentagon.getPoint(0)    // First vertex
def p1 = pentagon.getPoint(1)    // Second vertex
def p5 = pentagon.getPoint(5)    // Wraps around to first vertex (same as p0)
Important: Shape points use circular array indexing, so getPoint(n) and getPoint(n + vertexCount) return the same point.
Shape Centers
Shapes provide two methods for finding their center:
def bbox_center = shape.getCenter()     // Center of bounding box (returns a Vec object)
def geometric_center = shape.getCentroid()  // Average of all vertices
Note: For regular polygons, .getCentroid() returns the true geometric center, while .getCenter() returns the center of the bounding box, which may differ for rotated shapes.
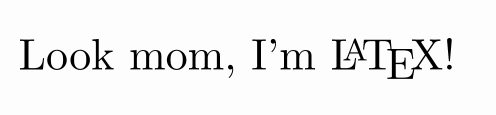
The LatexMathObject Class
The LatexMathObject class renders mathematical expressions using LaTeX, allowing you to display formulas and text with professional typesetting.
Creating LaTeX Objects
def text = LatexMathObject.make("This is a \\LaTeX equation \$e^{i\\pi}+1=0\$")
scene.add(text)
Handling Special Characters
LaTeX uses $ and \ as special characters. In Groovy, these must be escaped:
// INCORRECT - Groovy will interpret $ and \ as escape sequences
LatexMathObject.make("$e^{i\pi}+1=0$")  // ERROR!

// CORRECT - Escape the special characters
LatexMathObject.make("\$e^{i\\pi}+1=0\$")  // Works!

// BETTER - Use raw strings (prefix with 'r')
LatexMathObject.make(r"$e^{i\pi}+1=0$")  // Easiest!
Tip: Raw strings (prefixed with r) ignore escape sequences. Use either single or double quotes:
LatexMathObject.make(r"$e^{i\pi}+1=0$")  // Both work
LatexMathObject.make(r'$e^{i\pi}+1=0$')  // identically
Also, you can use triple quotes to enable multiline strings:
def text = LatexMathObject.make(r'''
$$
ax^2+bx+c=0
$$
''')
scene.add(text)
Compilation Modes
JMathAnim offers two LaTeX compilation methods:
-
Default (JLaTeXMath) - Fast, built-in renderer for most formulas:
def formula = LatexMathObject.make(r'$e^{i\pi}+1=0$') -
External LaTeX - Uses system LaTeX for advanced features:
def formula = LatexMathObject.make(
    r'$e^{i\pi}+1=0$',
    CompileMode.CompileFile
)
The external compiler:
- Requires a LaTeX distribution installed on your system
- Compiles to
.dvi, converts to.svg, imports asMultiShapeObject - Caches
.svgfiles for reuse in subsequent runs - Supports commands not available in JLaTeXMath (e.g.,
\begin{verbatim}), but in most cases JLaTexMath will be enough.
Recommendation: Use the default mode (JLaTeXMath) unless you need advanced LaTeX features.
The Line Class
The Line class represents infinite mathematical lines. In practice, it draws the visible portion within the current view.
Creating Lines
def A = Point.at(1, 1)
def B = Point.at(0, 1)
def v = Vec.to(1, 0.2)

// Line through points A and B
def line1 = Line.make(A, B)
    .drawColor("red")
    .thickness(20)

// Line through A in direction v
def line2 = Line.make(A, A.add(v))
    .drawColor("blue")
    .thickness(10)

// Predefined axes
def line3 = Line.XAxis().drawColor("darkorange")        // y = 0
def line4 = Line.YAxis().drawColor("darkmagenta")       // x = 0
def line5 = Line.XYBisector().drawColor("darkgreen")    // y = x

scene.add(line1, line2, line3, line4, line5)
play.shift(5, -1, -1.5, A)  // Animate point A
Note: Lines use direction vectors only at construction time. Moving a point after creating the line won't update the line's direction (unlike constraints, which are covered in advanced topics).
The Ray Class
Similar to Line, the Ray class represents half-infinite rays with syntax identical to Line constructors.
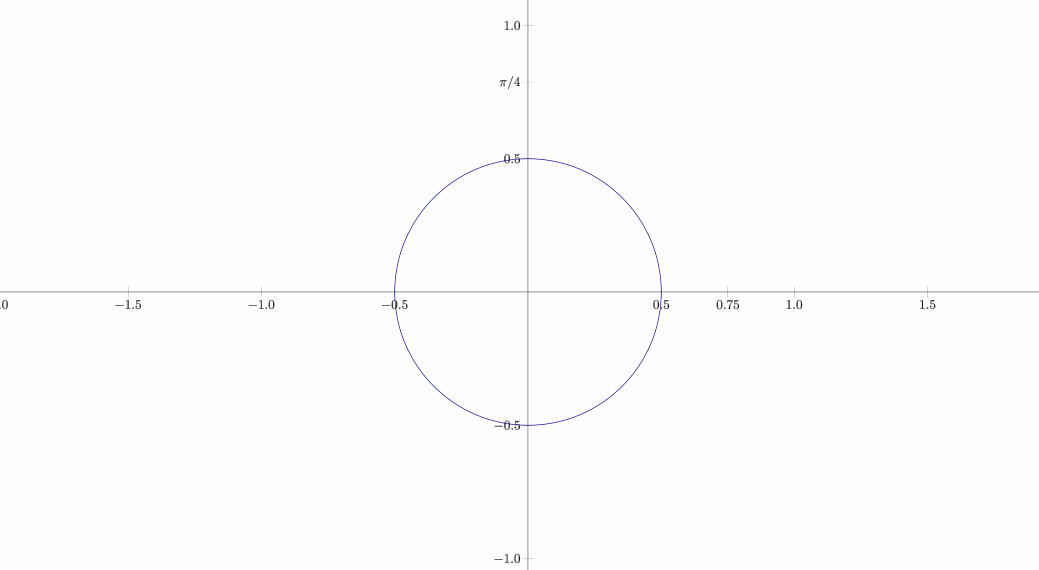
The Axes Class
The Axes class creates Cartesian coordinate axes with customizable ticks and labels. It's essentially a container managing multiple Line, Shape, and LatexMathObject instances.
Creating Axes
def axes = Axes.make()

// Add primary ticks
axes.generatePrimaryXTicks(-2, 2, 0.5)  // x: -2, -1.5, -1, ..., 2
axes.generatePrimaryYTicks(-2, 2, 0.5)  // y: -2, -1.5, -1, ..., 2

// Add custom ticks
axes.addXTicksLegend(0.75, TickType.PRIMARY)  // Tick at x = 0.75
axes.addYTicksLegend(r"$\pi/4$", PI / 4, TickType.PRIMARY)  // Custom label

scene.add(
    axes,
    Shape.circle()
        .scale(0.5)
        .drawColor("darkblue")
)
Note: By default, axes are created without ticks. Use generatePrimaryXTicks and generatePrimaryYTicks to add them.
Using the DSL format is even easier:
def axes = axes(
    range:[-2, 2],
    secondary: [maxwidth:0],
    ticksx: [0.75],
    ticksy: [[at: PI/4, label: '$\\pi/4$', type:"sec"]]
)
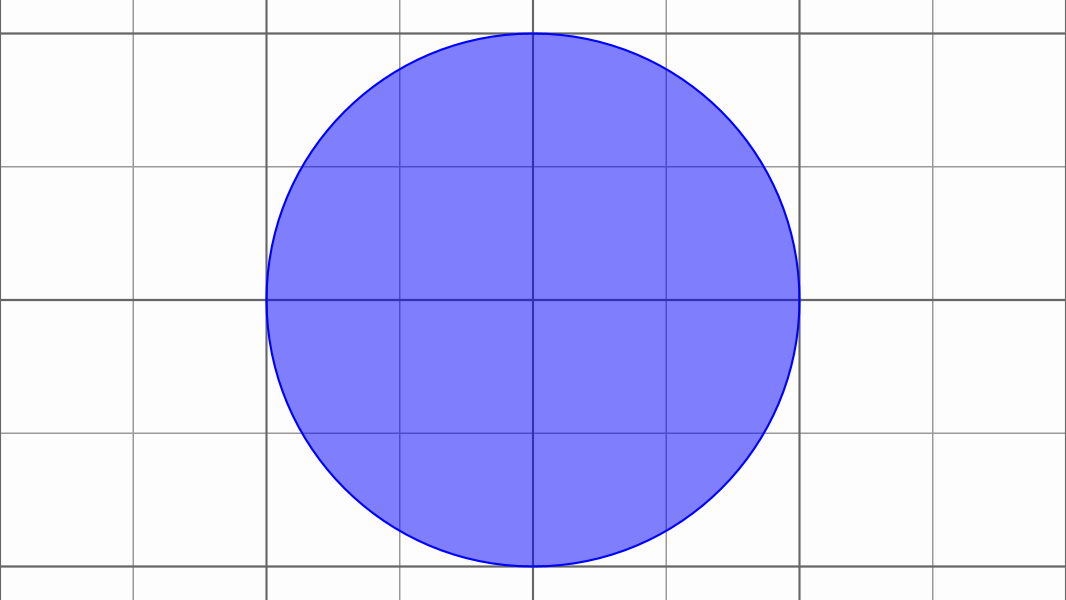
The CartesianGrid Class
Creates a grid with primary and secondary divisions, useful for reference and measurements.
// Grid centered at origin with subdivisions
def grid = CartesianGrid.make(
    0, 0,       // Center point (usually origin)
    2,          // Horizontal subdivisions for secondary grid
    2           // Vertical subdivisions for secondary grid
)

scene.add(
    grid,
    Shape.circle()
        .drawColor("blue")
        .fillColor("blue")
        .fillAlpha(0.5)
)
Styling: Grids use the gridPrimaryDefault and gridSecondaryDefault styles defined in your config files. See the Styling chapter for customization details.
You can also use the DSL version
def grid = grid(
    center:[0, 0] //Optional
    divisions: 2 //equivalent to divisions:[2,2]
)
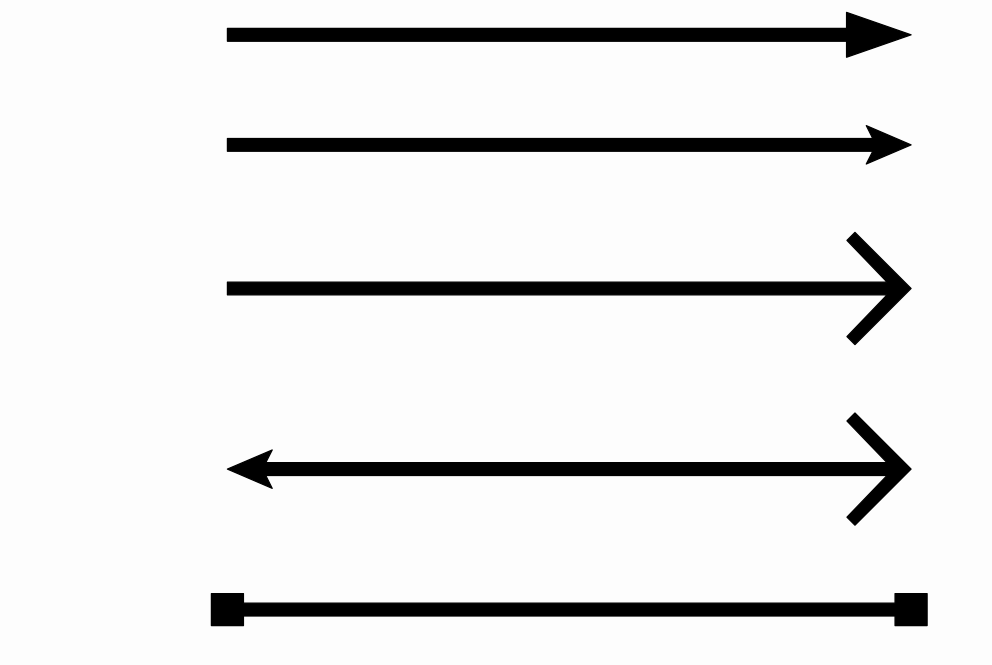
The Arrow Class
The Arrow class provides flexible arrow creation with various arrowhead styles and curvature options.
Basic Arrow Types
def A = Vec.to(0, 0)
def B = Vec.to(1, 0)

// Single-headed arrows with different styles
def ar1 = Arrow.make(A, B, ArrowType.ARROW1)
    .color("midnightblue")
def ar2 = Arrow.make(A.copy(), B.copy(), ArrowType.ARROW2)
    .color("firebrick")
def ar3 = Arrow.make(A.copy(), B.copy(), ArrowType.ARROW3)
    .color("darkgreen")

// Double-headed arrows
def ar4 = Arrow.makeDouble(
    A.copy(), B.copy(),
    ArrowType.ARROW2,  // Start arrowhead
    ArrowType.ARROW3   // End arrowhead
).color("goldenrod")

def ar5 = Arrow.makeDouble(
    A.copy(), B.copy(),
    ArrowType.SQUARE,
    ArrowType.SQUARE
).color("slategray")

// Arrange arrows vertically
def arrows = MathObjectGroup.make(ar1, ar2, ar3, ar4, ar5)
arrows.setLayout(LayoutType.LOWER, 0.1, 0.1)

scene.add(arrows)
camera.zoomToAllObjects()
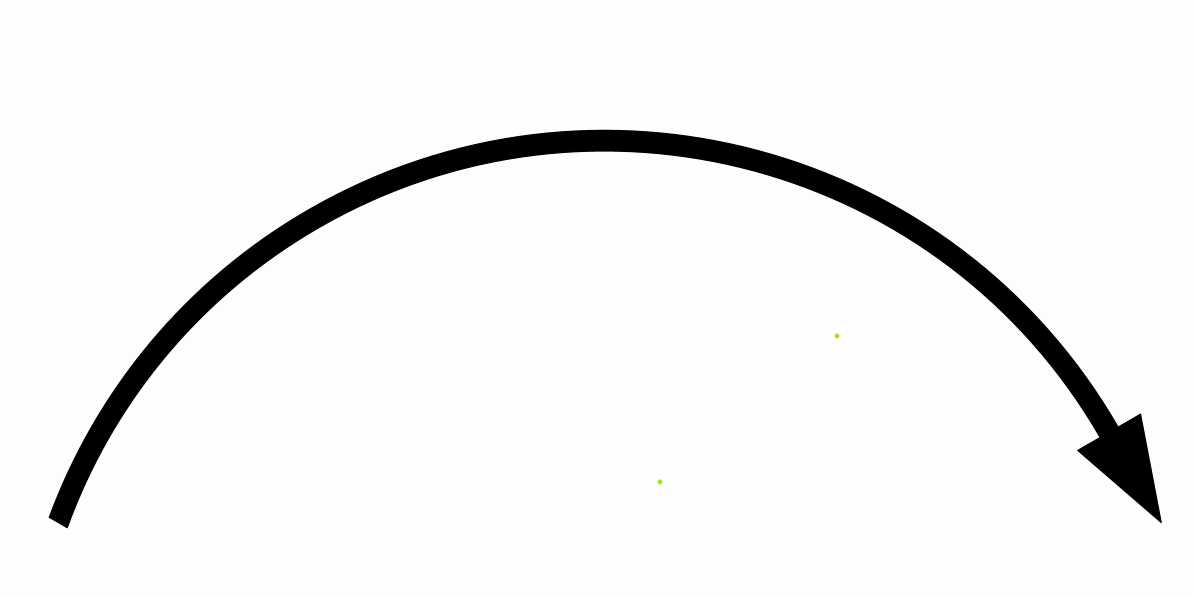
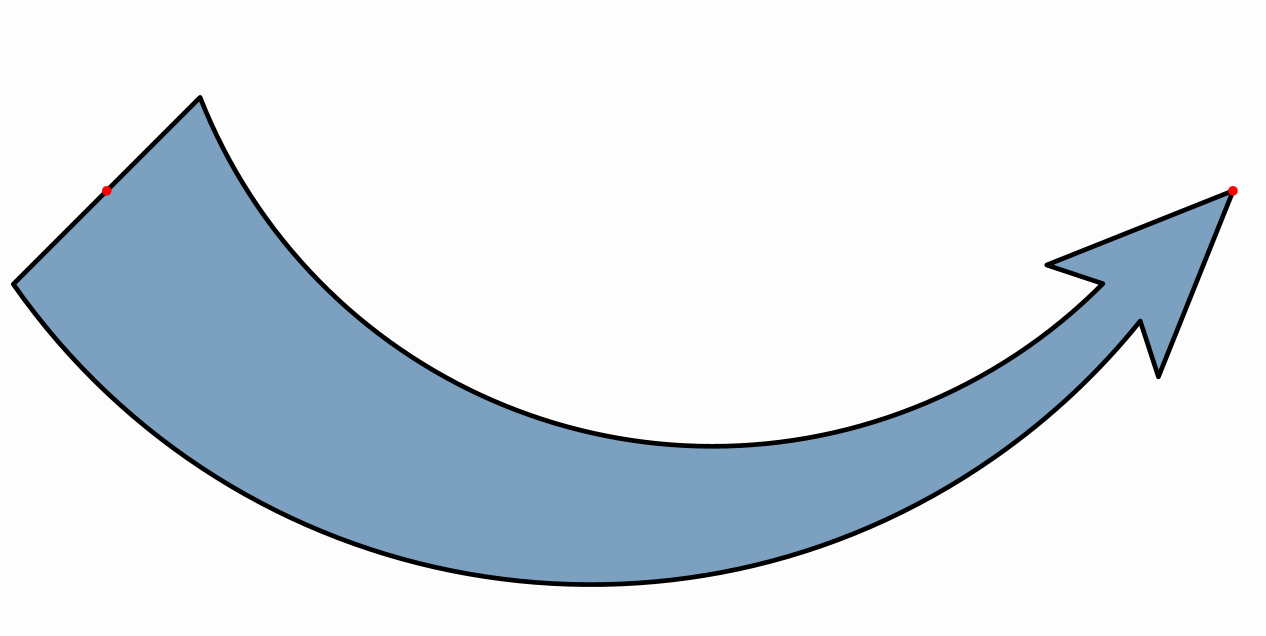
Curved Arrows
Arrows can be curved by setting a curvature parameter:
def A = Point.at(0, 0)
def B = Vec.to(1, 0)

def arrow = Arrow.make(A, B, ArrowType.ARROW1)
    .drawColor("firebrick4")
    .fillColor("firebrick3")
    .setArrowCurvature(60 * DEGREES)

scene.add(arrow)
camera.zoomToAllObjects()
Advanced Styling
Control the scale of individual arrowhead components:
def A = Point.at(0, 0).layer(1).drawColor("red")
def B = Point.at(2, 0).layer(1).drawColor("red")

def arrow = Arrow.make(A, B, ArrowType.ARROW2)
    .setArrowThickness(100)      // Base thickness
    .setCurvature(-45 * DEGREES)
    .setStartScale(5)            // Start arrowhead 5× larger than end
    .style("solidblue")

scene.add(arrow, A, B)
camera.zoomToAllObjects()
You can use the DSL format to define an arrow
def A = Point.at(0, 0).layer(1).drawColor("red")
def B = Point.at(2, 0).layer(1).drawColor("red")

def arrow = arrow(
    from:A,
    to:B,
    startscale: 5,
    arrowthickness: 100,
    curvature: -45*DEGREES,
    style:[name:"solidblue"]
)

scene.add(arrow, A, B)
camera.zoomToAllObjects()
The Connector class
The Arrow class is a subclass of AbstractConnector that represents anything that connects 2 objects. Another subclass of this is the Connector class that is similar to Arrow but doesn't start or ends in coordinates but from any MathObject, taking into account their bounding boxes as starting and ending.
The Delimiter Class
The Delimiter class creates extensible symbols (brackets, braces, parentheses) that automatically adjust to fit between two control points.
Creating Delimiters
def sq = Shape.square().center().style("solidBlue")

// Red brace with label
def delim1 = Delimiter.make(
    sq.getPoint(2),
    sq.getPoint(1),
    DelimiterType.BRACE,
    0.05  // Gap between control point and delimiter
)
delim1.addLabelTip(r"$x$")
delim1.color("#d35d6e")

// Green bracket with custom label (rotates with delimiter)
def delim2 = Delimiter.make(
    sq.getPoint(1),
    sq.getPoint(0),
    DelimiterType.BRACKET,
    0.05
)
delim2.addLabelTip(Shape.regularPolygon(3).scale(0.1))
delim2.color("#5aa469")
delim2.getLabelTip()
    .fillColor("yellow")
    .thickness(6)

// Control label rotation
delim2.setRotationType(RotationType.FIXED)  // Don't rotate label

// Orange parenthesis with scaled size
def delim3 = Delimiter.make(
    sq.getPoint(0),
    sq.getPoint(3),
    DelimiterType.PARENTHESIS,
    0.05
)
delim3.style("solidorange")
delim3.setDelimiterScale(3)  // 3× larger
delim3.addLabelTip("3")

scene.add(delim1, delim2, delim3, sq)

// Animate to show automatic adjustment
play.scale(3, 0.75, 1.8, sq)
play.scale(3, 2, 0.25, sq)
play.rotate(3, 60 * DEGREES, sq)
play.shrinkOut(sq)
scene.remove(delim1,delim2,delim3)

Key Features:
- Delimiters automatically recalculate every frame
- Always draw to the "left" when looking from point A to point B
- Labels can be set to FIXED (don't rotate), ROTATE (rotate fully), or SMART (avoid upside-down, default)
Advanced Delimiter Methods
// Set label with automatic LatexMathObject creation
delimiter.setLabel("x", 0.1)  // String creates LaTeX object

// Add label showing delimiter length (auto-updates)
delimiter.addLengthLabel()

// New delimiter types (v0.9.4+)
def lengthArrow = Delimiter.make(A, B, DelimiterType.LENGTH_ARROW, gap)
def lengthBracket = Delimiter.make(A, B, DelimiterType.LENGTH_BRACKET, gap)
The TippableObject Class
TippableObject marks specific points on shapes with customizable tips (symbols, text, arrows). A specialized subclass LabelTip is available for LaTeX labels.
Creating Tips
def hexagon = Shape.regularPolygon(6).center().style("solidblue")

// Arrow head at midpoint of one side
def tip1 = TippableObject.arrowHead(hexagon, 0.5 / 6, ArrowType.ARROW2)
        .setSlopeDirection(SlopeDirectionType.POSITIVE)
        .layer(1)

// Rotating LaTeX label
def tip2 = LabelTip.make(hexagon, 1.5 / 6, r"$a+b$",false)
        .color("darkslateblue")
        .layer(1)

// Non-rotating LaTeX label
def tip3 = LabelTip.make(hexagon, 2.5 / 6, r"$x$",false)
        .setRotationType(RotationType.FIXED)
        .color("firebrick")
        .layer(1)

// Equal length marks (2 marks)
def tip4 = TippableObject.equalLengthTip(hexagon, 3.5 / 6, 2)
        .layer(1)

// Custom shape tip aligned with contour
def tip5 = TippableObject.make(
        hexagon, 4.5 / 6,
        SlopeDirectionType.POSITIVE,
        Shape.circle().scale(0.05).style("solidOrange")
).layer(1)

// Custom shape tip aligned away from contour
def tip6 = TippableObject.make(
        hexagon, 5.5 / 6,
        SlopeDirectionType.NEGATIVE,
        Shape.square().scale(0.1).style("solidRed")
)
tip6.setAnchor(AnchorType.LEFT).layer(1)
scene.add(hexagon)

play.moveIn(3,ScreenAnchor.CENTER, tip1, tip2, tip3, tip4, tip5, tip6)
play.rotate(5, PI, hexagon)
Understanding the Position Parameter:
- Position is specified as a fraction of the shape's perimeter
- 0.5 / 6 means "halfway along the first side" of a 6-sided shape
- 1.5 / 6 means "halfway along the second side"
- Positions wrap around (circular indexing)
Slope Direction:
- POSITIVE: Tip points to the left of the contour direction
- NEGATIVE: Tip points to the right of the contour direction
Importing Images
JMathAnim supports both bitmap and vector images. Images are loaded from the resources/images/ folder by default (configurable in styling settings).
Bitmap Images
Import any bitmap format supported by JavaFX (PNG, JPG, etc.):
def img = JMImage.make("euler.jpg")
    .center()
    .rotate(-5 * DEGREES)

def text = LatexMathObject.make("All hail the great Euler!")
    .stack()
    .withGaps(0.1, 0.1)
    .withDestinyAnchor(AnchorType.LOWER)
    .toObject(img)

play.run(
    Commands.moveIn(2, ScreenAnchor.LEFT, img),
    ShowCreation.make(2, text)
)
scene.waitSeconds(2)
SVG Images
Import and animate SVG vector graphics:
def svg = SVGImport.load("donaldKnuth.svg")
svg.setHeight(2).center()

play.showCreation(svg)  // Animates drawing the SVG
scene.waitSeconds(2)
File Location: Place SVG files in <project_root>/resources/images/
SVG Import Details:
- Creates a MultiShape object containing multiple Shape instances
- Each SVG element becomes a separate Shape with a JMPath
- Supports standard transformations and animations
- Limitation: Some elements (e.g., gradients) may not import with 100% accuracy
The MathObjectGroup Class
MathObjectGroup manages collections of MathObject instances as a single entity, enabling batch operations and layouts.
Creating Groups
def square = Shape.square()
def triangle = Shape.regularPolygon(3)
def circle = Shape.circle()

def group = MathObjectGroup.make(square, triangle, circle)
Group Operations
Groups support all standard MathObject operations:
group.shift(1, 1)              // Move entire group
group.rotate(45 * DEGREES)      // Rotate all members
group.scale(2)                  // Scale all members
group.setFillColor("cadetblue") // Apply to all members
Adding Groups to Scene
Adding a group is equivalent to adding all its members:
scene.add(group) // Same as: scene.add(square, triangle, circle)
Note: You don't need to add the group itself to display its members. Add objects individually for more control over visibility.
Why Use Groups?
Groups excel at: - Batch transformations: Transform multiple objects together - Layout management: Arrange objects automatically (see TransformingObjects chapter) - Animation coordination: Animate multiple objects as one unit
Example using layouts:
def group = MathObjectGroup.make(square, triangle, circle)
group.setLayout(LayoutType.LOWER, 0.1, 0.1)  // Arrange vertically
scene.add(group)
The Rect Class
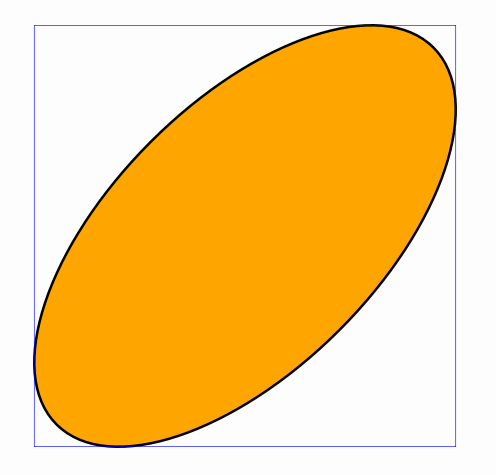
The Rect class represents axis-aligned bounding boxes. While not directly drawable, it's essential for positioning and collision detection.
Getting Bounding Boxes
Every MathObject (and anything implementing Boxable) has a bounding box:
def ellipse = Shape.circle()
    .scale(1, 0.5)
    .rotate(45 * DEGREES)
    .style("solidorange")

def bbox = ellipse.getBoundingBox()  // Returns Rect
def rect = Shape.rectangle(bbox).drawColor("blue")

scene.add(ellipse, rect)
Rect Properties and Methods
// Corner coordinates
def xMin = bbox.xmin     // Left edge
def xMax = bbox.xmax     // Right edge
def yMin = bbox.ymin     // Bottom edge
def yMax = bbox.ymax     // Top edge

// Dimensions
def width = bbox.getWidth()
def height = bbox.getHeight()

// Corner points
def center = bbox.getCenter()
def upperLeft = bbox.getUpperLeft()
def upperRight = bbox.getUpperRight()
def lowerLeft = bbox.getLowerLeft()
def lowerRight = bbox.getLowerRight()

// Relative positioning
def point = bbox.getRelCoordinates(0.25, 0.75)  // 25% across, 75% up
def centerAlt = bbox.getRelCoordinates(0.5, 0.5)  // Same as getCenter()

// Transformations
def expanded = bbox.addGap(0.1, 0.2)  // Add 0.1 horizontal, 0.2 vertical gap
bbox.centerAt(destination)  // Move center to destination
def rotated = bbox.getRotatedRect(45 * DEGREES)  // Smallest rect containing rotated bbox
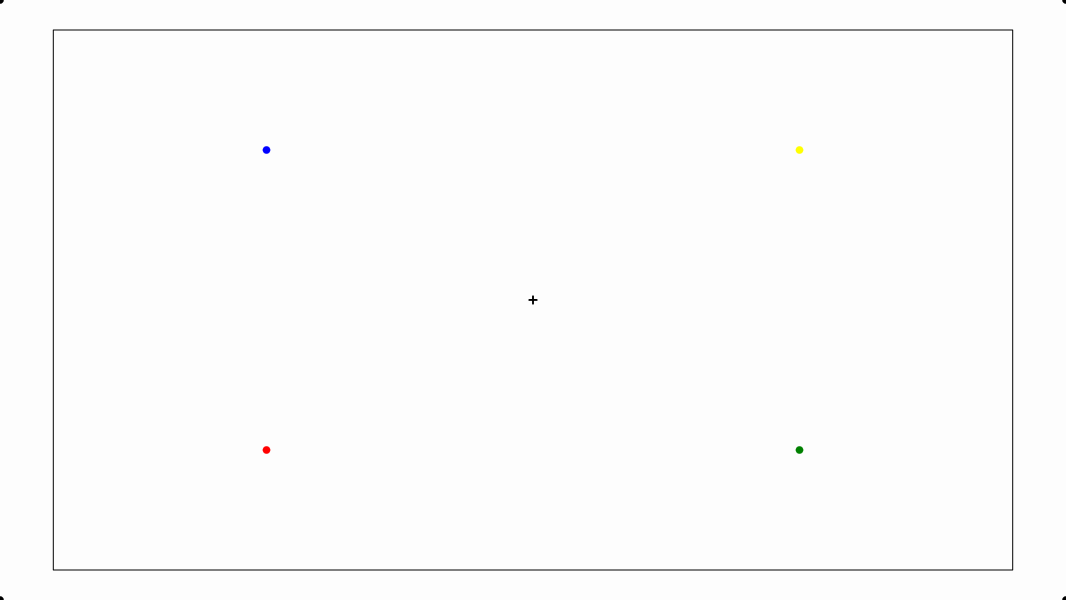
Working with the Math View
The math view (visible screen area) is represented as a Rect:
def mathView = scene.getMathView()

// Create points at key screen positions
def center = Point.at(mathView.getCenter())
    .dotStyle(DotStyle.PLUS)

def corners = [
    Point.at(mathView.getUpperLeft()),
    Point.at(mathView.getUpperRight()),
    Point.at(mathView.getLowerLeft()),
    Point.at(mathView.getLowerRight())
]

// Points at 25% and 75% positions
def Q1 = Point.at(mathView.getRelCoordinates(0.25, 0.25))
    .drawColor("red")
def Q2 = Point.at(mathView.getRelCoordinates(0.75, 0.25))
    .drawColor("green")
def Q3 = Point.at(mathView.getRelCoordinates(0.75, 0.75))
    .drawColor("yellow")
def Q4 = Point.at(mathView.getRelCoordinates(0.25, 0.75))
    .drawColor("blue")

scene.add(center, *corners, Q1, Q2, Q3, Q4)
scene.add(
    Shape.rectangle(mathView)
        .scale(0.9)  // 90% of screen size
)
Default Math View Coordinates
At initialization (16:9 aspect ratio): - Center: (0, 0) - X range: -2 to 2 - Y range: -1.125 to 1.125
Note: Y boundaries adjust automatically based on aspect ratio while maintaining the center and X boundaries.
Next Steps
Now that you understand the basic objects, explore: - Styling: Customize colors, thickness, and visual properties - Transforming Objects: Advanced positioning, scaling, and animation