Cameras
A Camera object in JMathAnim is responsible for converting mathematical coordinates into screen coordinates. There are two predefined cameras built into JMathAnim: the default camera, accessible through the public variable camera or the scene.getCamera() method in your Scene2D class, and the fixed camera, accessible through the public variable fixedCamera or the scene.getFixedCamera() method.
All MathObjects have an associated Camera object that manages the conversion from mathematical coordinates to screen coordinates. Mathematical coordinates are the usual coordinates in the plane: the origin is at (0,0), and the y-coordinate increases upwards. Screen coordinates determine where the actual rendering takes place (window, movie frame, or generated image). They behave differently; for instance, the point (0,0) is located at the lower-left corner of the window, and the y-coordinate decreases upwards. However, you do not need to worry about this distinction, as this is precisely what the Camera class handles. From now on, we will always refer to mathematical coordinates.
The default camera object, as seen previously, is centered at (0,0) with the x-range from −2 to 2. The y-range is computed according to the aspect ratio of the screen. For example, if you are generating a 16:9 video, the y-range will be from −1.125 to 1.125. In essence, a Camera maps its mathematical range to the screen or movie frame. Any MathObject outside the camera range will be outside the visible area and may be partially rendered or not rendered at all.
As mentioned earlier, Camera class objects can be shifted, uniformly scaled and rotated. The camera object is the default camera assigned to objects, whereas fixedCamera is intended for objects that should remain fixed relative to the screen. Consider the following example:
def numBoxes = 16

def boxes = group(
    obj: (0..<numBoxes).collect { n ->
        def square = shape(
            type:      'square',
            transform: [scale: 0.25],
            style:     [fillColor: 'violet', fillAlpha: 1 - (n + 1) / numBoxes, thickness: 6]
        )
        def text = latex(text: "$n", stack: [to: square], layer: 1)
        group(obj: [square, text])
    },
    layout: 'right',
    gap:    0.1,
    stack:  [screen: 'left']
)

def title = latex(
    text:  r'How many boxes?',
    stack: [screen: 'upper', gaps: [0.1, 0.1]]
)

scene.add(title, boxes)

// Pan the camera 3 units to the right in 2 seconds
animCamera(type: 'shift', dx: 3, runtime: 2)
Or in a more straightforward Groovy style, for comparison:
def group = MathObjectGroup.make()
def numBoxes = 16

// Create numbered squares
for (int n = 0; n < numBoxes; n++) {
    def square = Shape.square()
        .scale(0.25)
        .fillColor("violet")
        .fillAlpha(1 - (n + 1) / numBoxes)
        .thickness(6)

    def text = LatexMathObject.make("$n")
        .stack().toObject(square)
        .layer(1)

    group.add(MathObjectGroup.make(square, text))
}

//Locate the boxes in the left side of the screen...
group.stack().toScreen(ScreenAnchor.LEFT)

//and set this layout
group.setLayout(LayoutType.RIGHT, .1)

//Create a title
def title = LatexMathObject.make(r'How many boxes?')
//Locate the title in the upper part of the screen
title.stack()
    .withGaps(.1, .1)
    .toScreen(ScreenAnchor.UPPER)

scene.add(title, group)//Add everything


//Pan the camera 3 units to the right in 2 seconds
play.cameraShift(2, 3, 0)
You will see an animation where the camera pans over the created boxes, but the title moves as well.
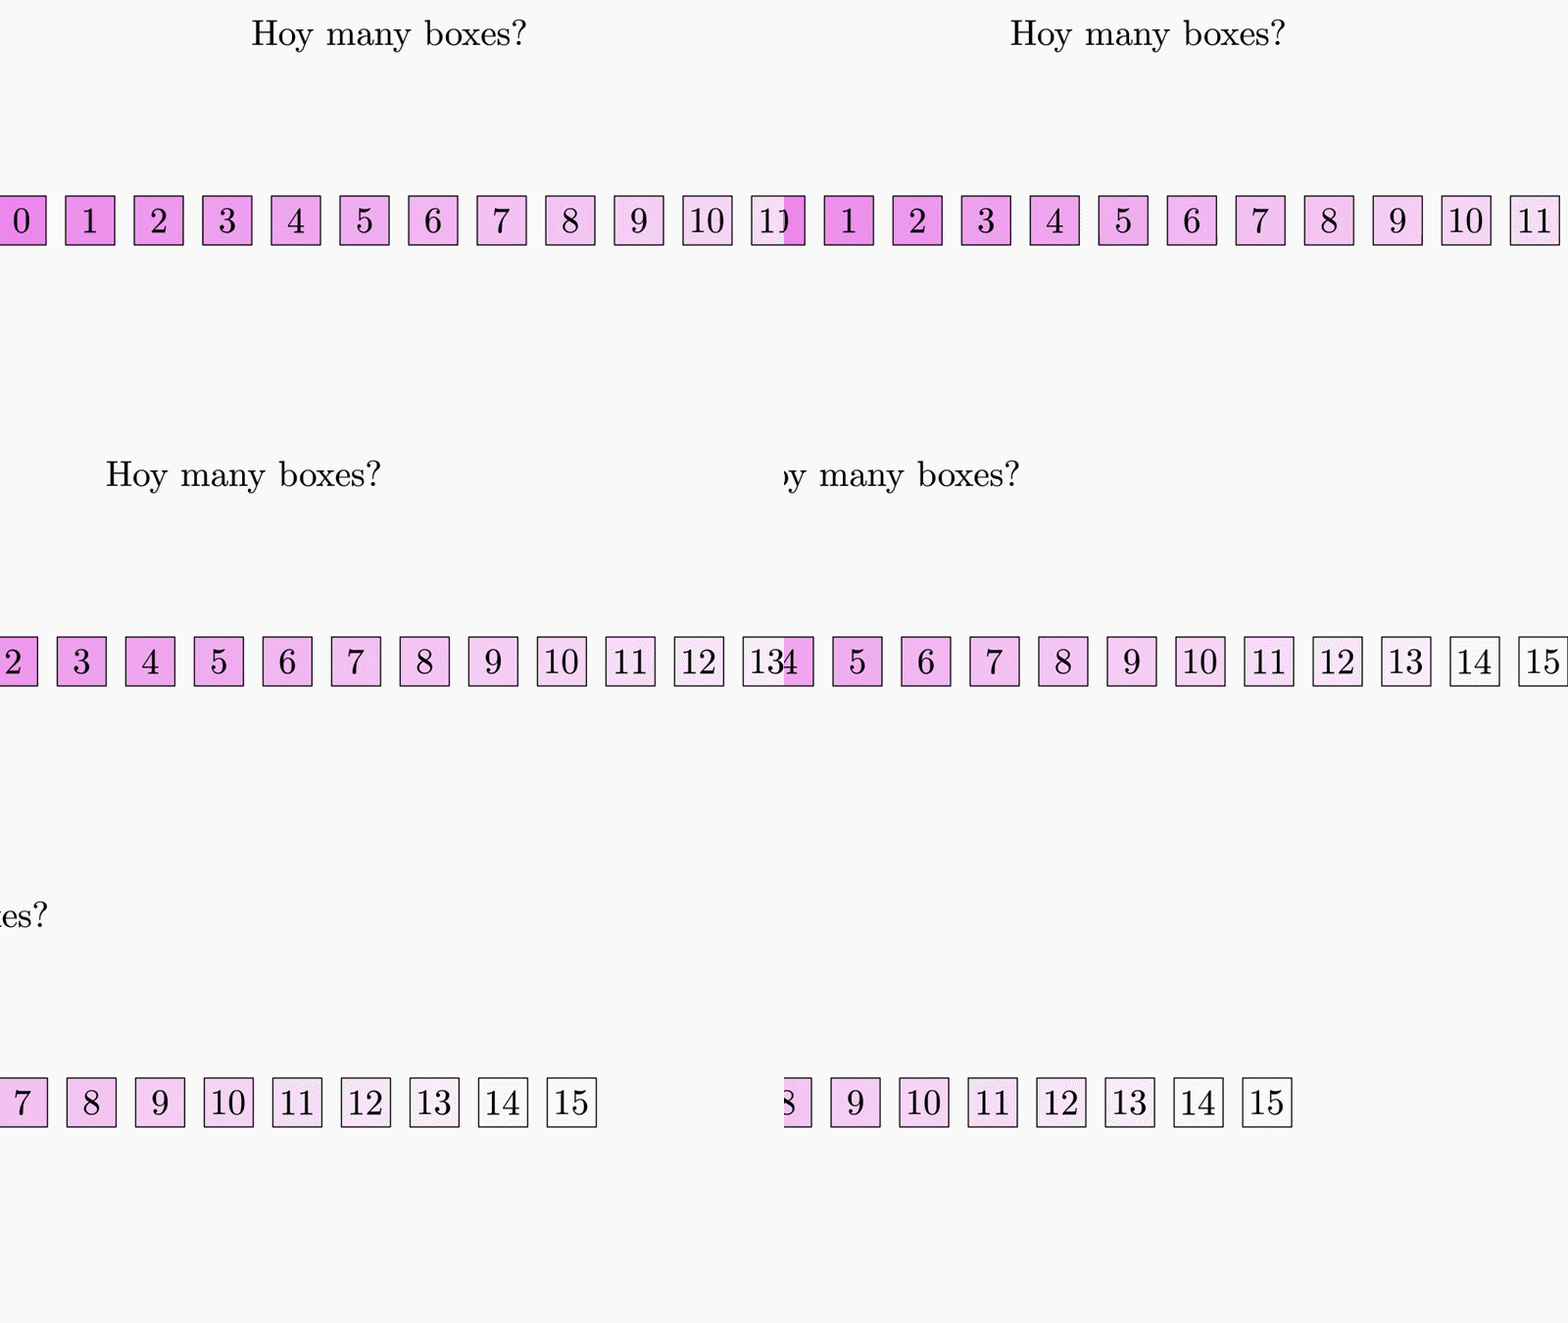
If this behavior is not desired, one possible (but inelegant) solution is to update the title position at every frame instead of using the play.cameraShift method:
def anim = Commands.cameraShift(2, camera, Vec.to(3, 0))
anim.initialize()
while (!anim.processAnimation()) {
    //Ensure to relocate the title before generating a new frame
    title.stack()
        .withGaps(.1, .1)
        .toScreen(ScreenAnchor.UPPER)
    scene.advanceFrame()
}
Although this approach works, it is not elegant and may lead to maintenance issues as the code becomes more complex. A simpler and more robust solution is to force the title to use the fixedCamera:
def title = latex(
    text:  r'How many boxes?',
    stack: [screen: 'upper', gaps: [0.1, 0.1]],
    fixedCamera: true
)
....
animCamera(type: 'shift', dx: 3, runtime: 2) //This will affect only objects with normal camera
Or in Groovy syntax:
def title = LatexMathObject.make(r'How many boxes?')
    .setCamera(fixedCamera)
....
play.cameraShift(2, 3, 0) //This will affect only objects with normal camera
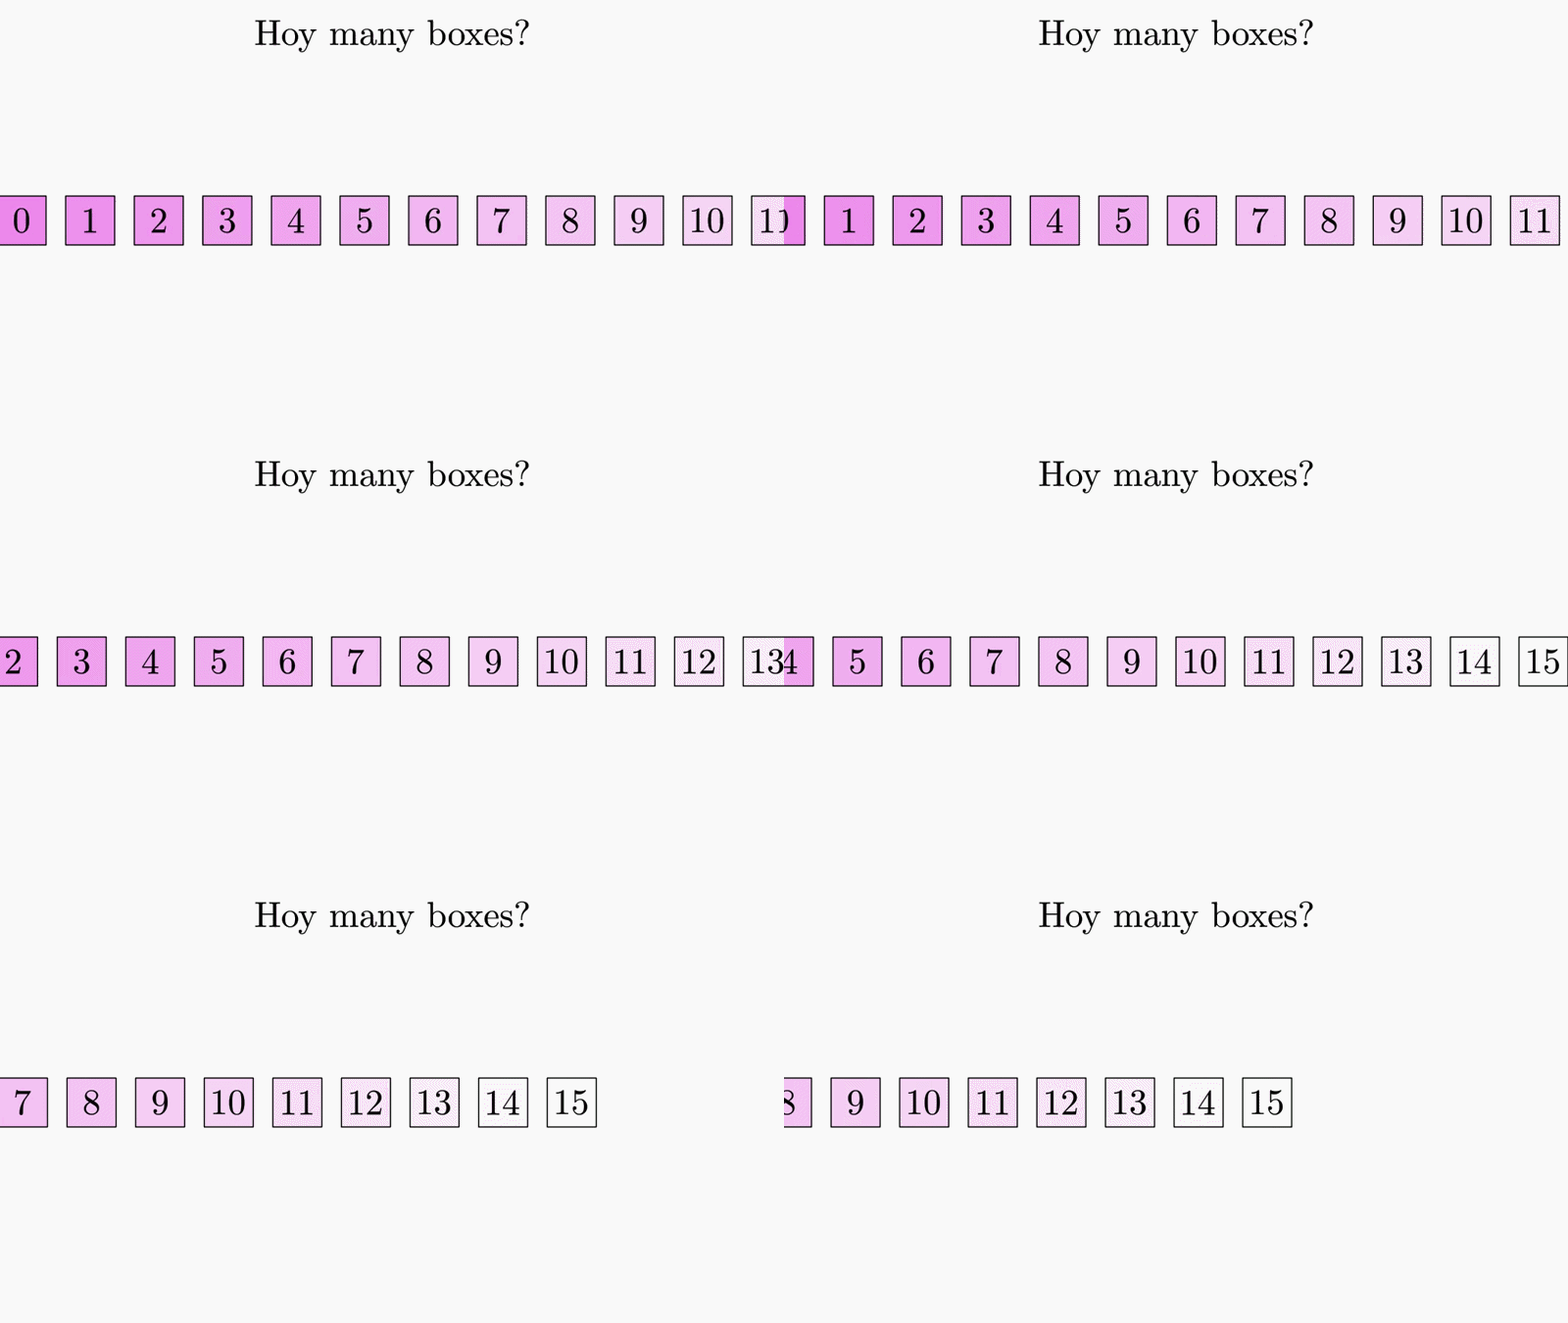
Moving the camera without animating it
animCamera(...) interpolates a change of view over time. Its static counterpart is camera(...), which applies the same changes at once, and is what you want between two animations, or before the first one:
camera(zoomToAllObjects: true, gaps: 0.1)   // the classic "fit everything"
camera(rect: [-1, -1, 1, 1])                // show this region
camera(center: [1, 0], scale: 2)            // pan, then zoom out
The entries are applied in the order they are written, exactly like the transform: map, so camera(center: [1, 0], scale: 2) pans and then zooms out, while the opposite order zooms first. The exceptions are camera, gaps and centered, which are settings rather than actions and are read before any of them: camera(zoomToObjects: [a, b], gaps: 0.5) leaves the expected margin, wherever gaps is written.
Three verbs place the view around objects, and they are not the same thing:
| Key | What it does |
|---|---|
zoomToObjects |
Zooms in or out until the objects fill the view |
adjustToObjects |
Zooms out only: if they already fit, the view is left alone |
centerAtObjects |
Centers on them, then adjusts the zoom |
Each of them has an "all the objects in the scene" version: zoomToAllObjects, adjustToAllObjects and centerAtAllObjects, taking true.
By default the two zoom/adjust verbs recenter the view on the objects. Pass centered: false to keep the view where it is: zoomToObjects then only changes the zoom level, and adjustToObjects only widens the view when the objects do not fit in it.
camera(zoomToObjects: [a, b], centered: false) // fit them without panning
The rest of the keys are the plain state of the camera: rect (a Rect, [xmin,ymin,xmax,ymax], a number or a preset name such as "screen"), center, shift, scale (greater than 1 zooms out), zoom (its reciprocal), width, gaps and centered. And save, restore and reset remember a view to come back to:
camera(save: true)
camera(zoomToObjects: detail)
// ... explain the detail ...
camera(restore: true)
camera: "fixed" acts on the fixed camera instead of the scene one, and a Camera instance can be passed directly. The call returns the affected camera.
Rotating the camera
The camera can also be turned around the center of its view. rotate sets the angle, in radians, counterclockwise, and rotateBy adds to the current one:
camera(rotate: 15*DEGREES)     // tilt the view
camera(rotateBy: -5*DEGREES)   // and straighten it a little
camera(rotate: 0)              // back upright
The animated form is animCamera(type: "rotate", angle: ...), where the angle is always the one added to the current rotation:
animCamera(type: "rotate", angle: PI/6, runtime: 2)
Turning the camera counterclockwise makes the scene appear to rotate clockwise, exactly like turning a real camera does. Use a negative angle for the opposite effect.
Three things are worth knowing about a rotated camera:
camera.mathViewis no longer what is on screen. It keeps meaning the center, the zoom level and the aspect ratio of the view, which is whatscale,zoom,widthandcenteract on. What is actually visible is that rectangle turned around its center, andcamera.visibleMathBoundingBoxis the smallestRectcontaining it. Objects that reach the whole screen (line,ray,axes, the grids, afuncGraphwith a dynamic range) are drawn against the latter, so they still cover the corners.- The fixed camera is never rotated. Objects drawn with it, and those with
absoluteSize, stay upright while the scene turns, which is usually what a title or a legend wants. Screen anchors (stack: [screen: "upper"],Vec.relAt) follow the rotation, so an object anchored to a corner of the screen stays in that corner. - Fitting the view to objects still works, but with a rotated camera the view has to be a little wider for the same objects to fit in it, so
zoomToObjectsand friends zoom out slightly more than they would with the camera upright.
Updaters
The Camera class allows you to register CameraUpdater instances that automatically update the camera state on every frame. To do this, use the method camera.registerUpdater(<updater>). Below are a couple of examples.
FollowObject
The FollowObject camera updater keeps the camera centered on a given object. A simple, concise, Groovy syntax example is worth a thousand words:
Point P = point(
      at: [1.5, 0],
      style: [drawColor: 'firebrick', thickness: 60, layer: 1]
)
def Ptrail = trail(
      marker: P,
      addToScene: true,
      style: [drawColor: 'steelblue', thickness: 40]
)
scene.add(
      P,
      Ptrail,
      latex(text: r'Turning point'),
      grid(style: [drawColor: 'gray70'])
)

updater(
      type: "cameraFollow",
      obj: P,
)
animRotate(
      runtime: 5,
      obj: P,
      center: [0, 0],
      angle: 2*PI
)
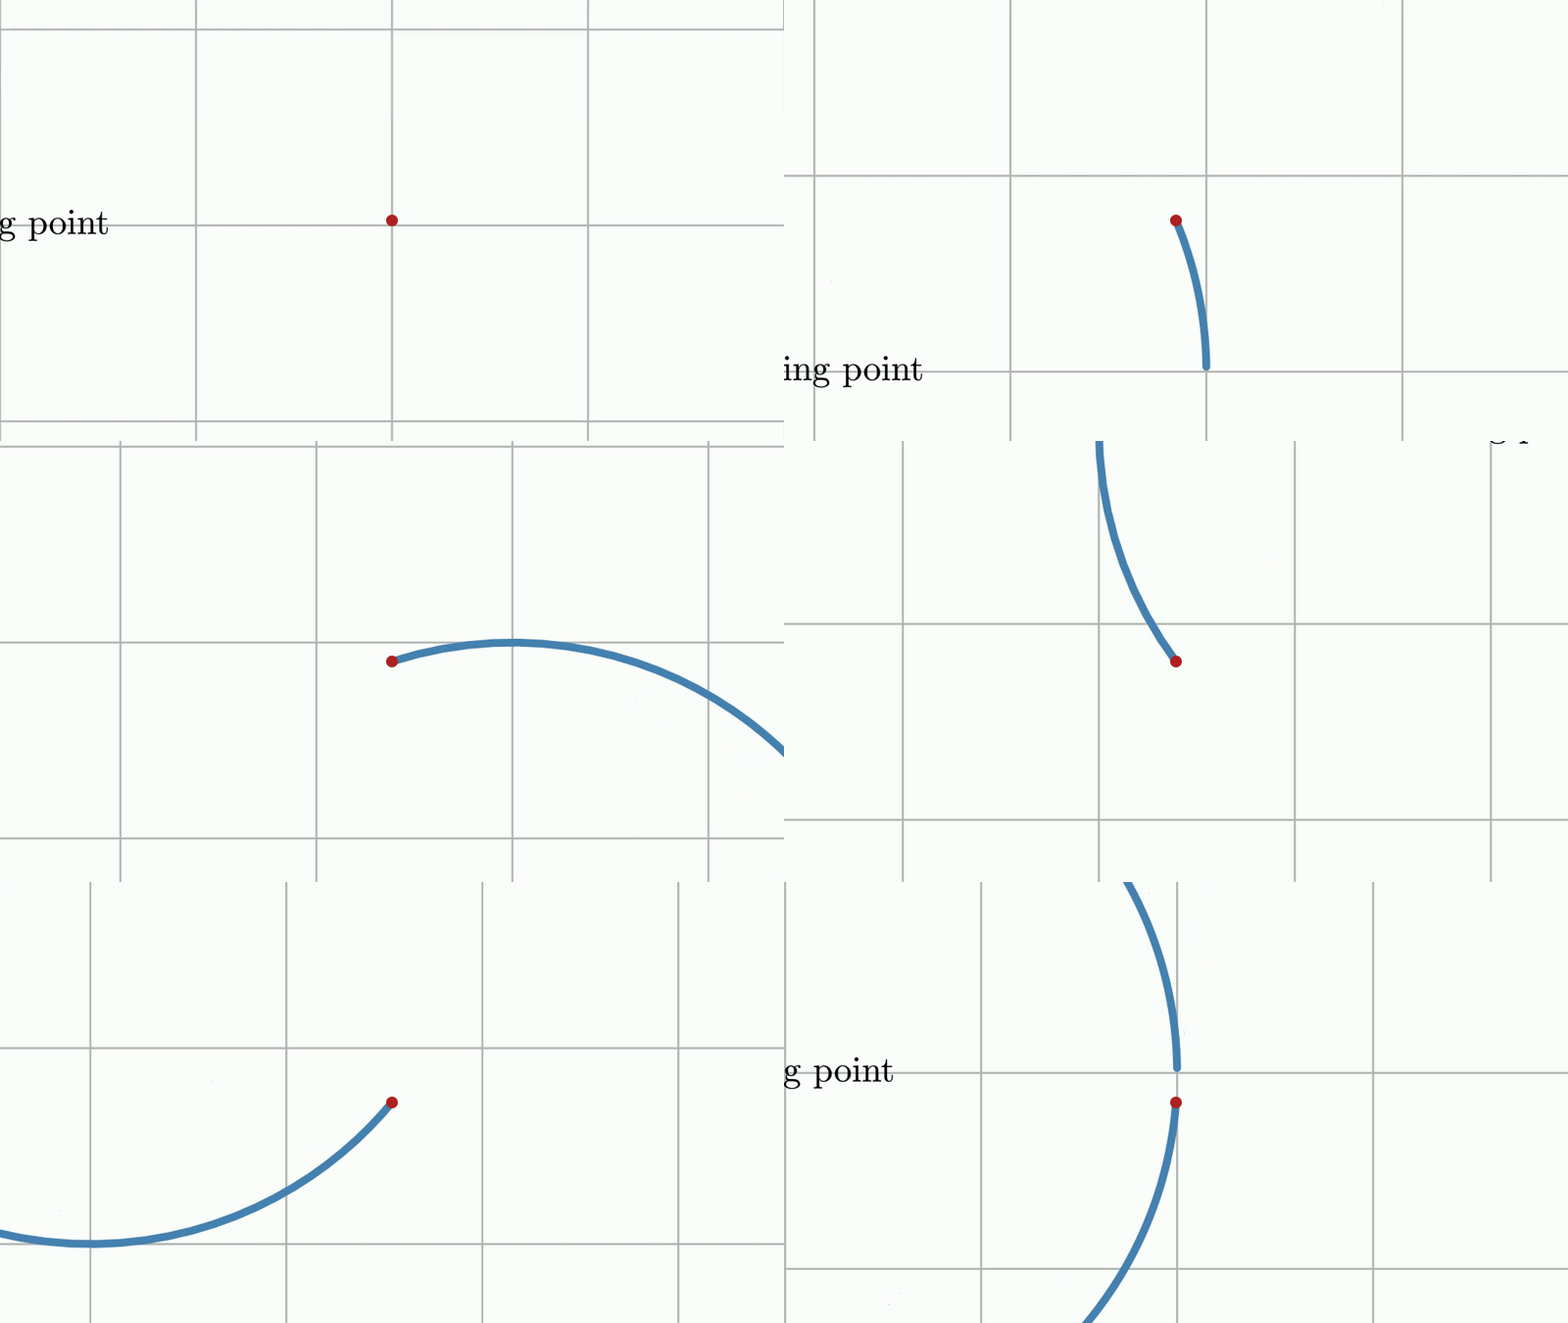
cameraAdjust camera updater
Ensures that the specified objects remain visible on screen. If no objects are provided, all objects added to the scene are considered.
In the previous example, if we change the updater block with
groovy
updater(//gaps .1, .1, adjust to all objects
    type: "cameraAdjust",
    gaps: 0.1
)
you will obtain the following animation:
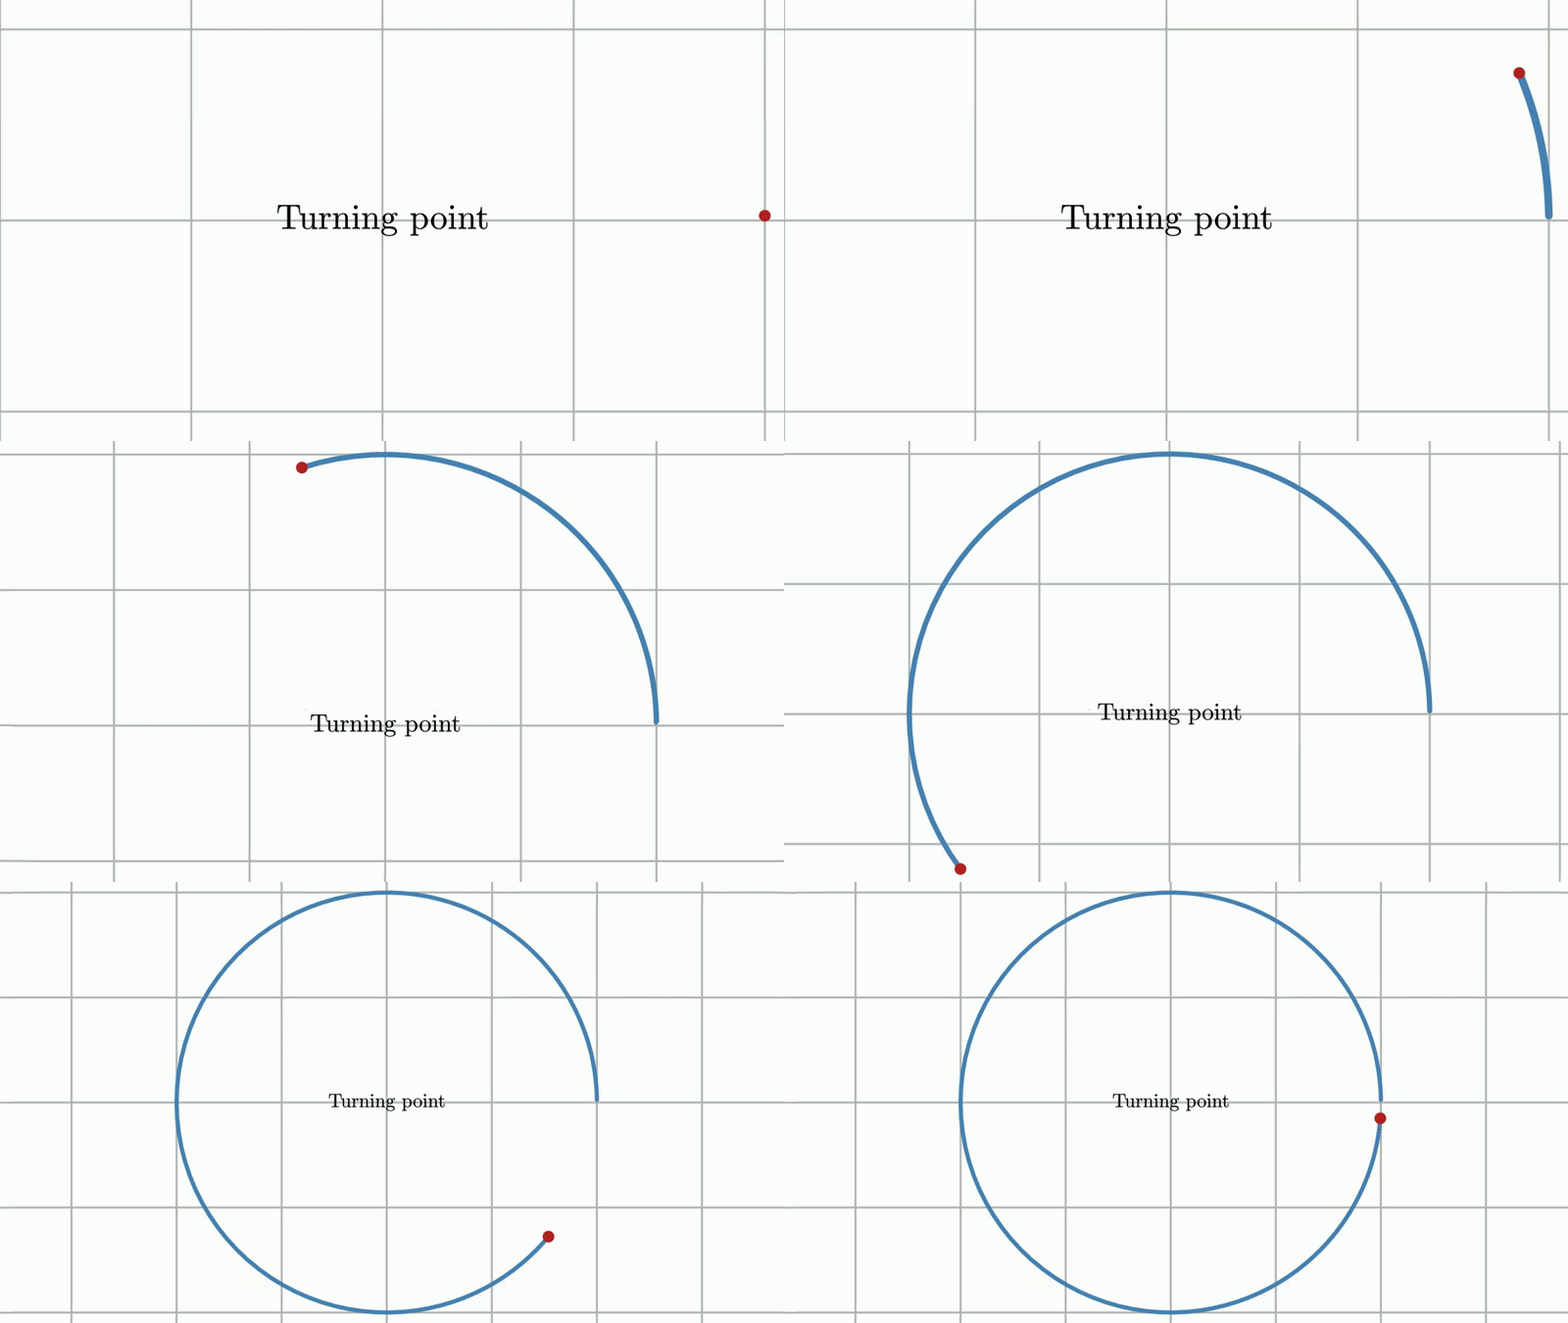
Note that the cameraAdjust updater never zooms in. It only zooms out when necessary to ensure that the selected objects remain visible
DeadZoneFollow
FollowObject recenters the camera on every frame, which on a back-and-forth trajectory makes the whole scene shake. The DeadZoneFollow updater only moves the camera when the object reaches the outer margin of the view: while it stays in the central dead zone, the camera does not move at all. If you change the updaterblock in the previous example with something like this:
updater(
    type: "cameraDeadZone",
    obj: P,
    margins: 0.3,
    smooth: 0.15
)
You will get following animation:
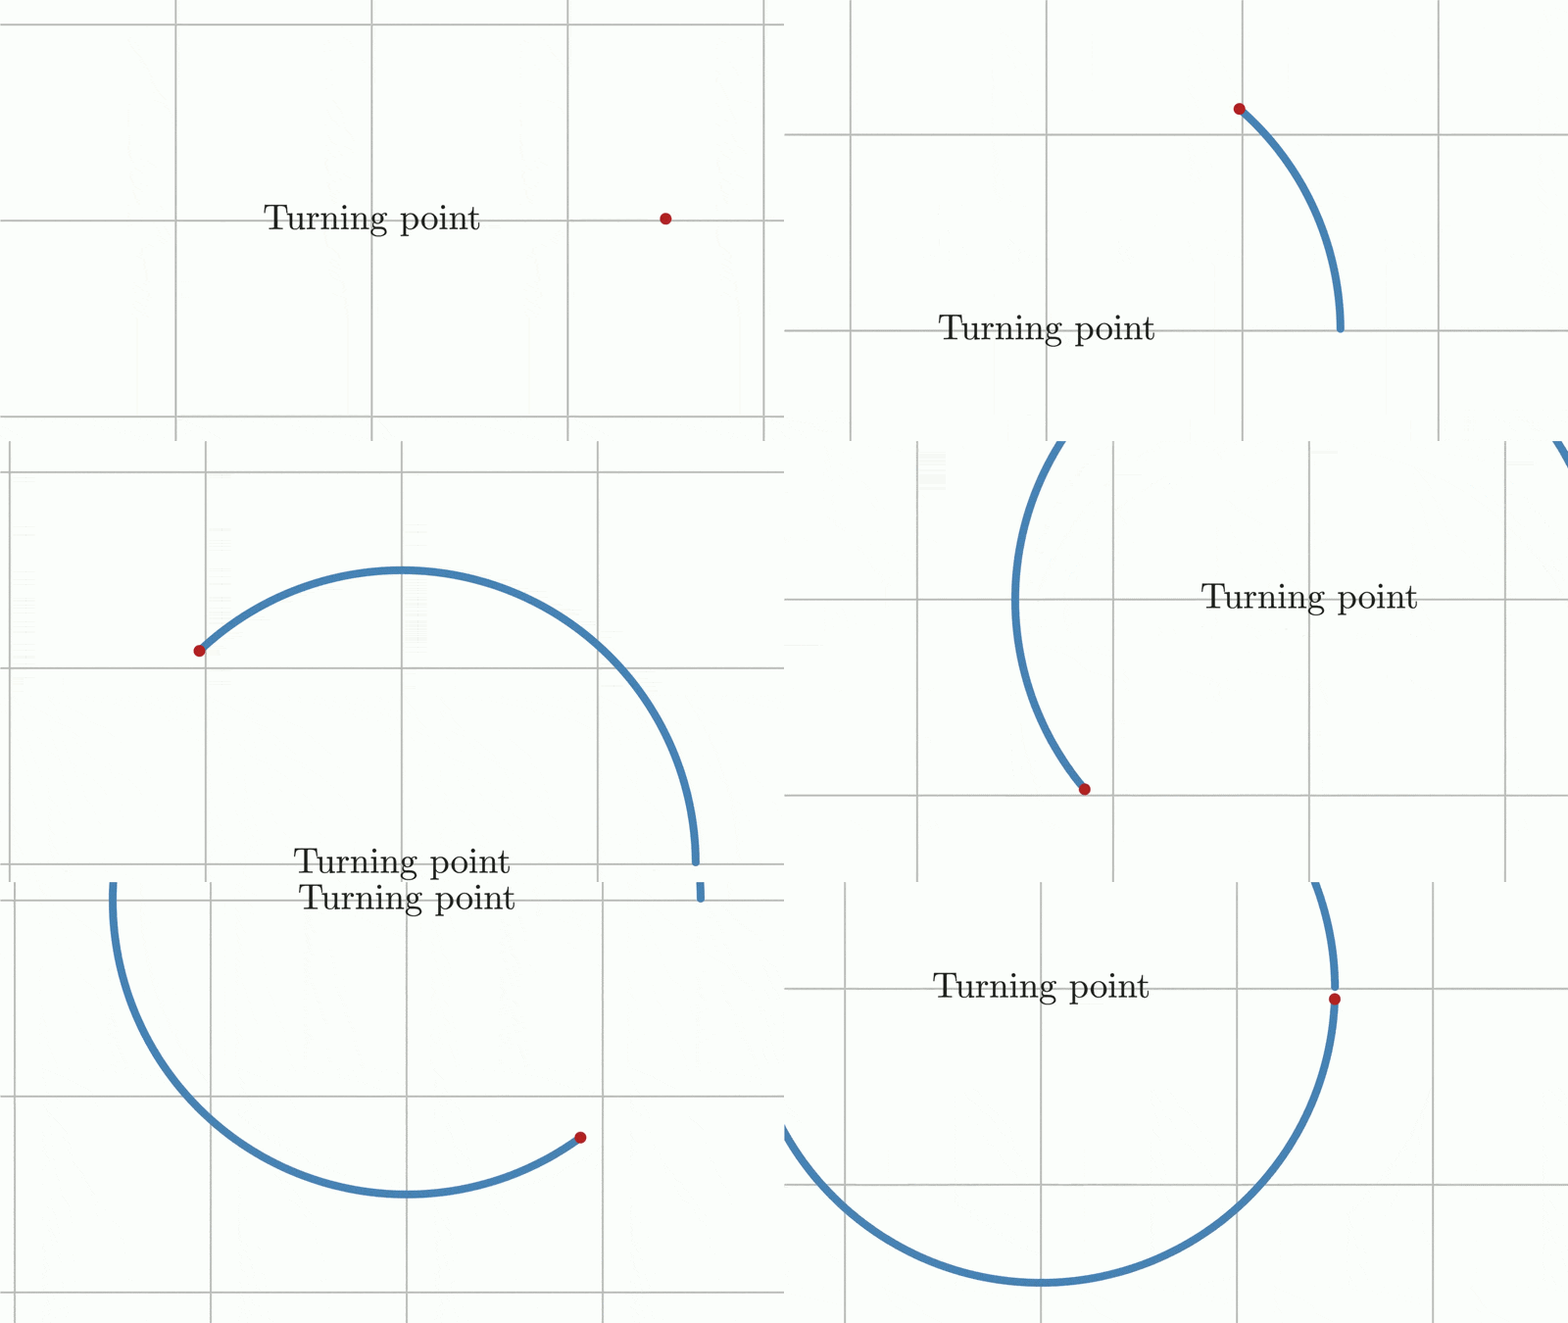
The margins are a fraction of the math view size (so they don't depend on the zoom level): 0.25 leaves the central half of the view as dead zone, and 0 moves the camera only when the object is about to leave the view. The camera is then shifted by the minimum amount that brings the object back inside the dead zone; with withSmooth(f) only that fraction f of the needed shift is applied per frame, giving a soft, lagging follow instead of a hard snap.
Add camera: 'fixed' to register them on the fixed camera instead of the default one, although in most cases you want to let this camera still. See the Advanced topics chapter for the object updaters and the full parameter list.